We have a new documentation site. Please go here to see the latest.
Add checklist from email
This guide is based on Jira built-in automation functionality.
The guide works for Classic projects only. Next-gen projects are too limited and do not support automation features.
Jira allows creating an issue from an email.
This guide explains how to extract a checklist from the email body and add the checklist to the issue created by Jira from the email.
Prerequisites
"Save checklist data to Jira custom fields" option must be enabled in Issue Checklist Global Settings.
Step by step guide
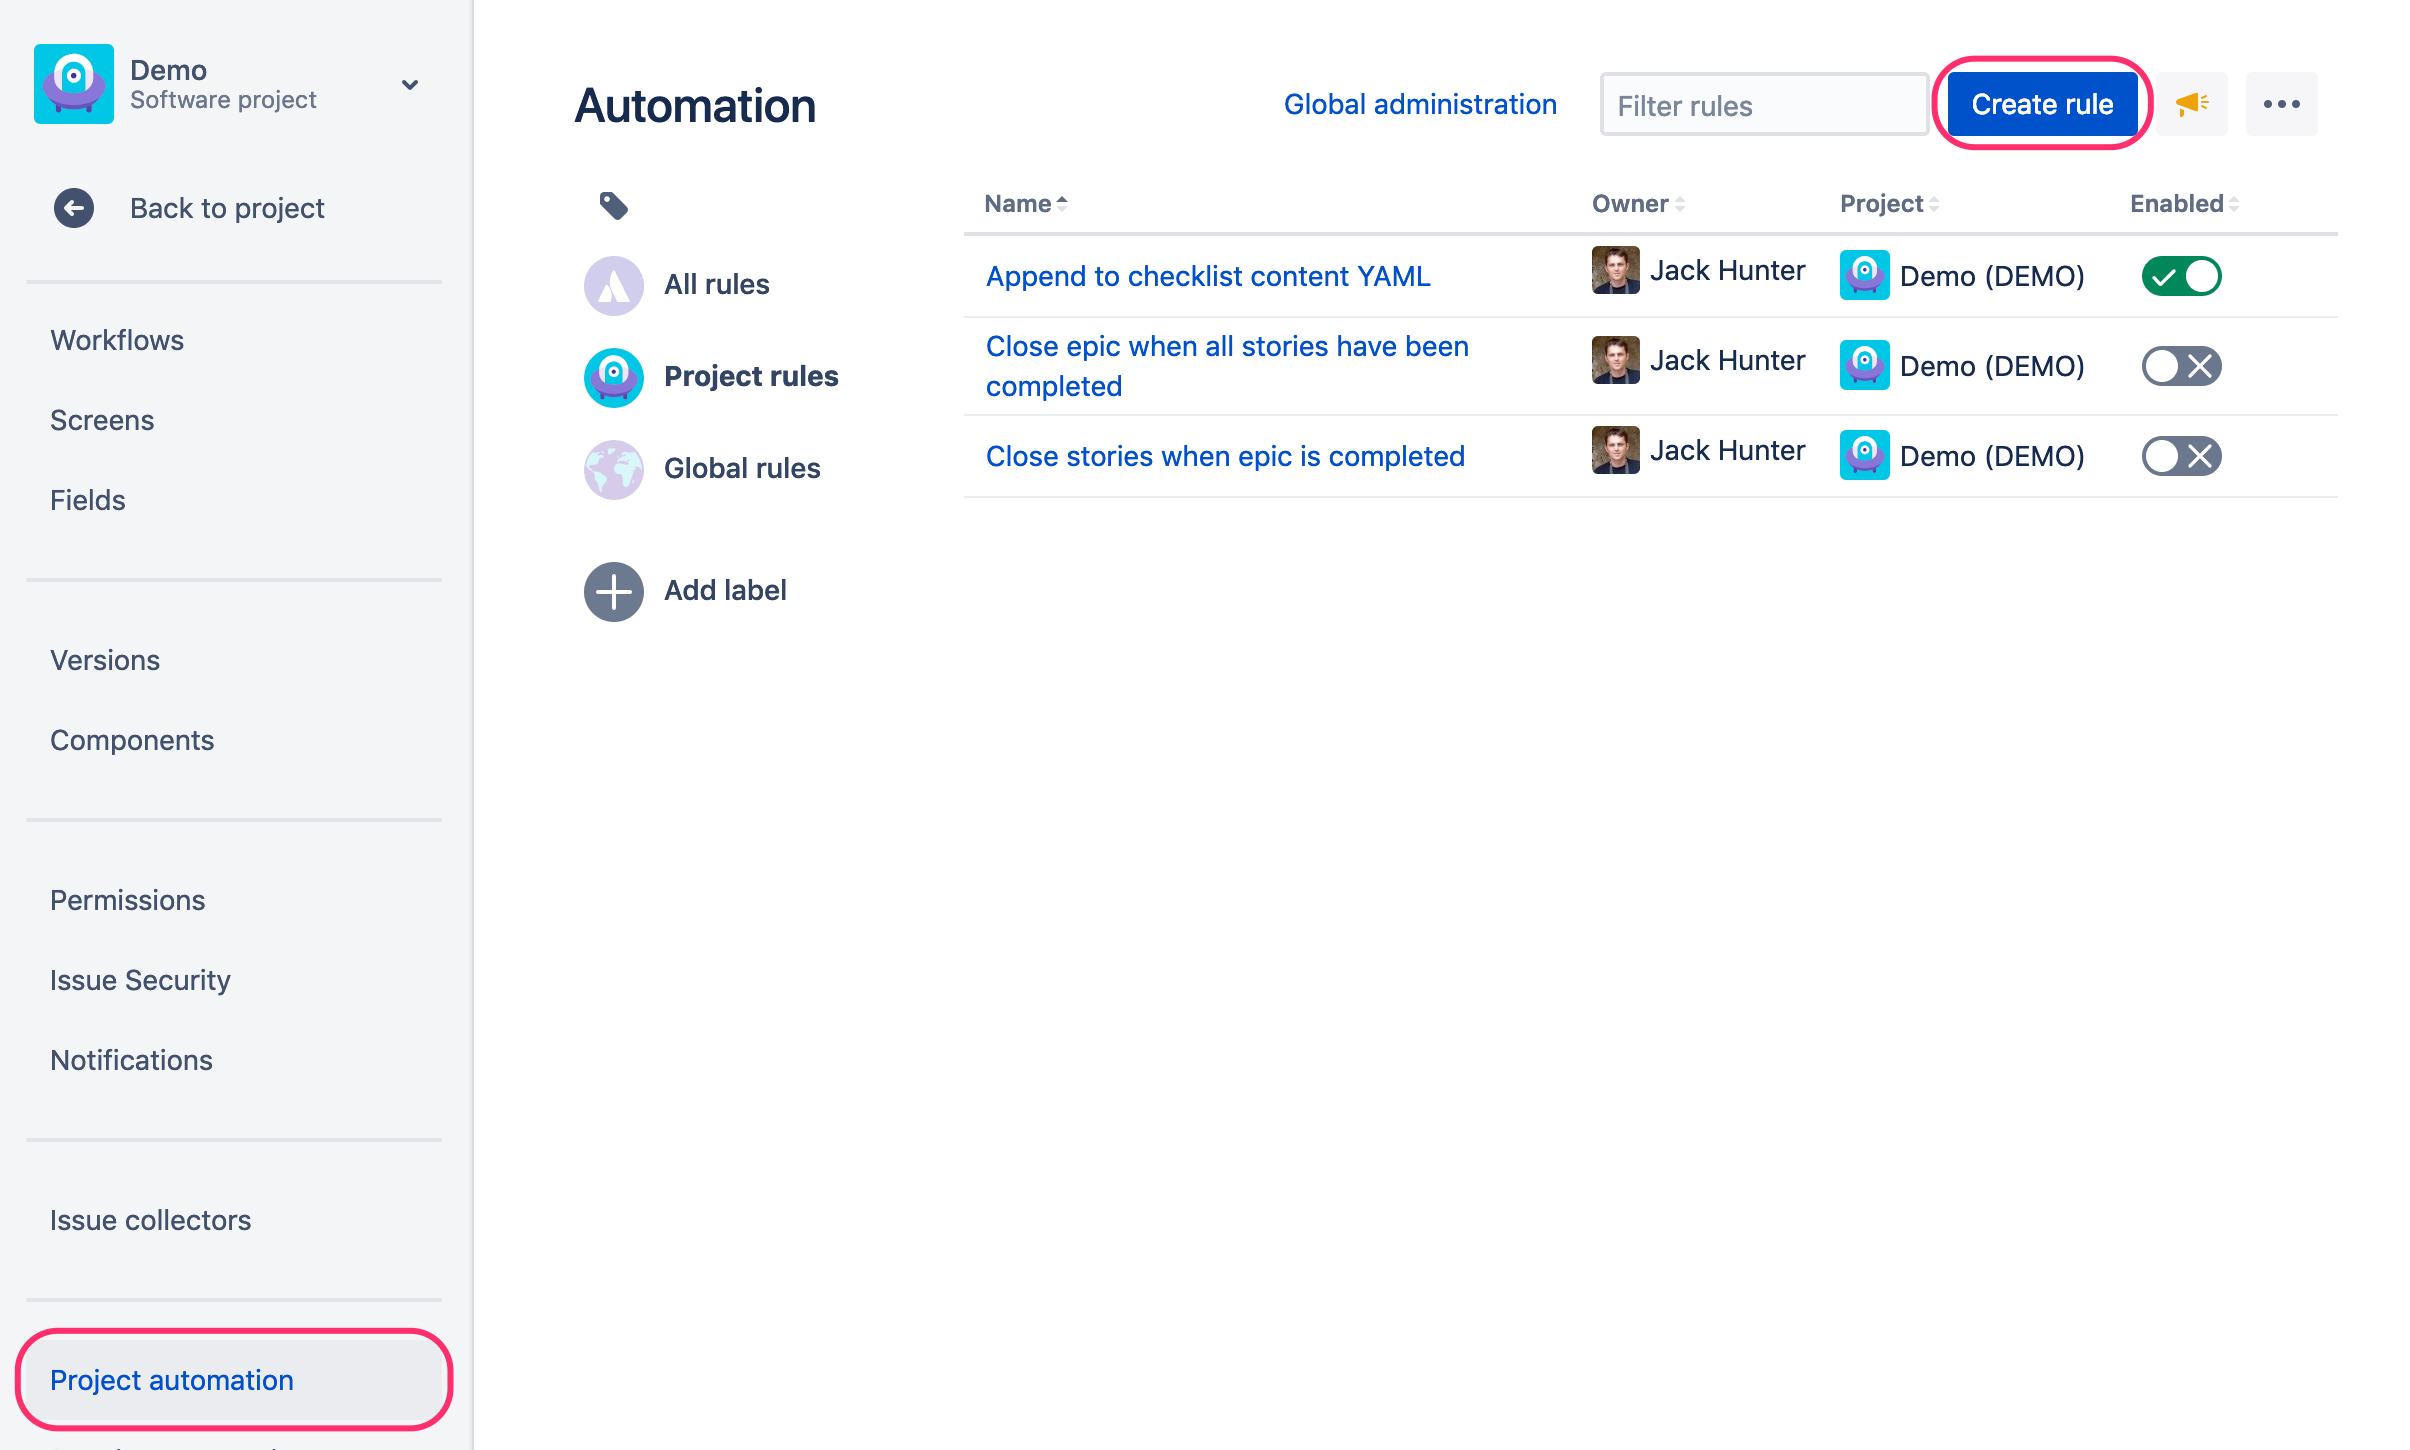
- Create a new rule in Automation plugin (go to Project Settings > Project automation and click Create rule button)
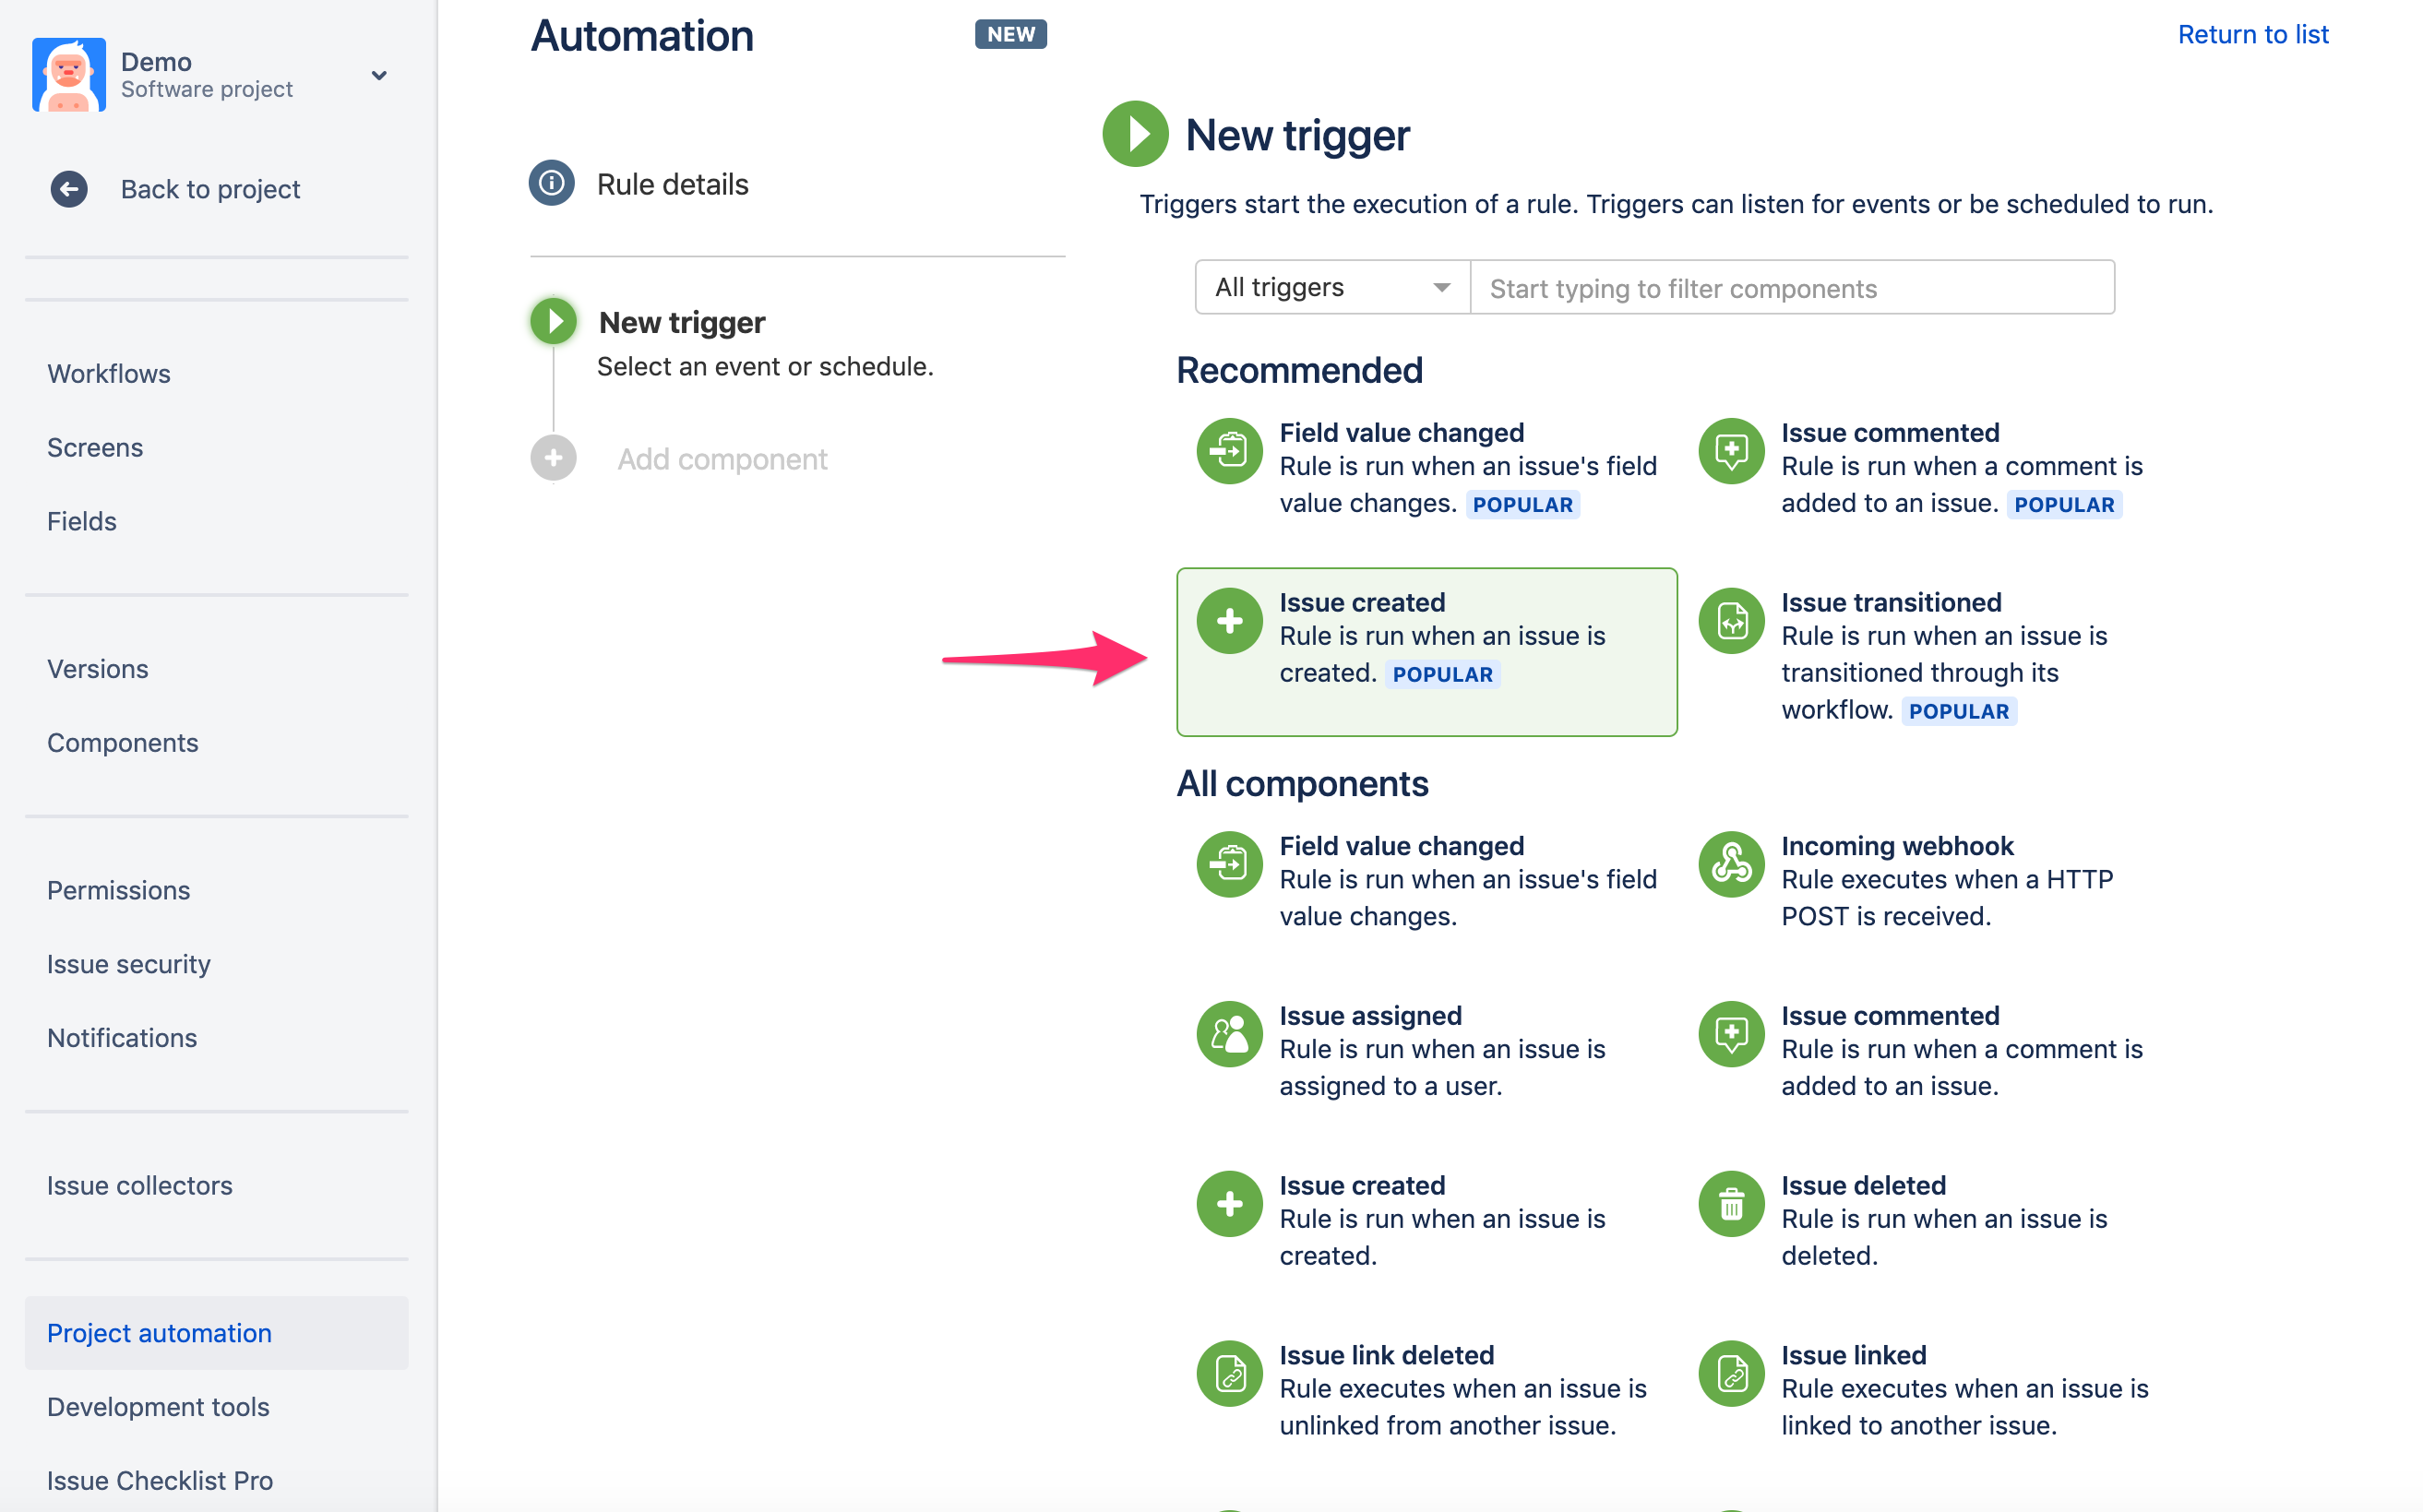
- Select "Issue Created" as a trigger
- Click "Save" in the next step when asked about creating a new rule.
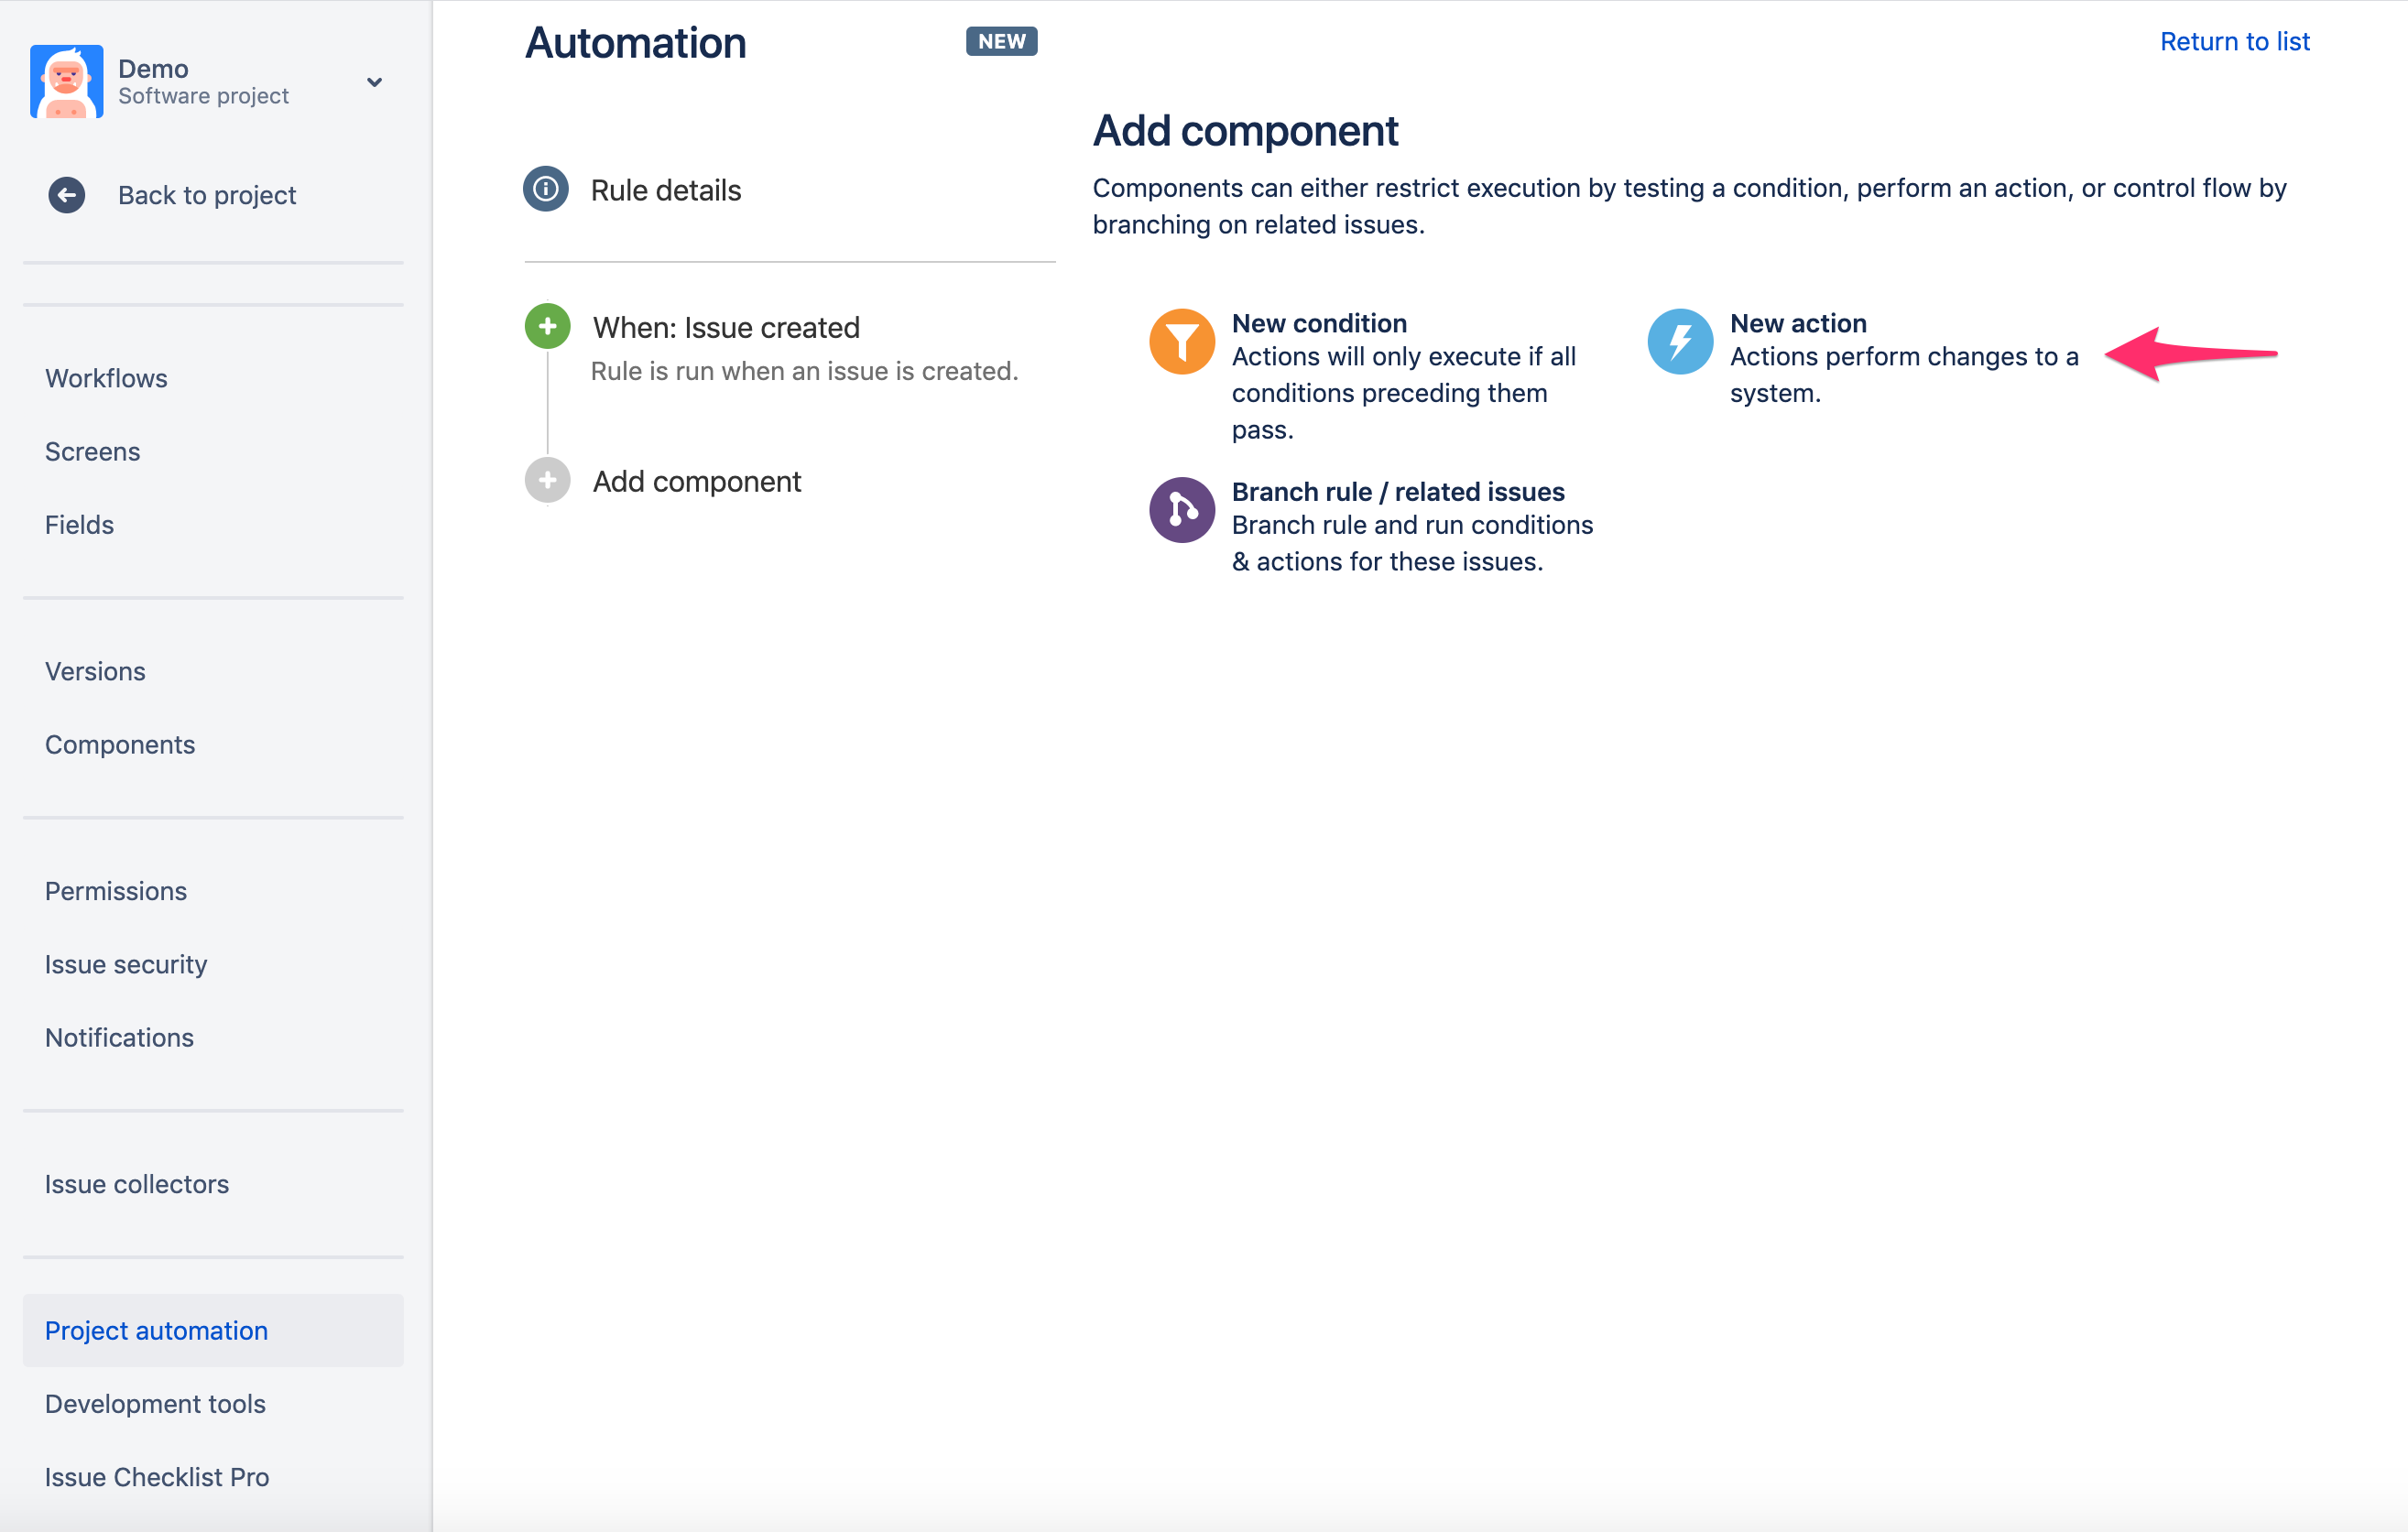
- Select "New Action" option in the next step
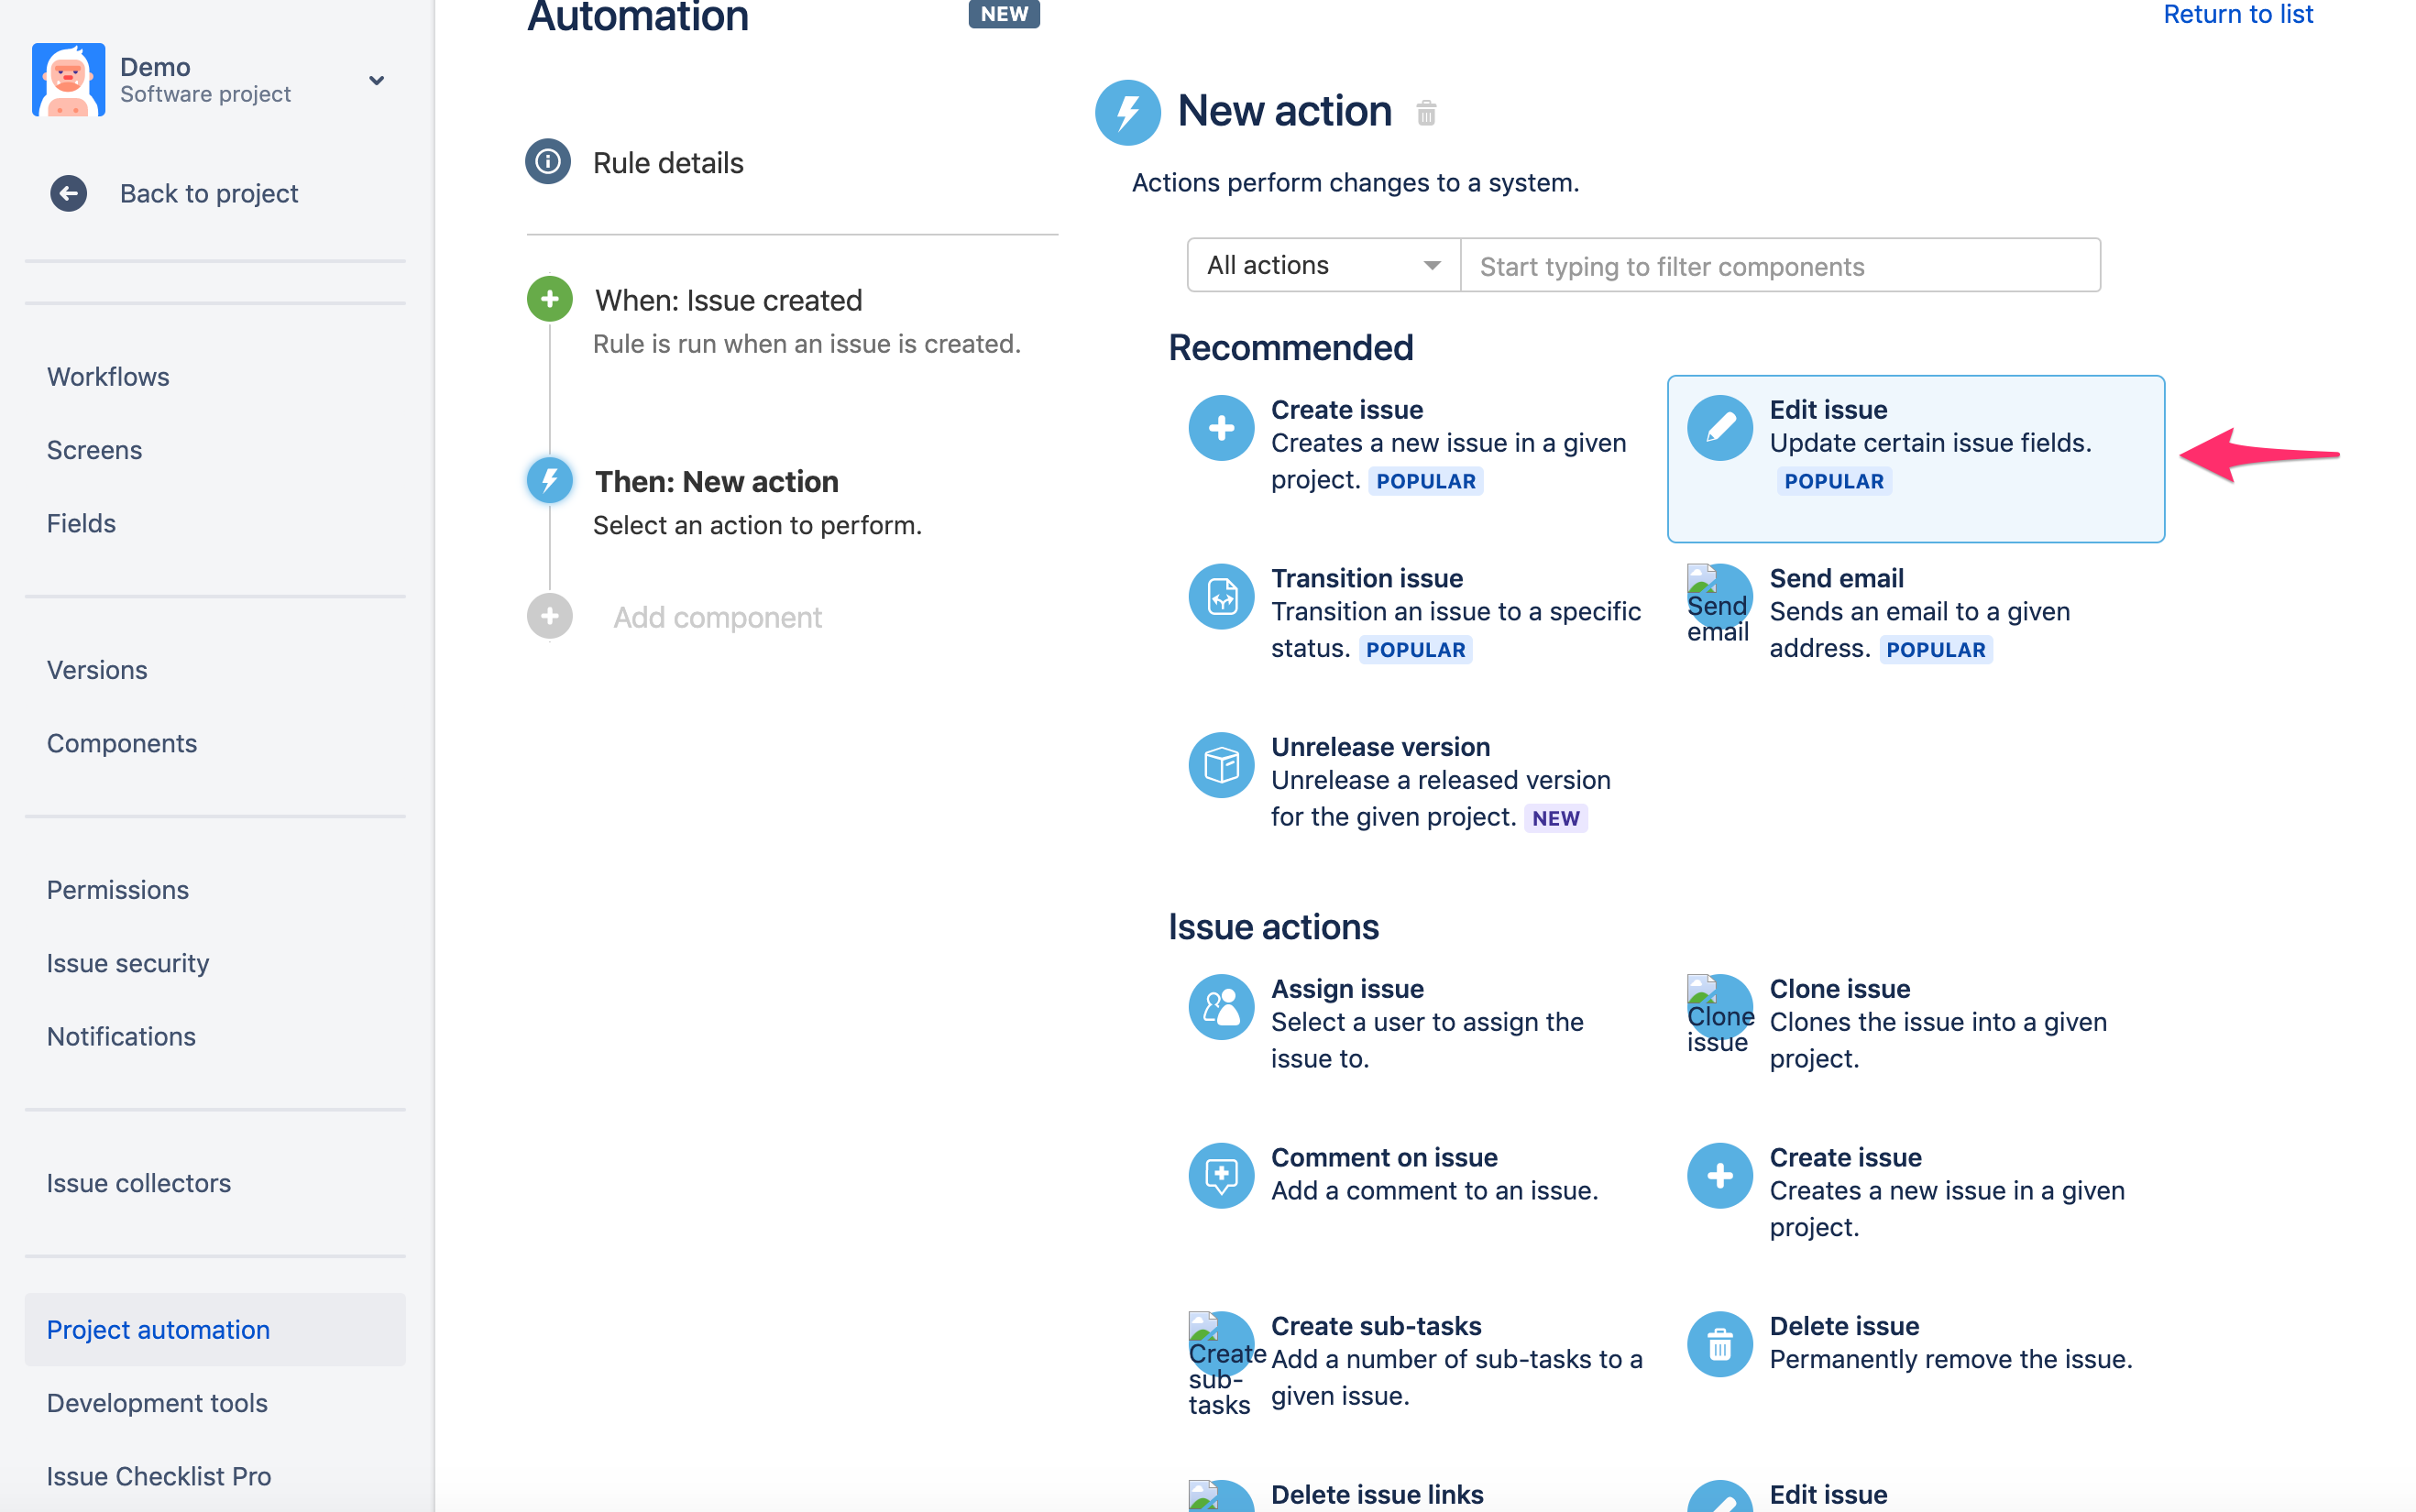
- Select "Edit Issue" option on the "New Action" page
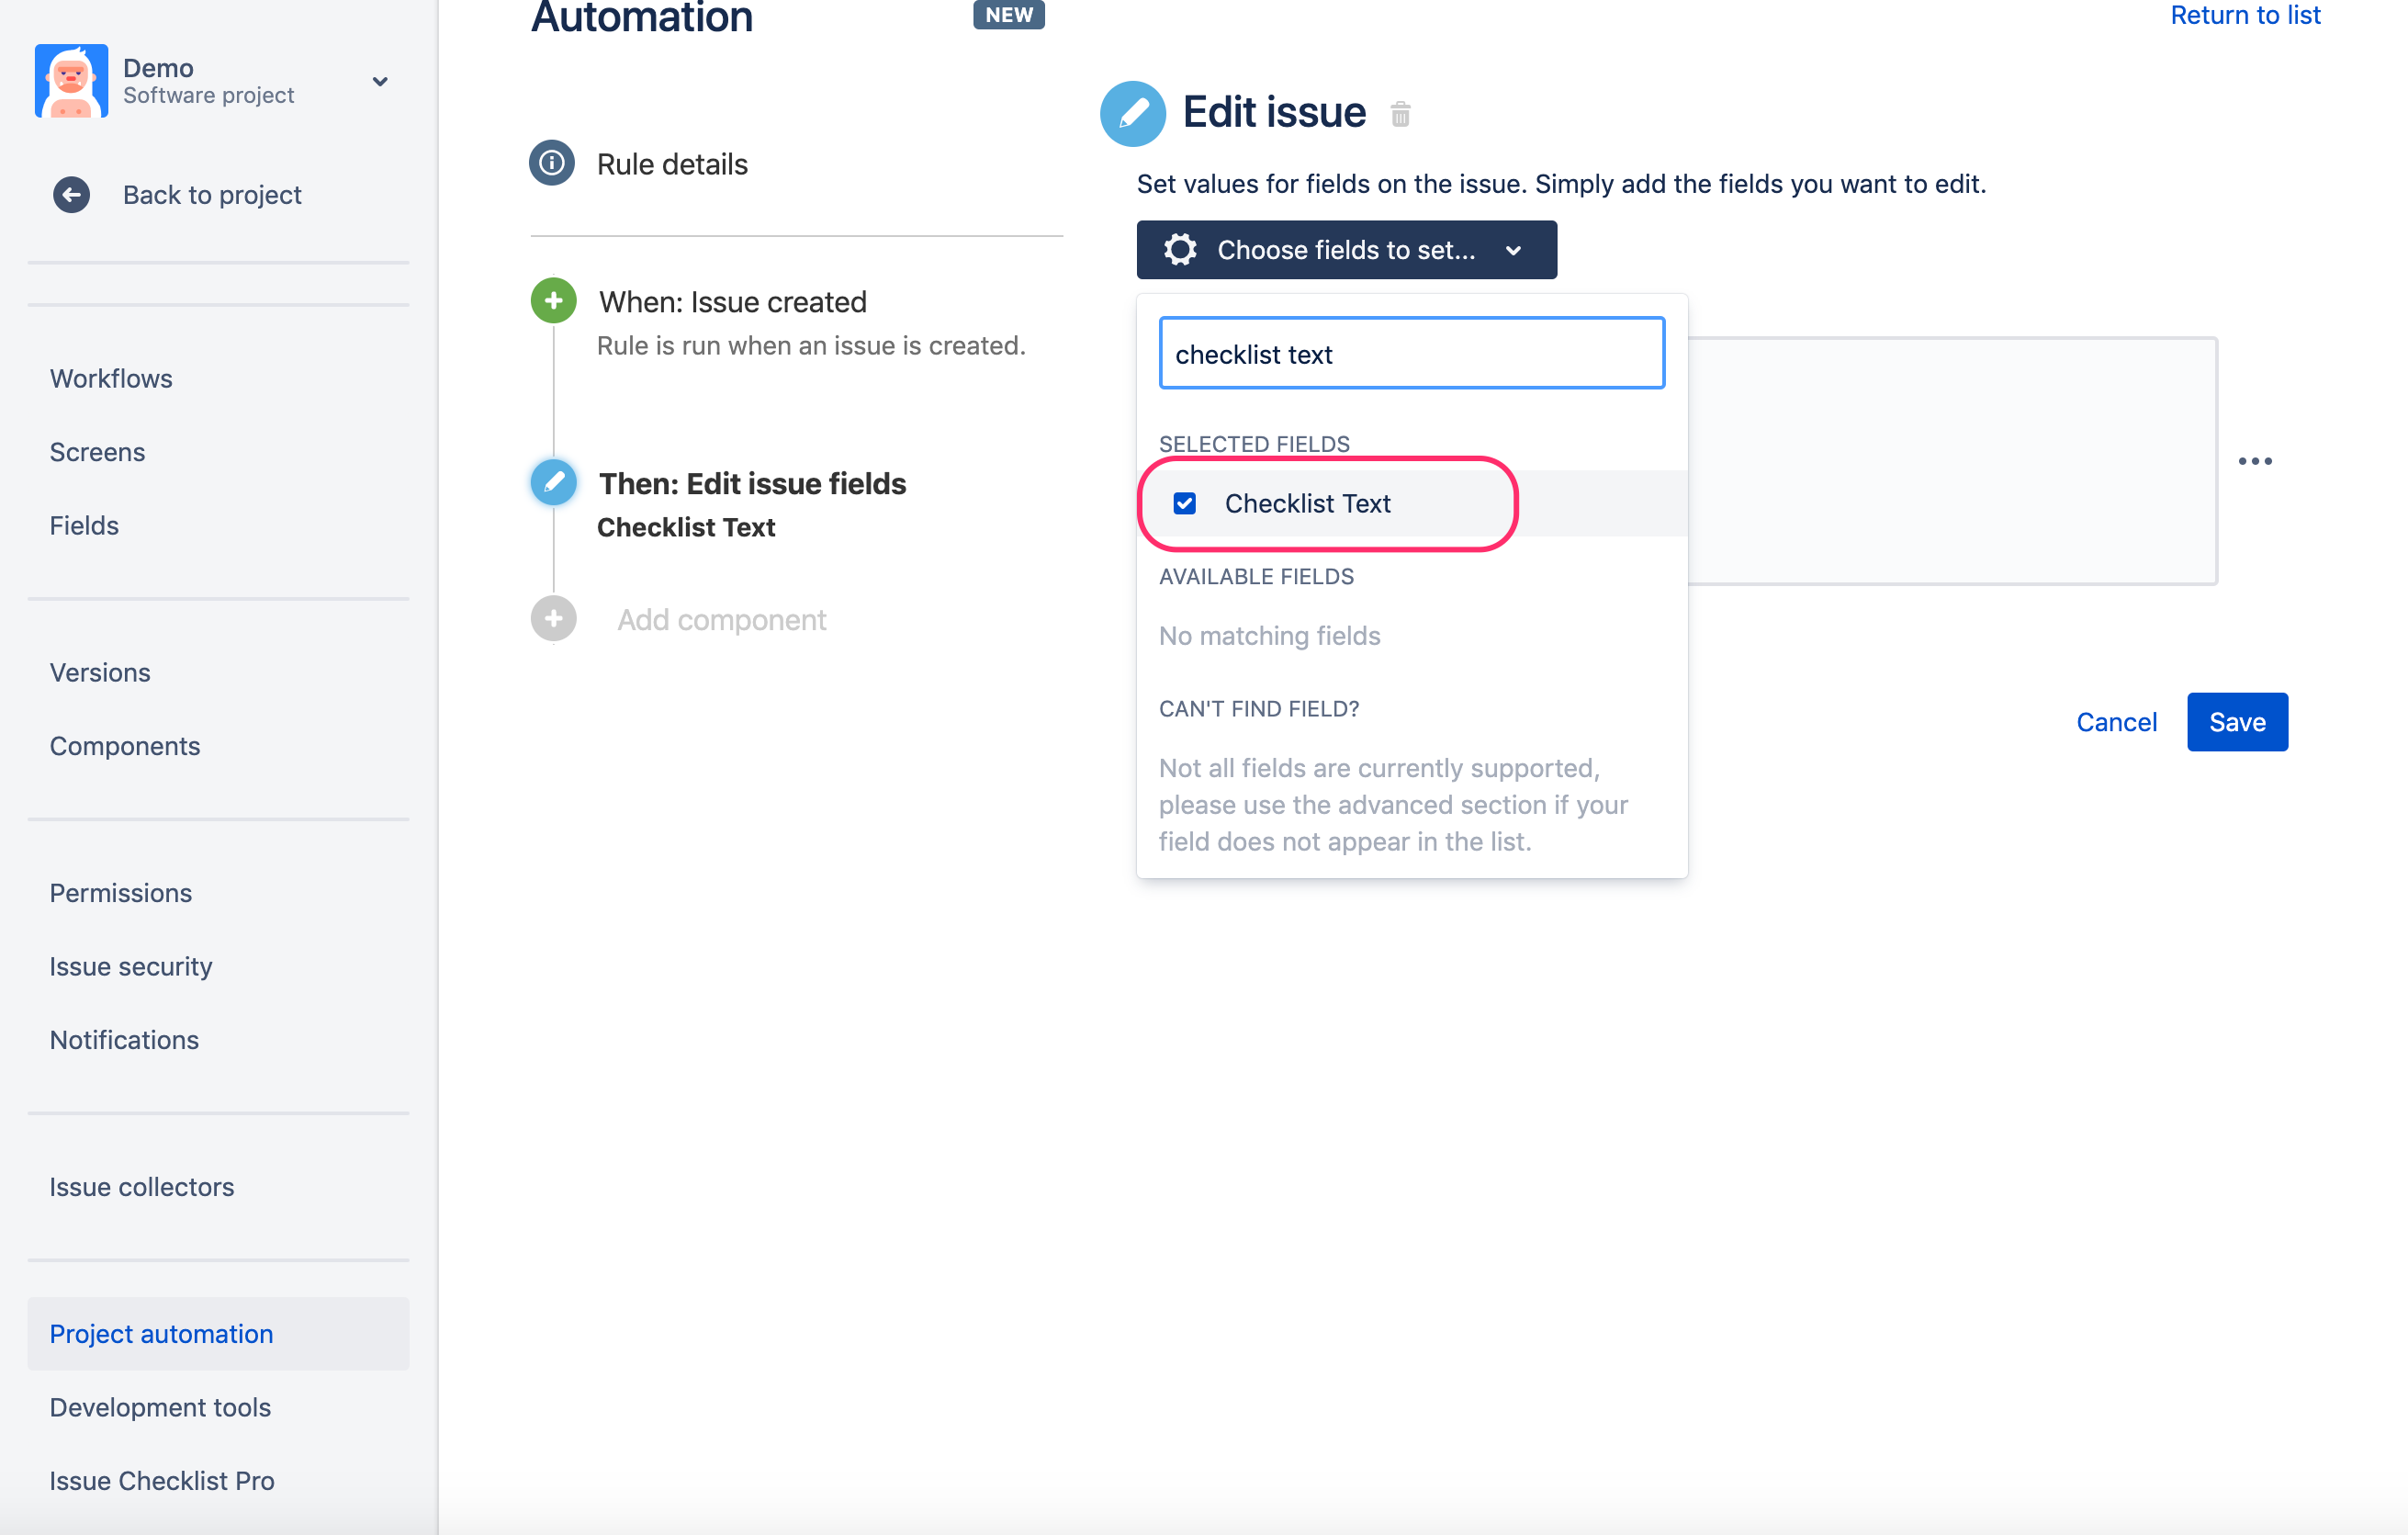
- On the "Edit Issue" page select "Checklist Text" field from the dropdown
Paste following regular expression into the text field and click "Save" button to continue
{{issue.description.match("(?s)(\[\].*)")}}The above regular expression matches the text (in the email body) that starts with empty square brackets []. Read more how to work with regular expressions in Automation app
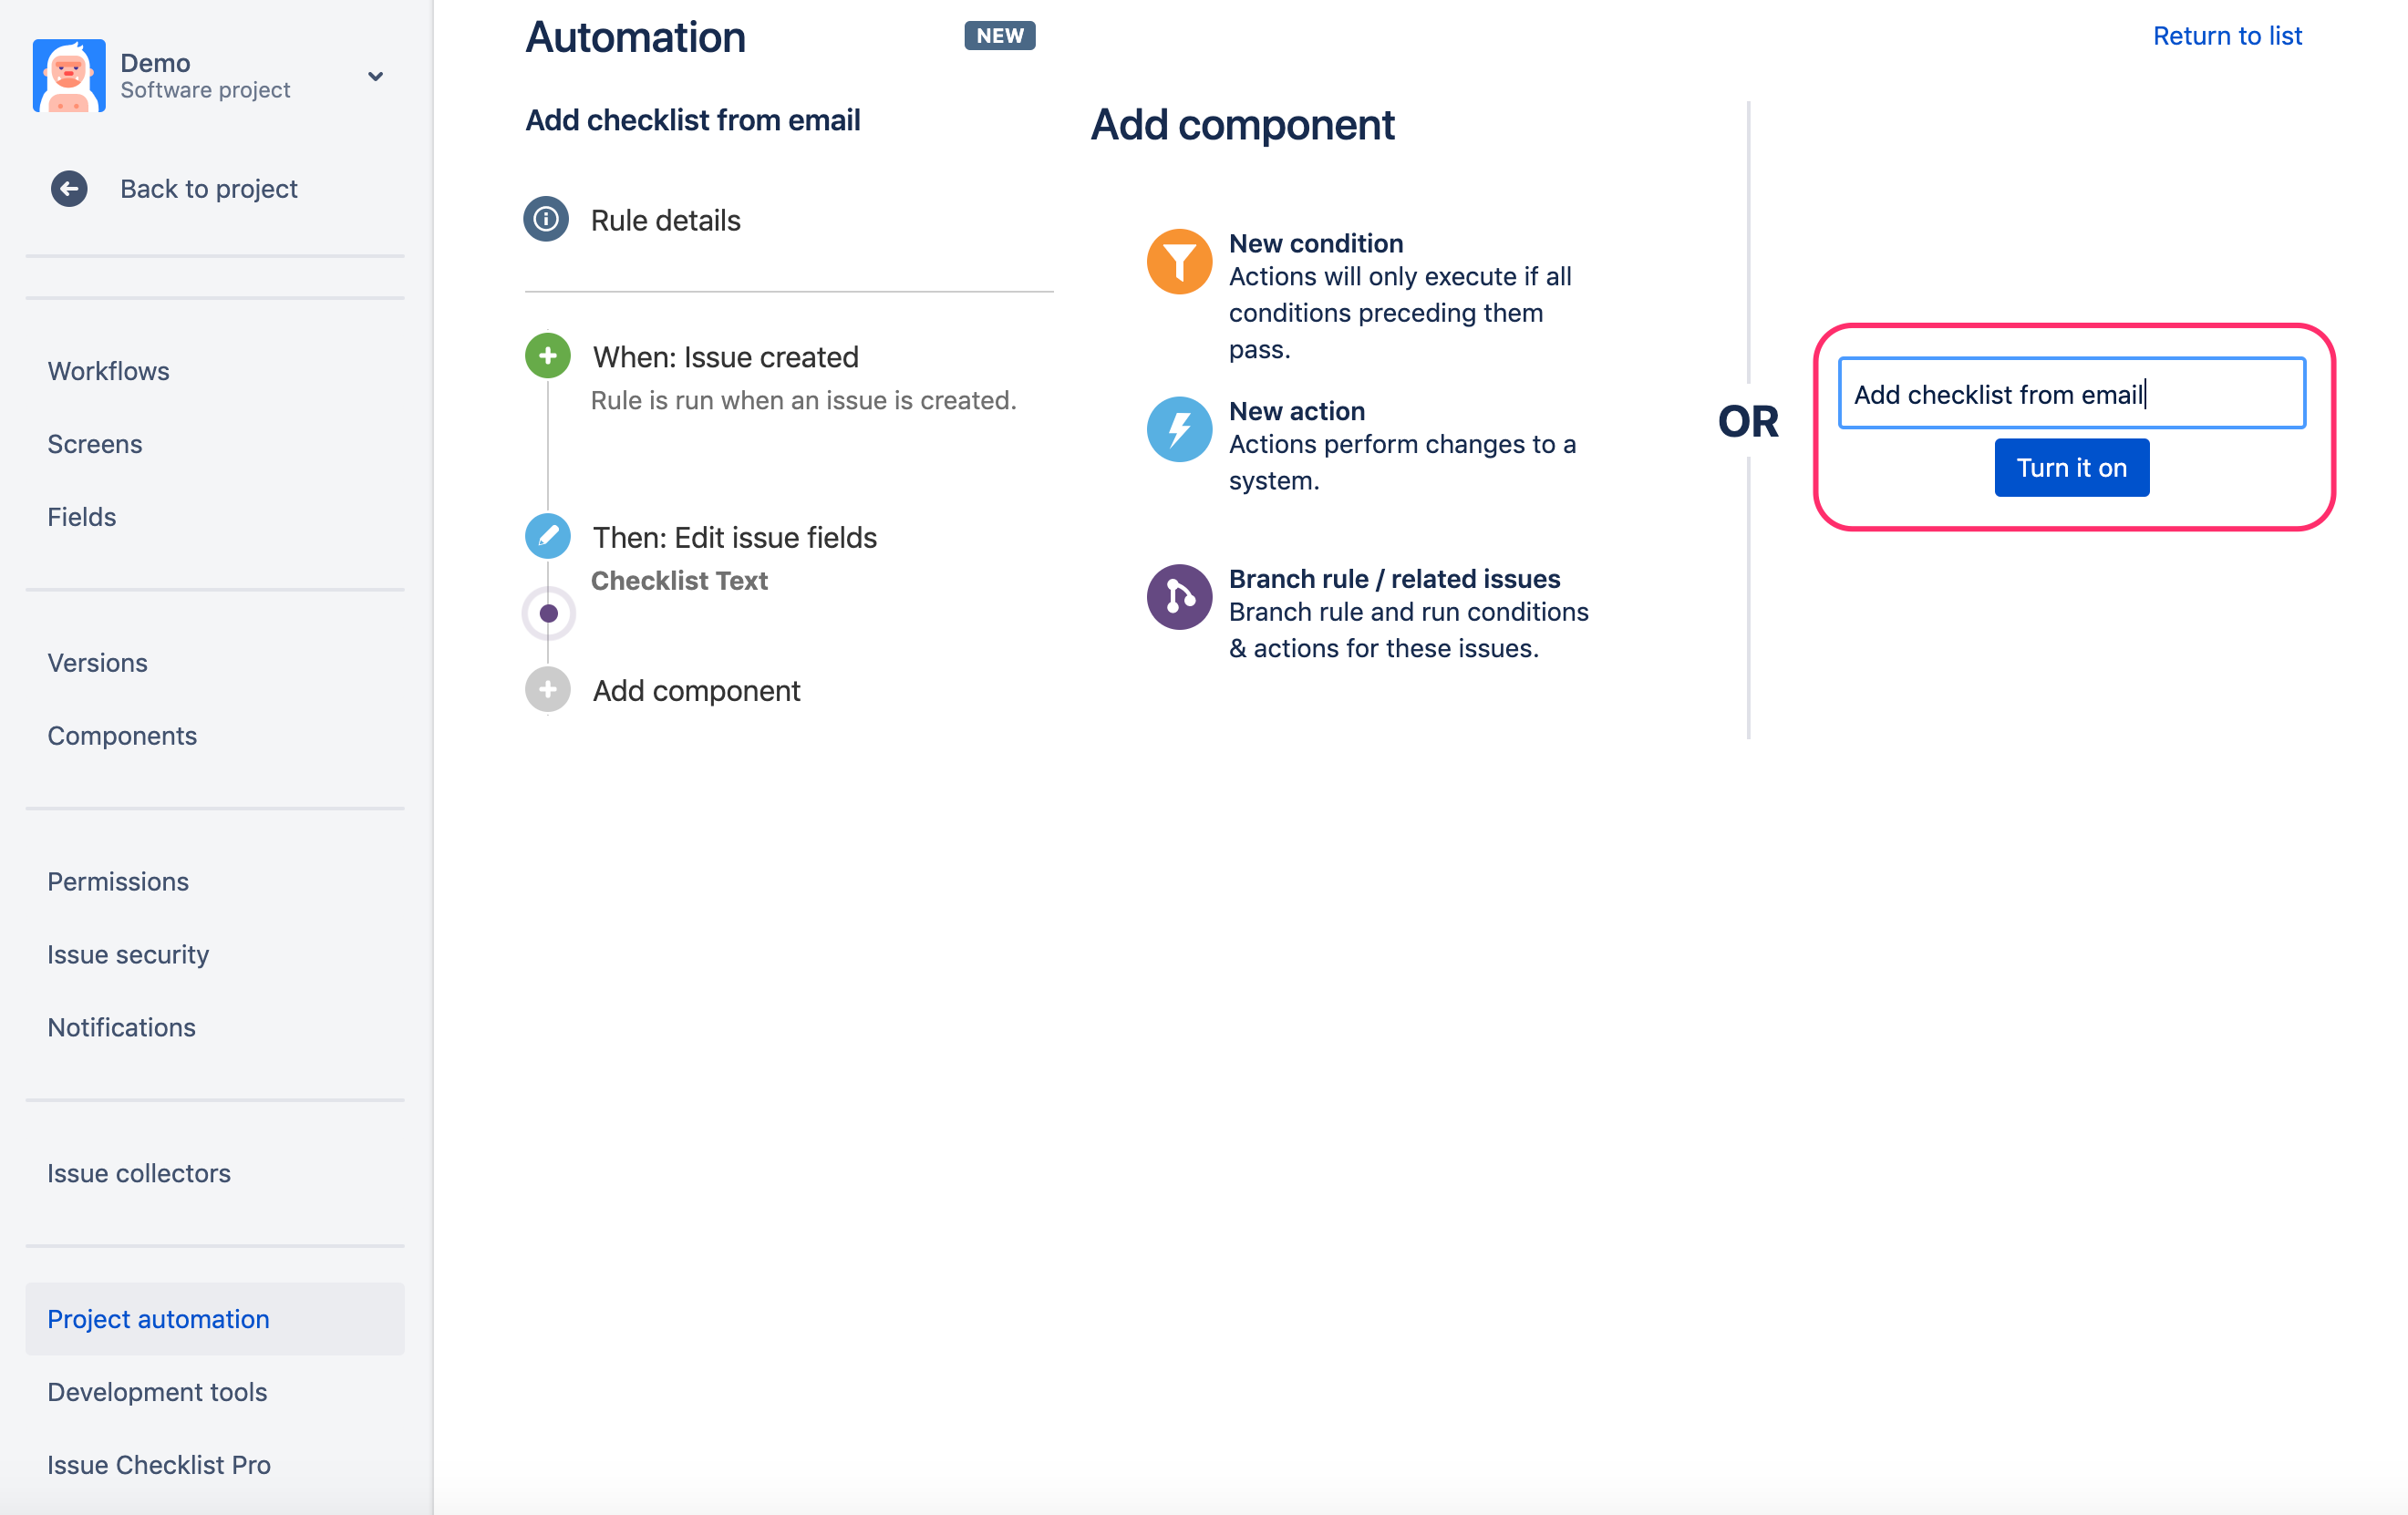
- In the last step give a name to your rule and click the "Turn it on" button.
Test your setup with the following email body
This is some email text.
It can be multiline.
The checklist starts below.
[] first checklist item
[] second checklist item
[] last checklist item
Unfortunately, this line will become a checklist item too so you must avoid anything below the checklist.
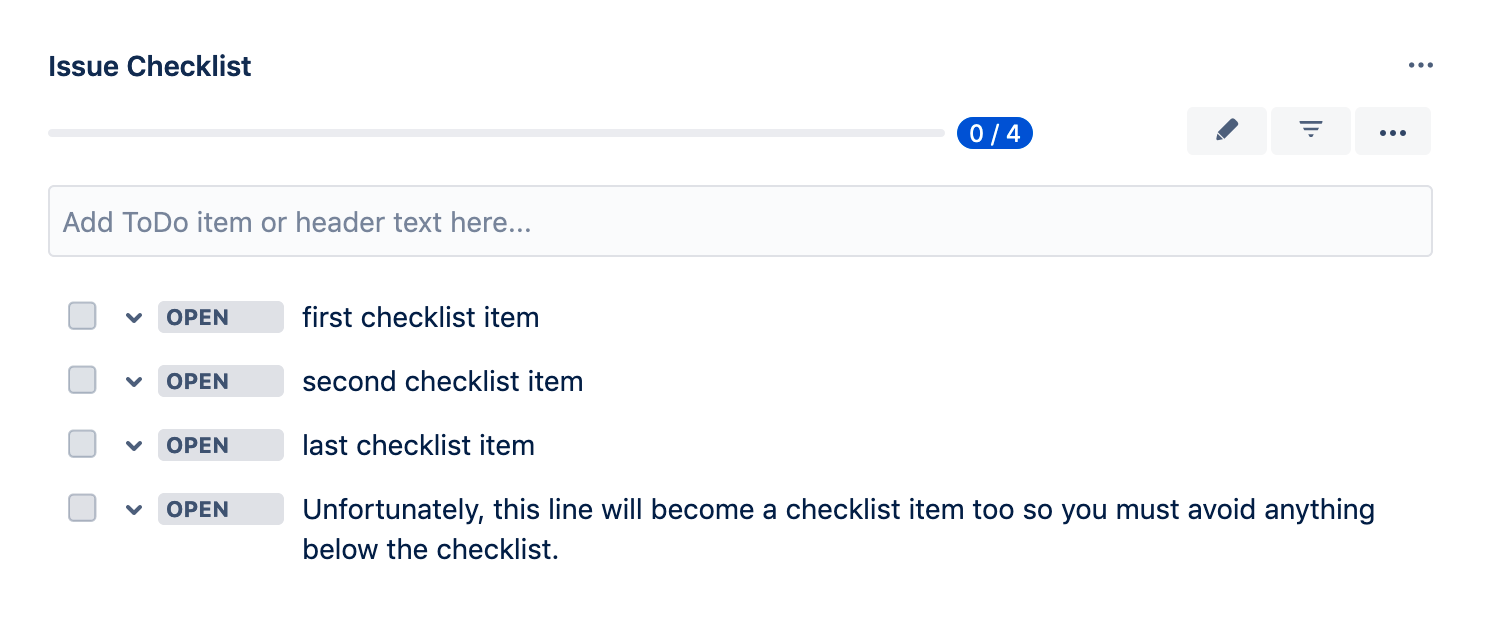
which should turn into the following checklist
