We have a new documentation site. Please go here to see the latest.
Add label when checklist item is completed
This guide is based on Jira built-in automation functionality.
The guide works for Classic projects only. Next-gen projects are too limited and do not support automation features.
You will need to modify the regular expression if you have custom checklist statuses for checked items. For example, if you have a custom status named "finished", replace "x|done|skipped" with "x|done|skipped|finished".
Prerequisites
"Save checklist data to Jira custom fields" option must be enabled in Issue Checklist Global Settings.
Guide
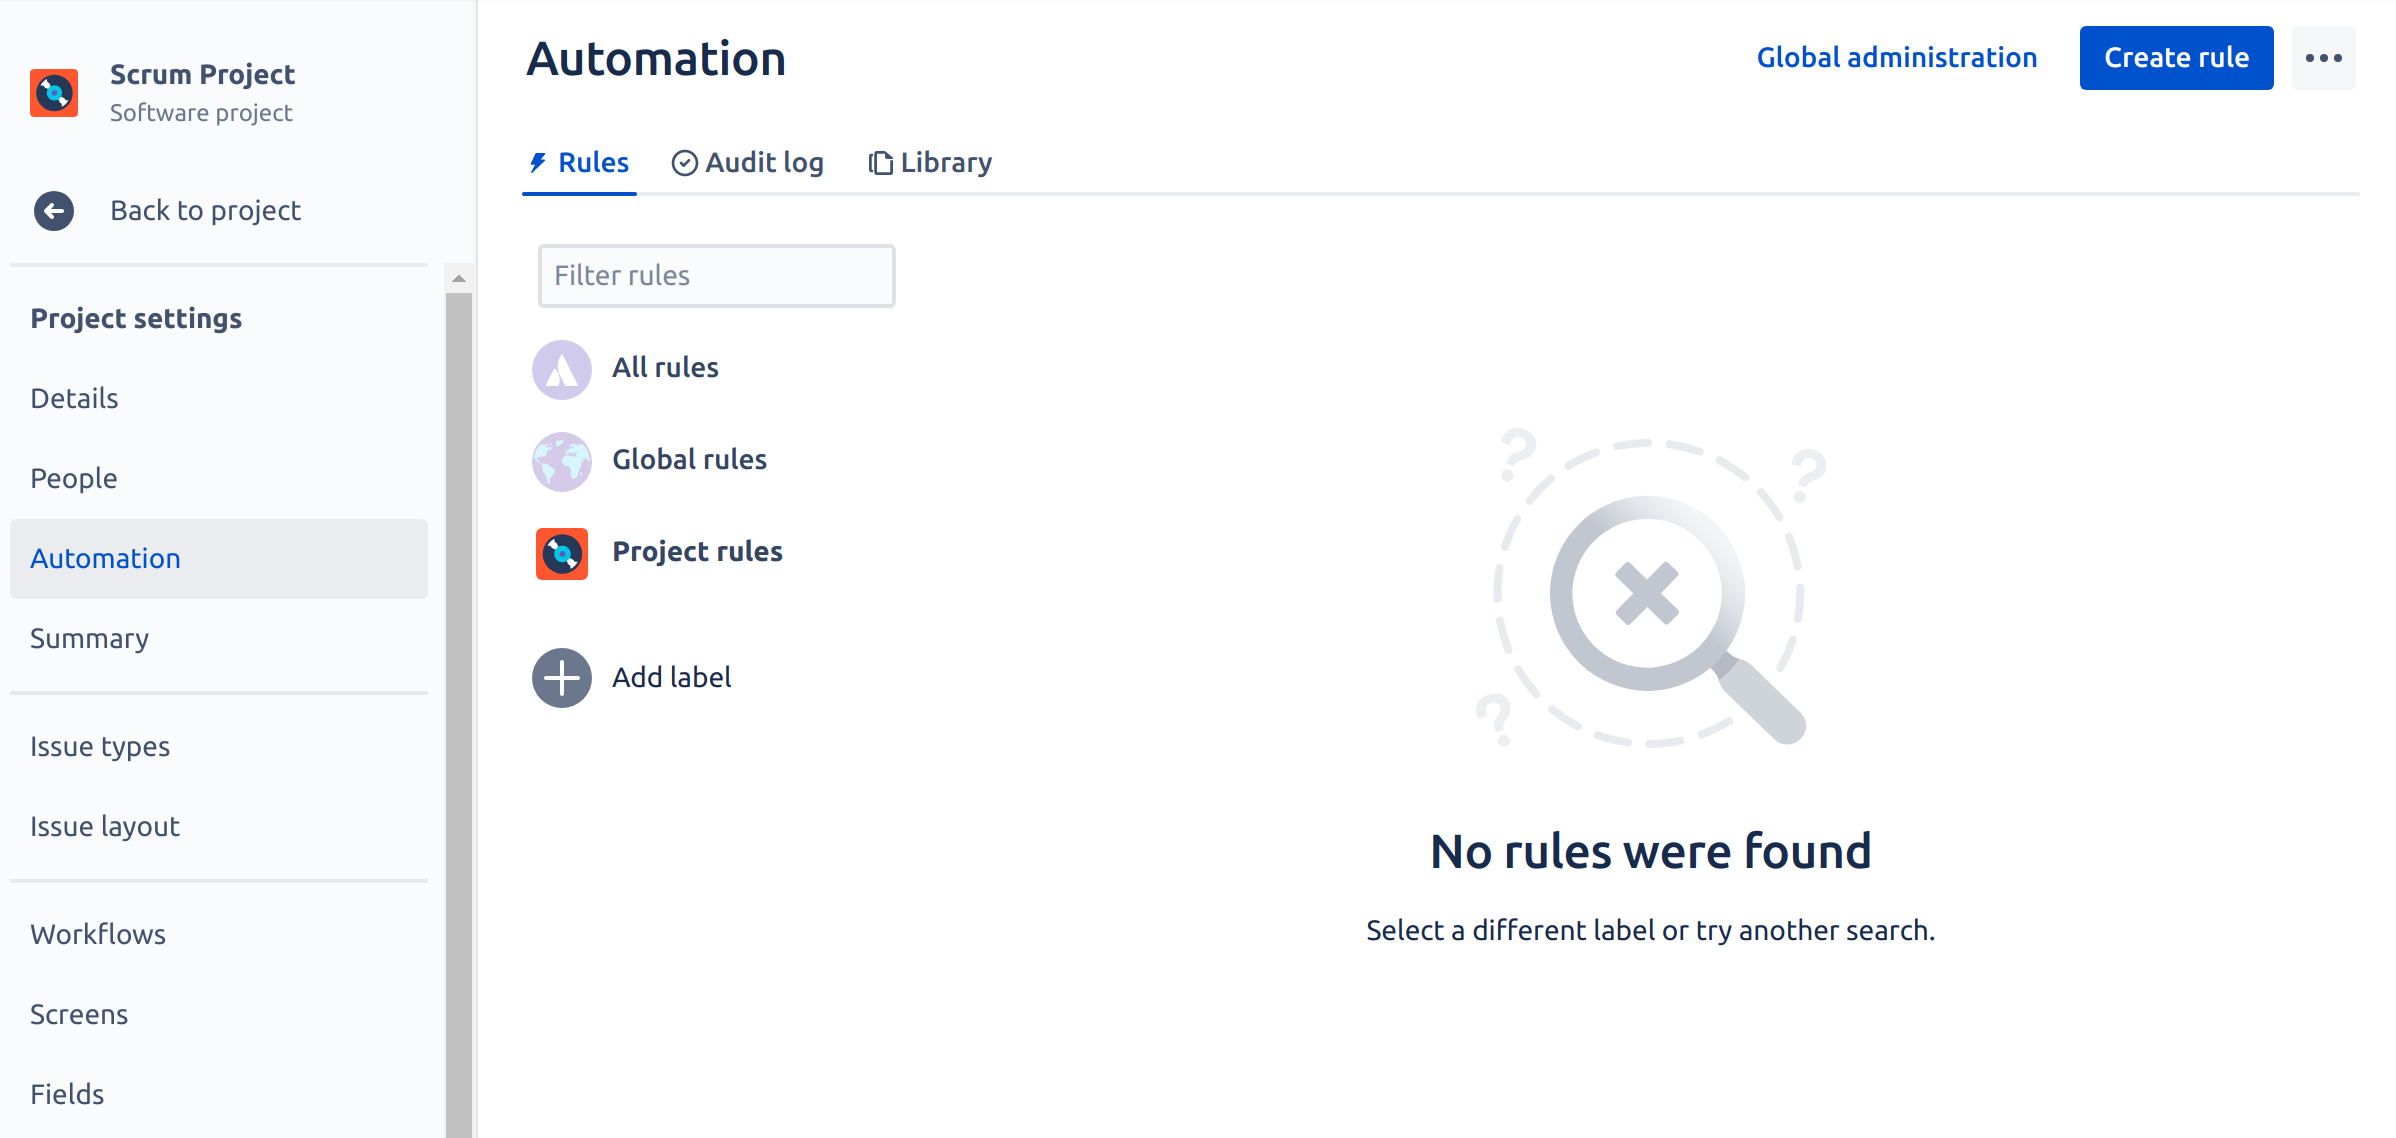
- Go to Automation listing page (it is either Project settings > Automation or Jira Settings > System > Automation rules) and press Create rule button:
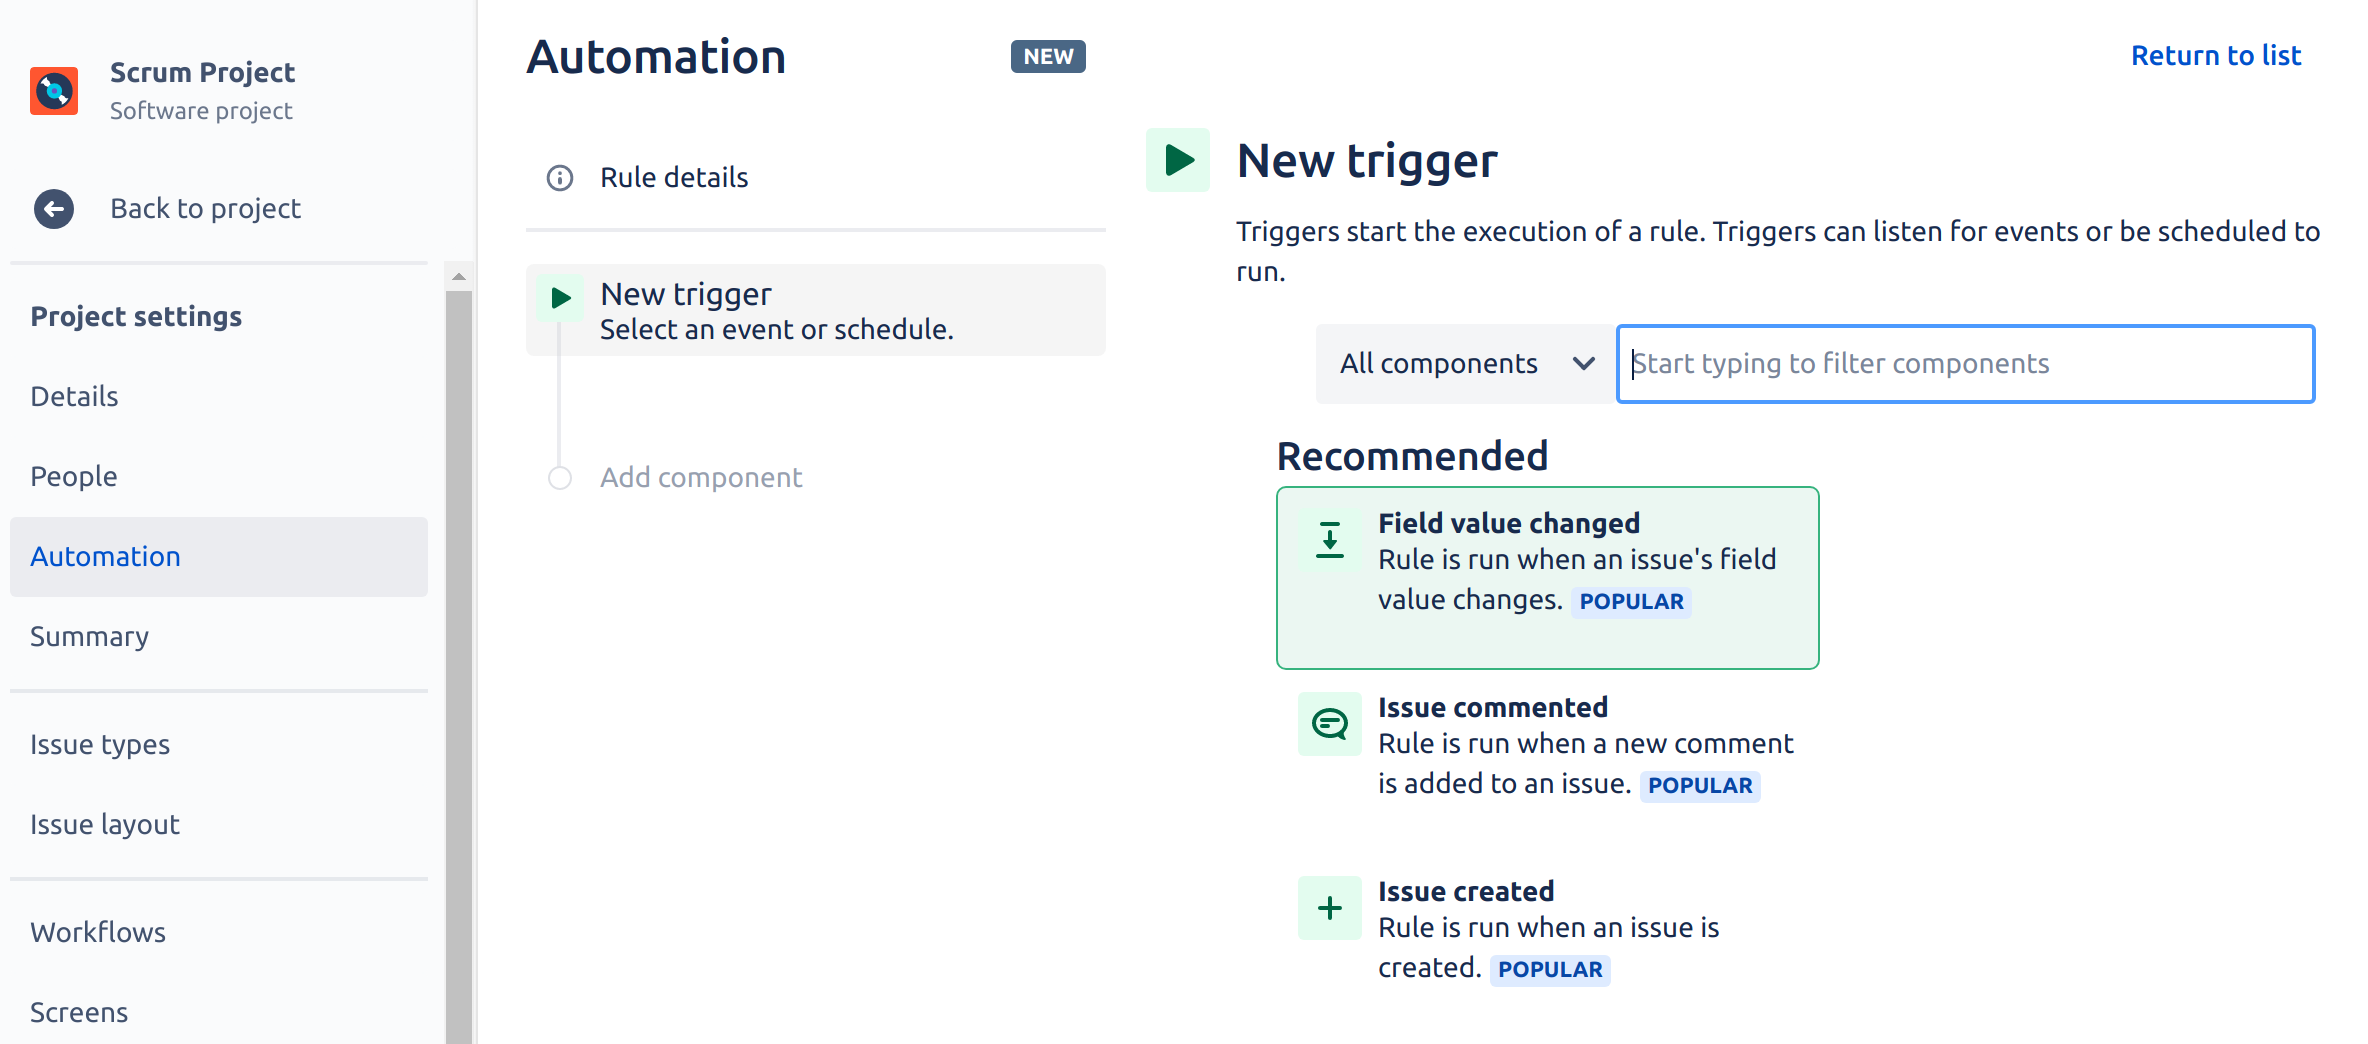
- On the New trigger page, Select Field value changed option:
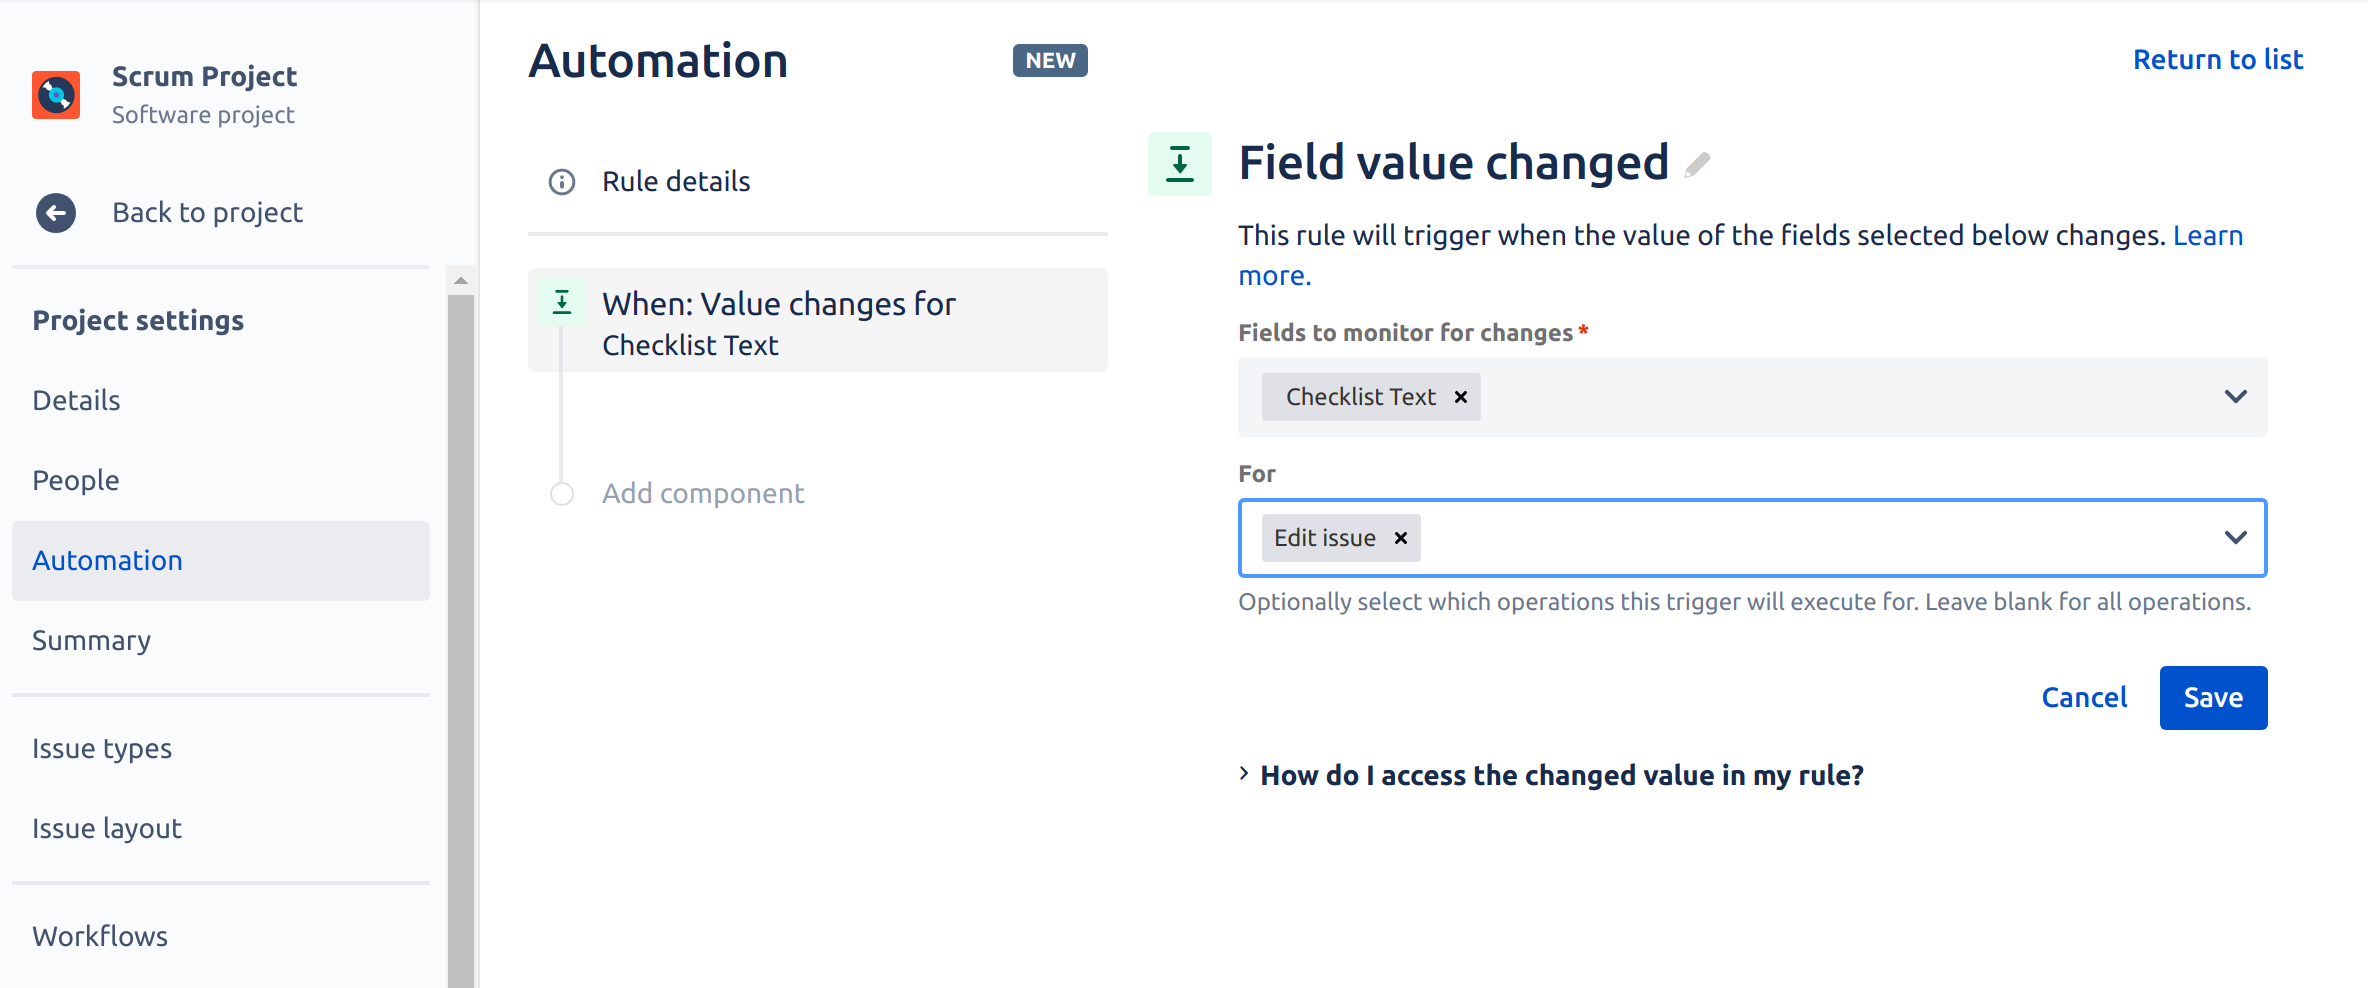
- On the Field value changed page select Checklist Text in the first list and then select Edit issue in the second list. Next, press Save button:
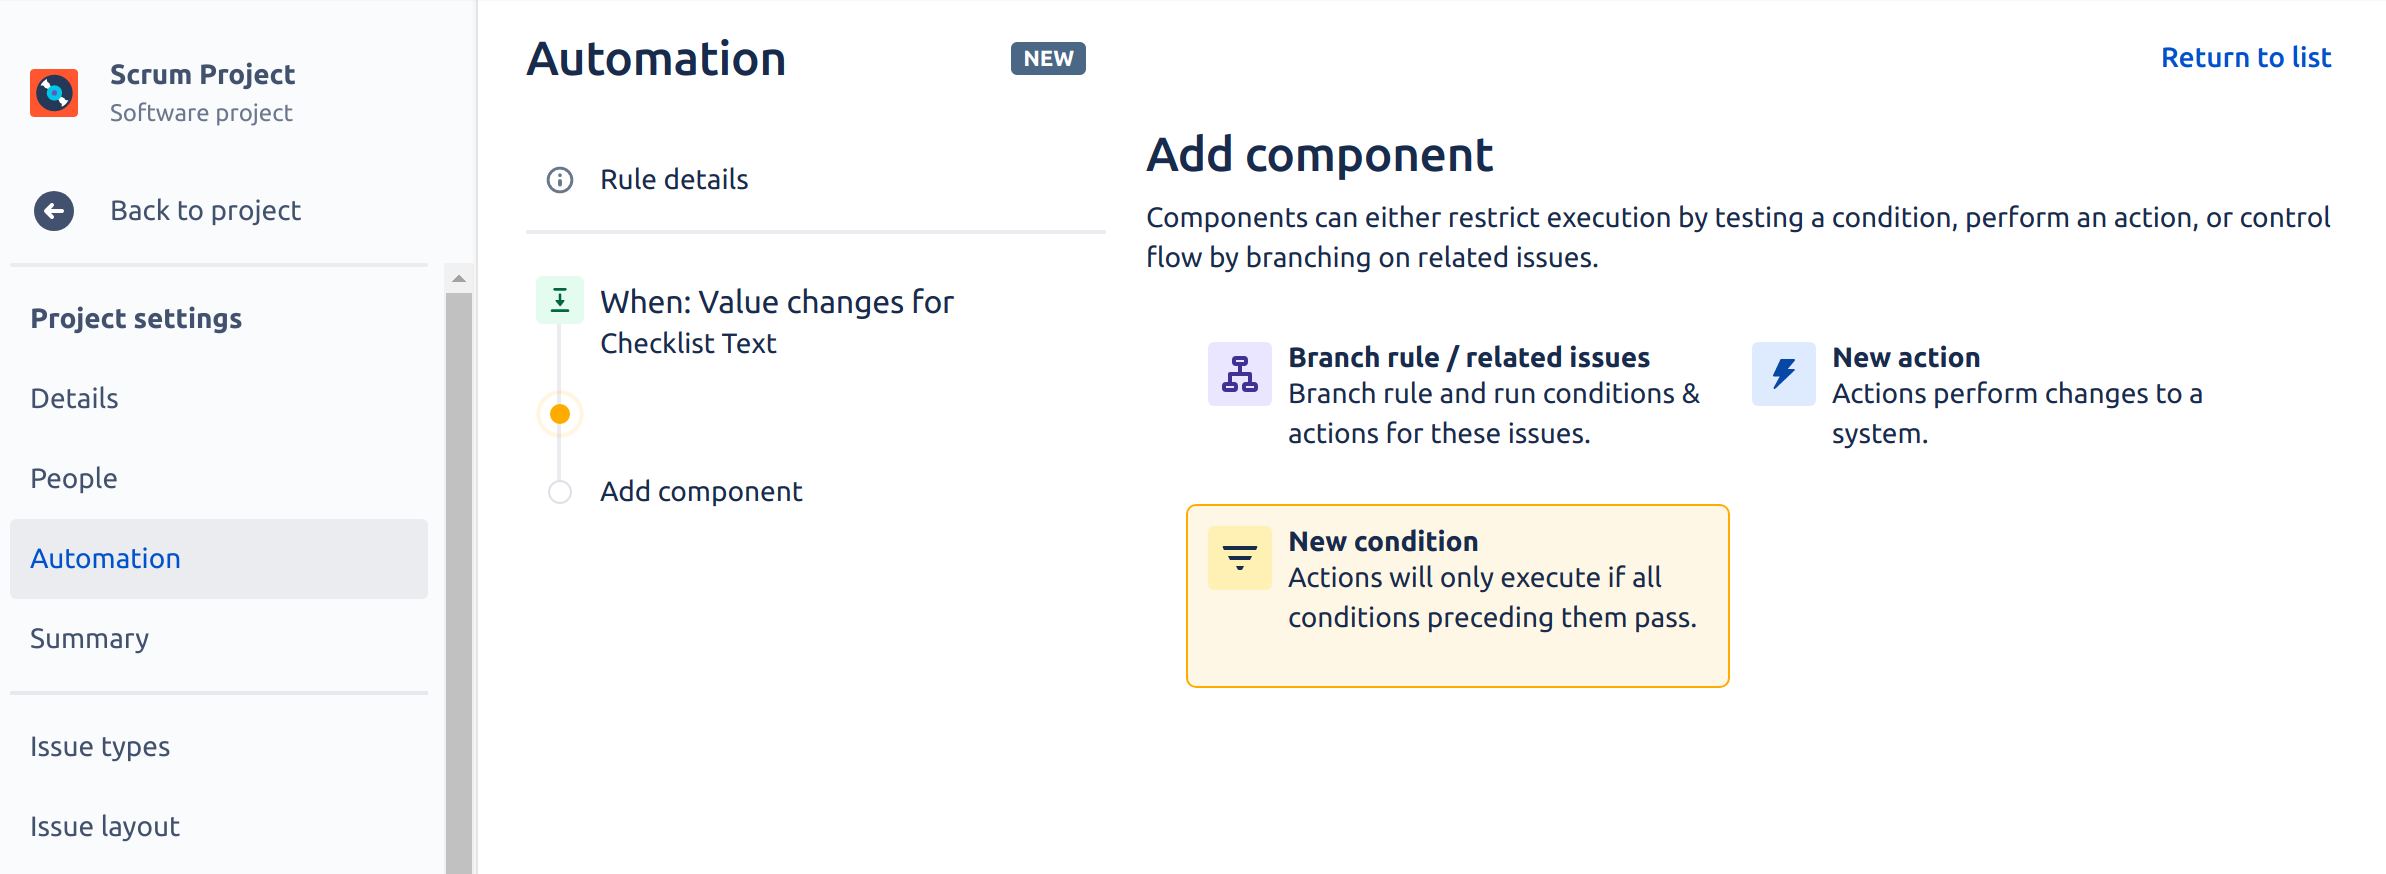
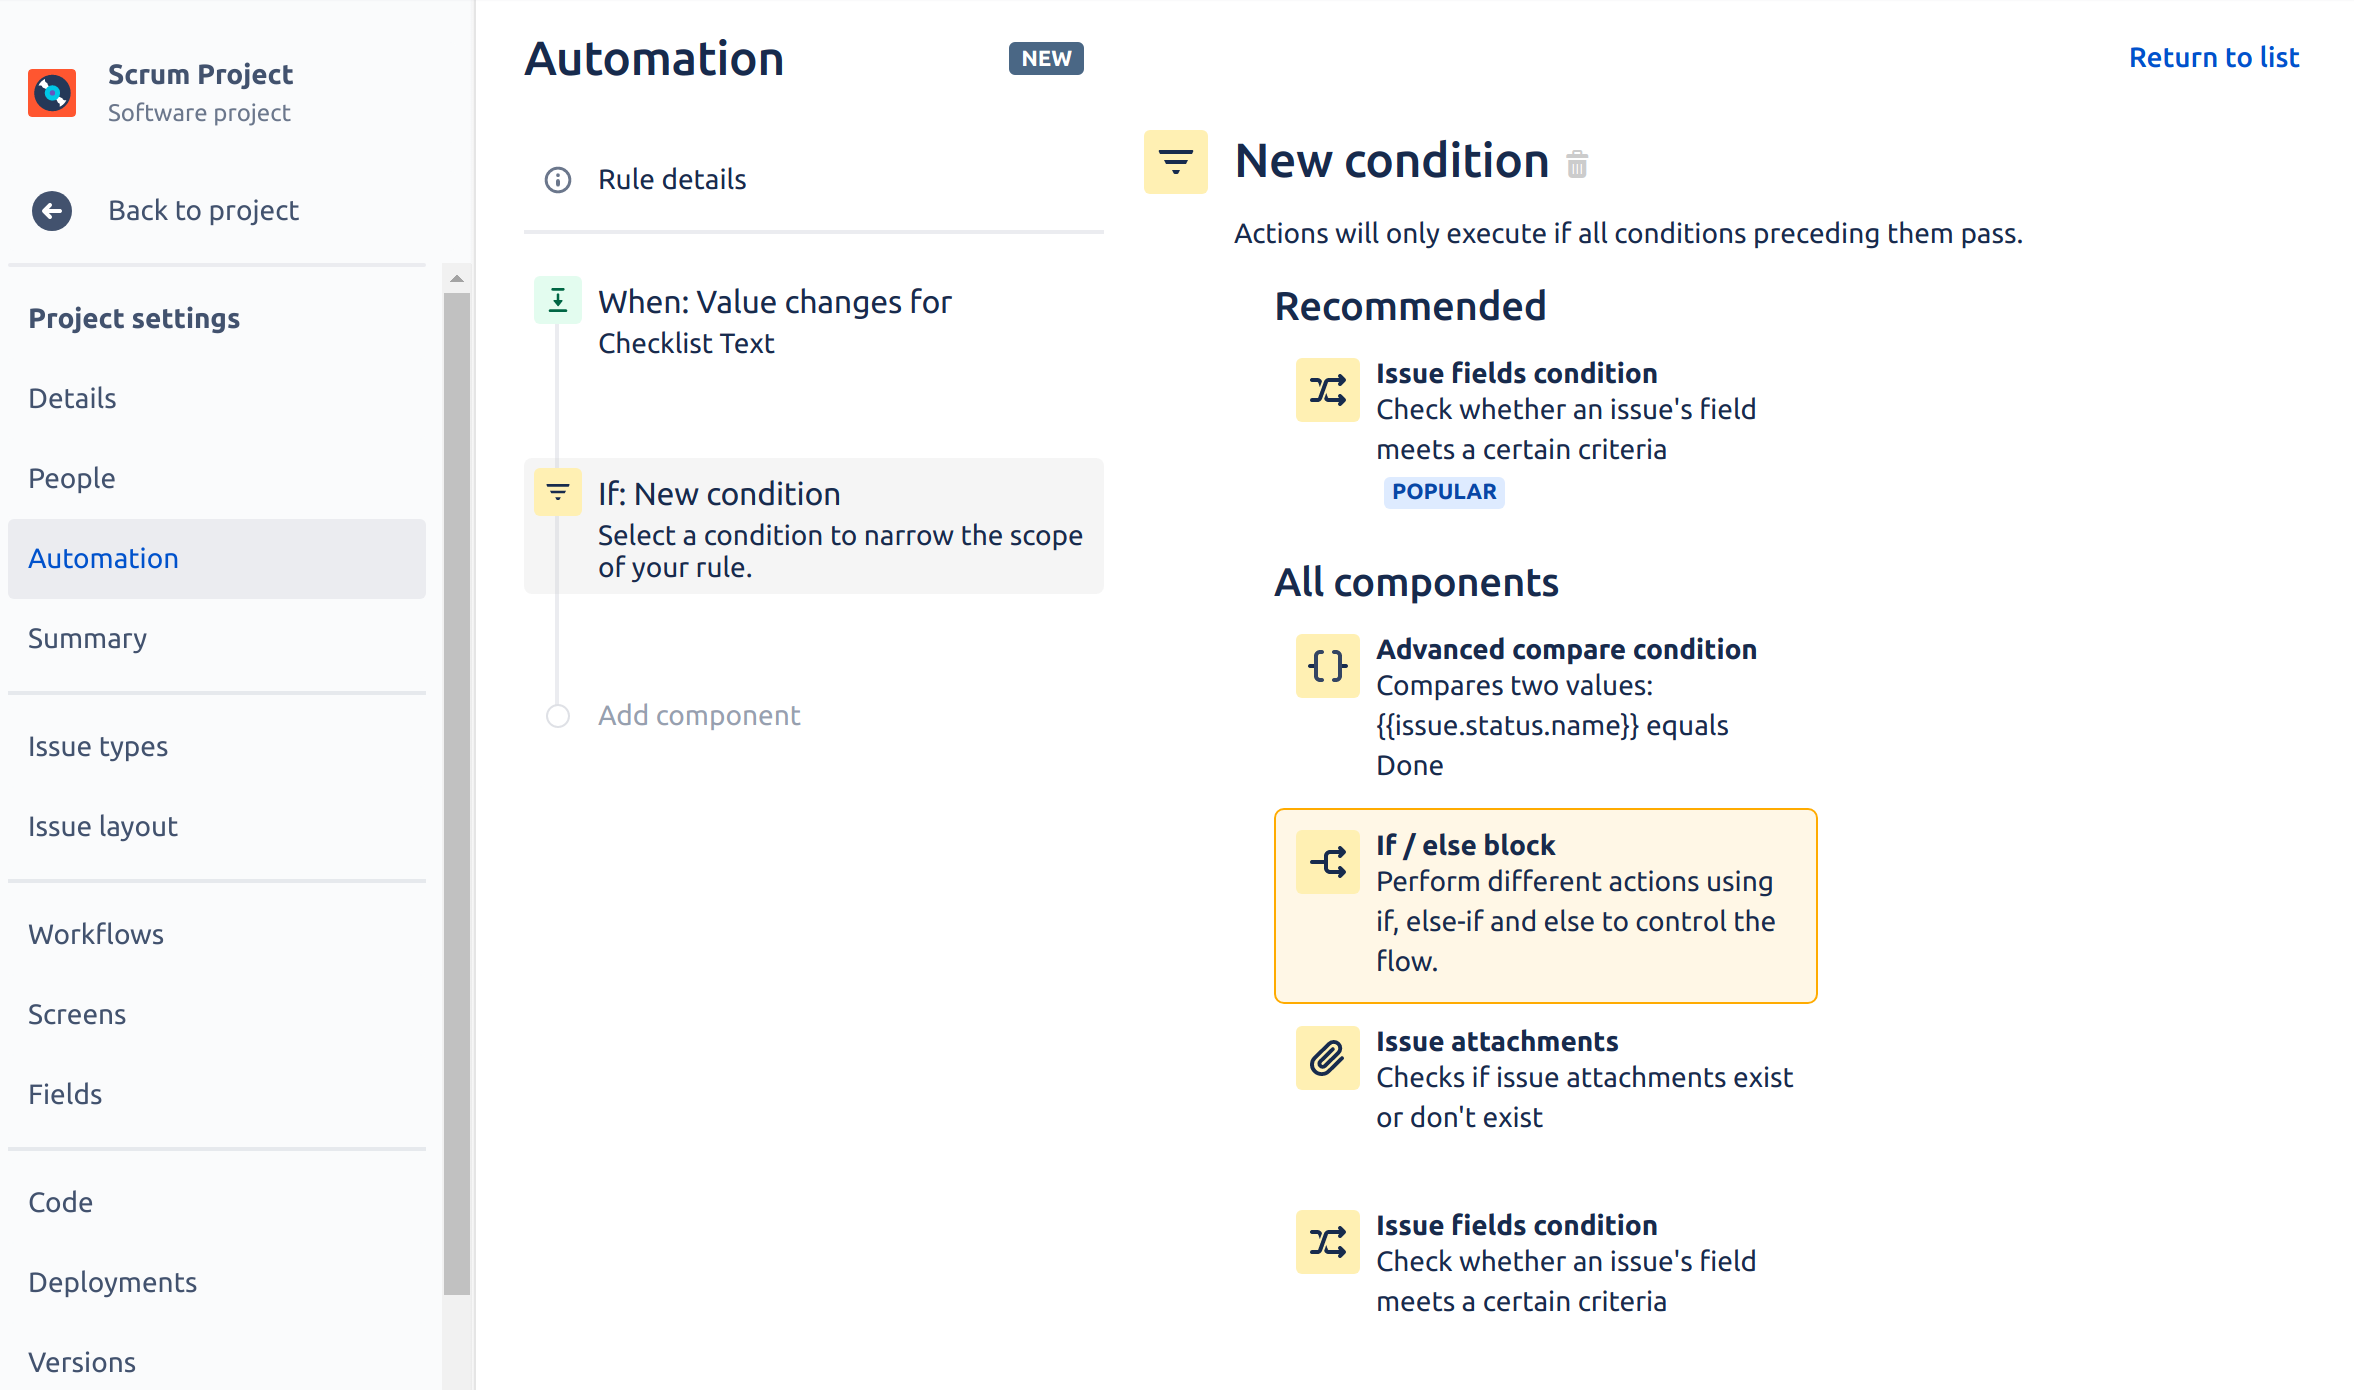
- On the Add component page select New condition option:
- One the New condition page select if / else block option:
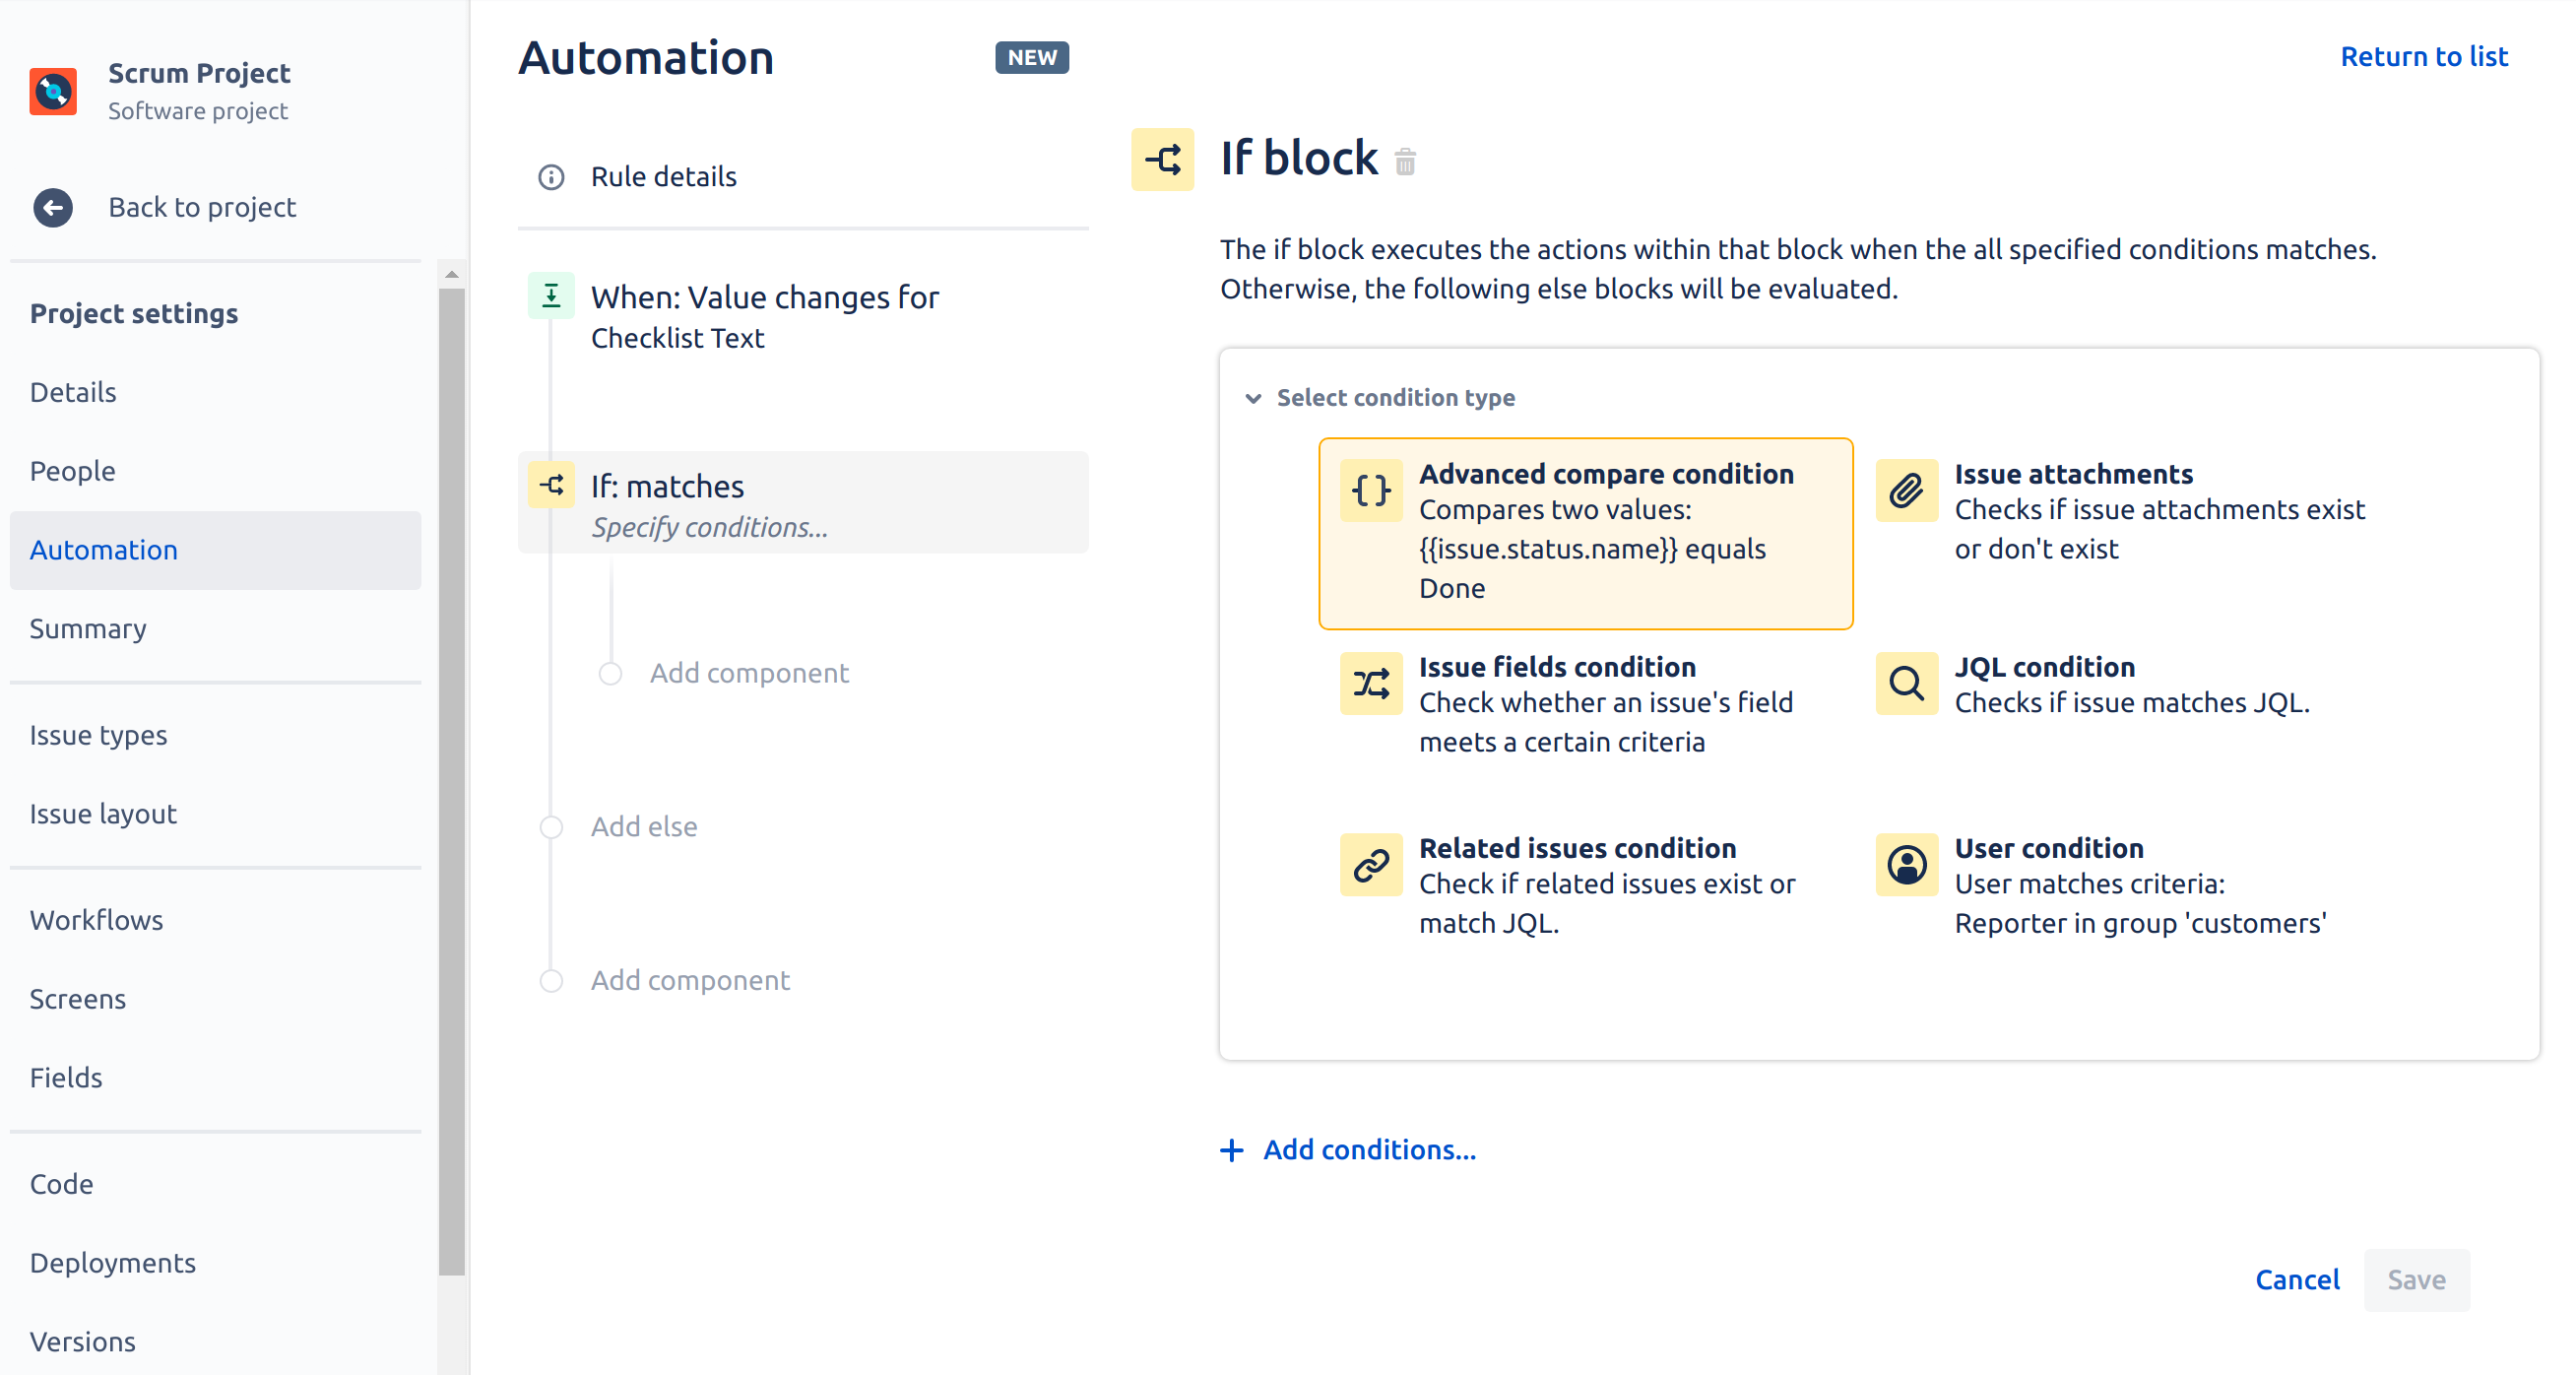
- On the If block page press Add conditions... link and next select Advanced compare condition:
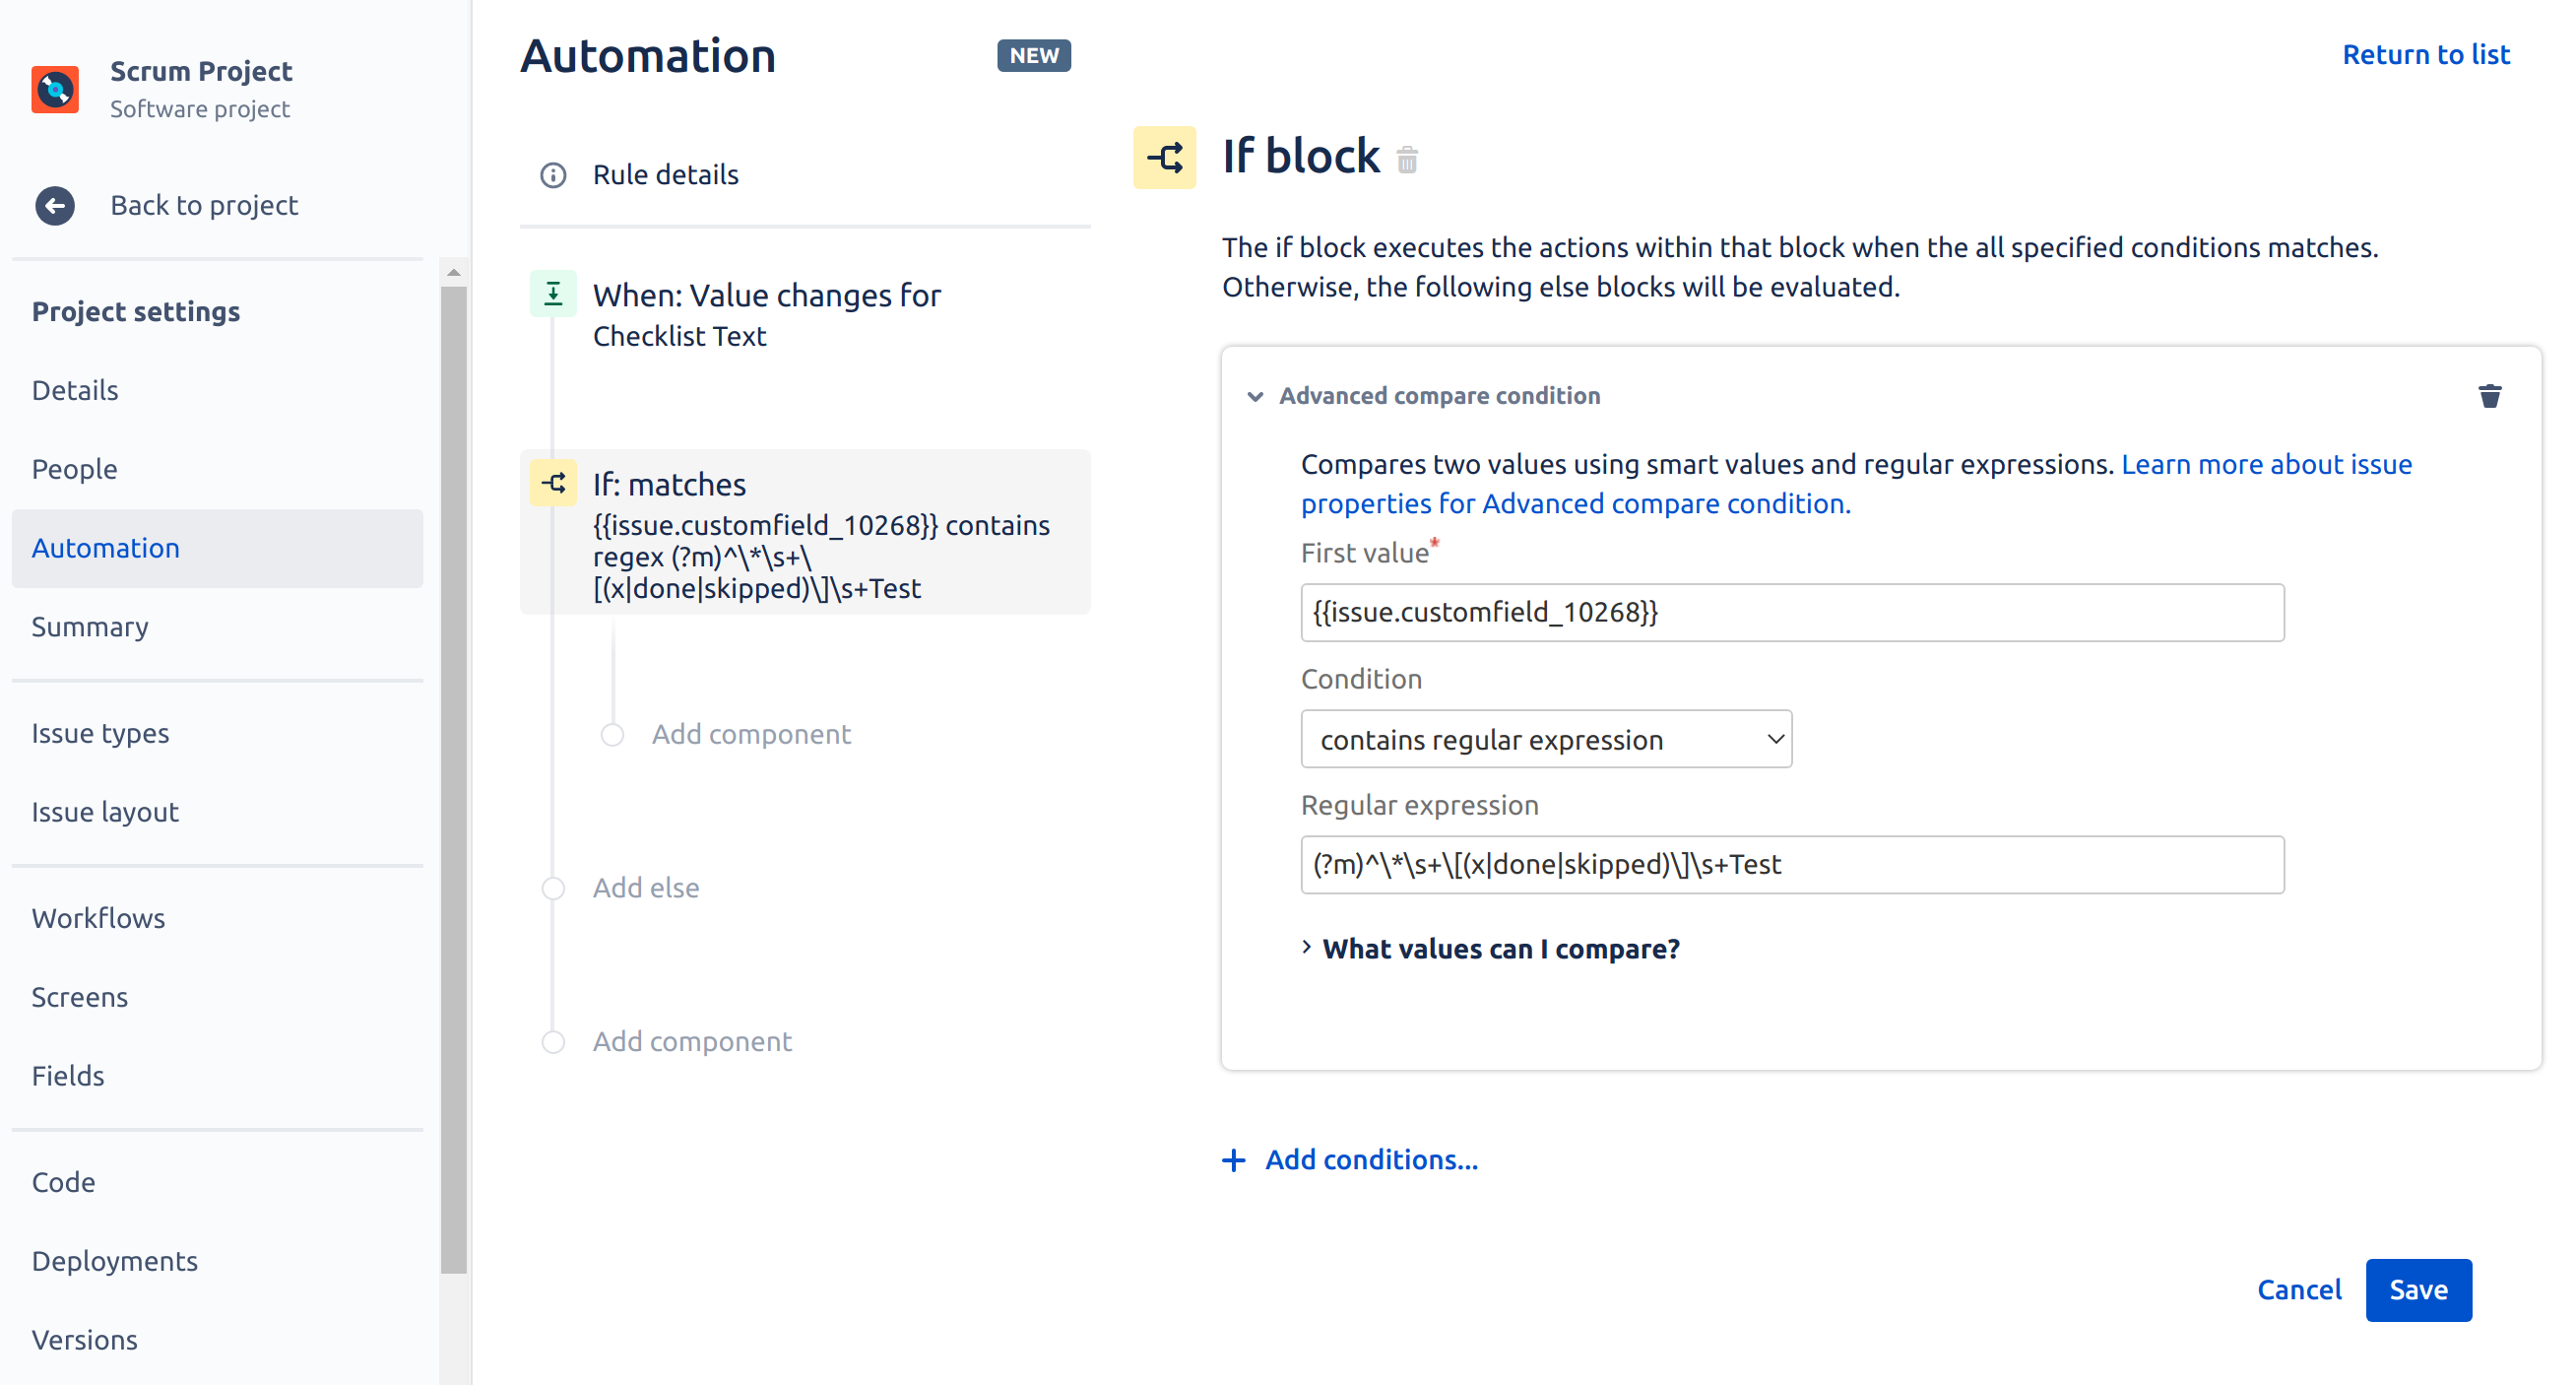
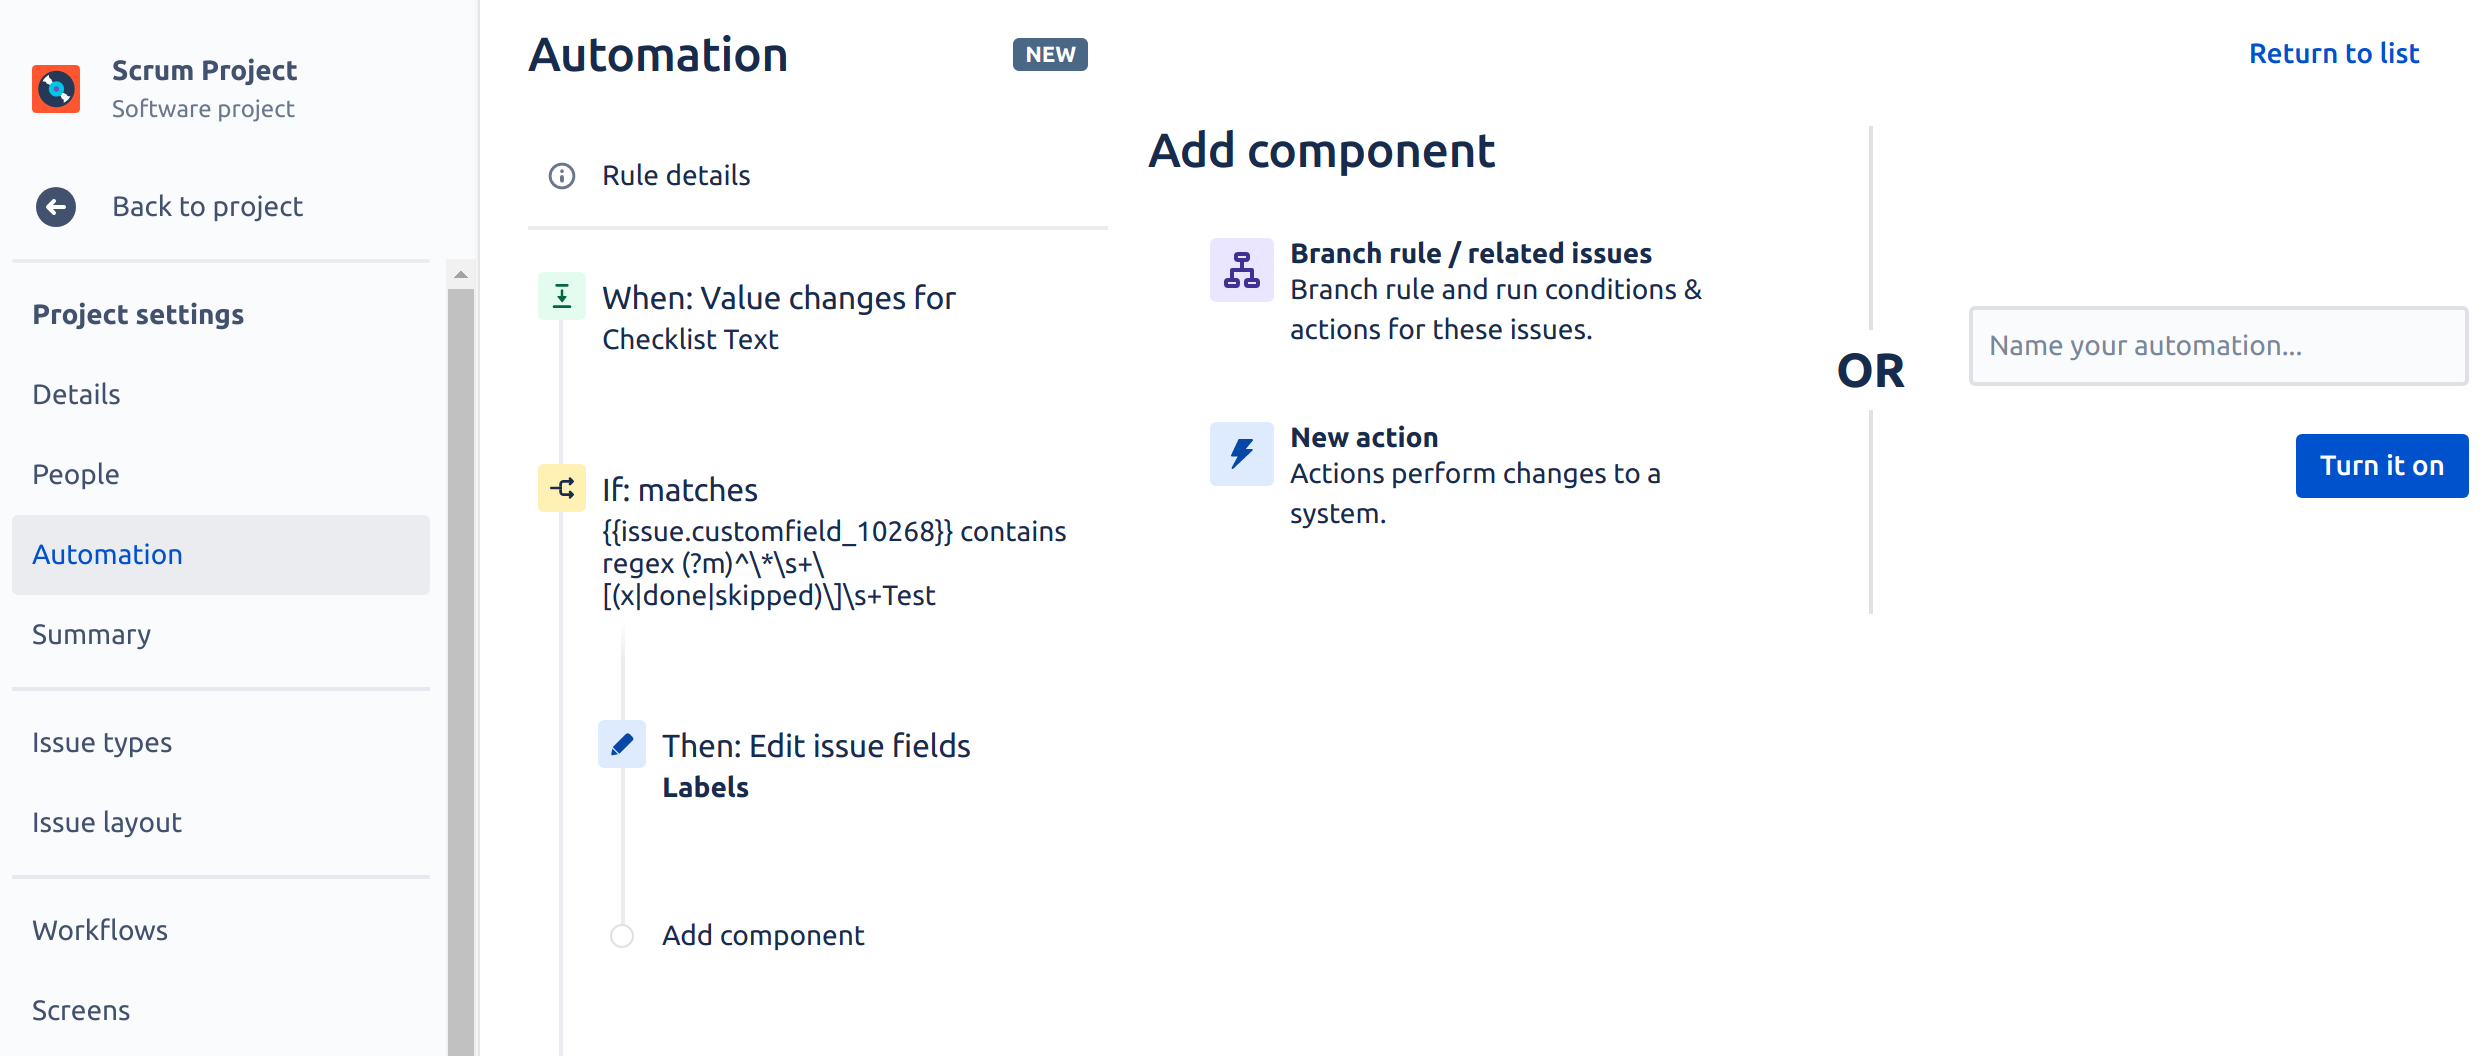
- On the next If block page enter following details in the form:
{{issue.customfield_10268}}- contains regular expression
(?m)^\*\s+\[(x|done|skipped)\]\s+Test
Where:
(1) customfield_10268 is an ID of Checklist Text custom field that you must replace with value from your Jira. Read how to find custom field ID.
(2) Test is a text/summary of checklist item that we want to test for checked status (replace it with summary of your checklist item).
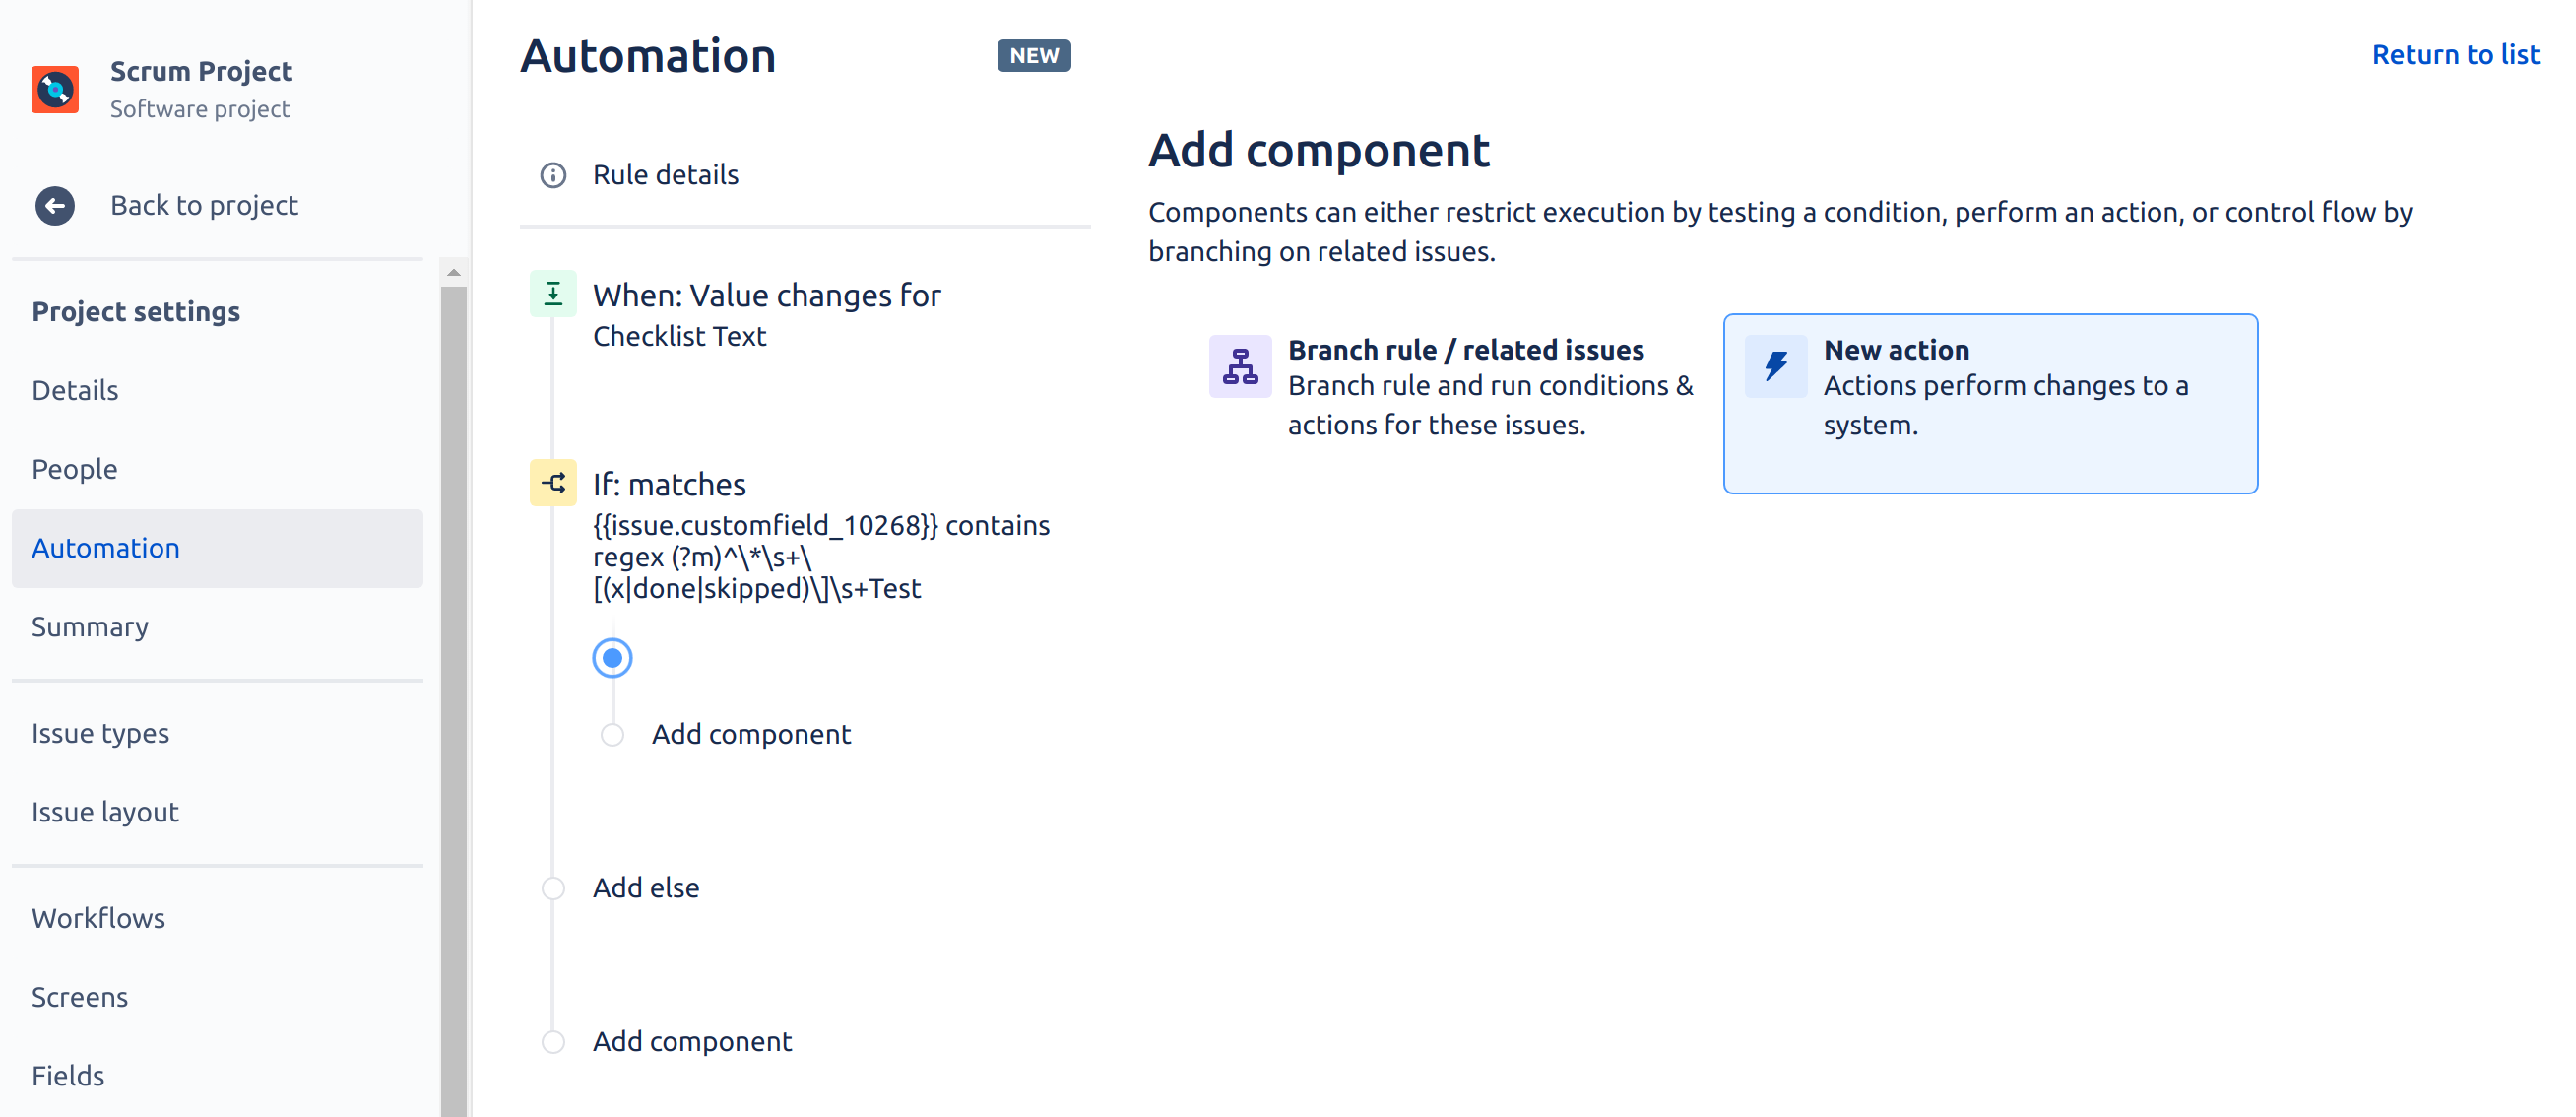
Press Save when finished. - On the New component page select New action option:
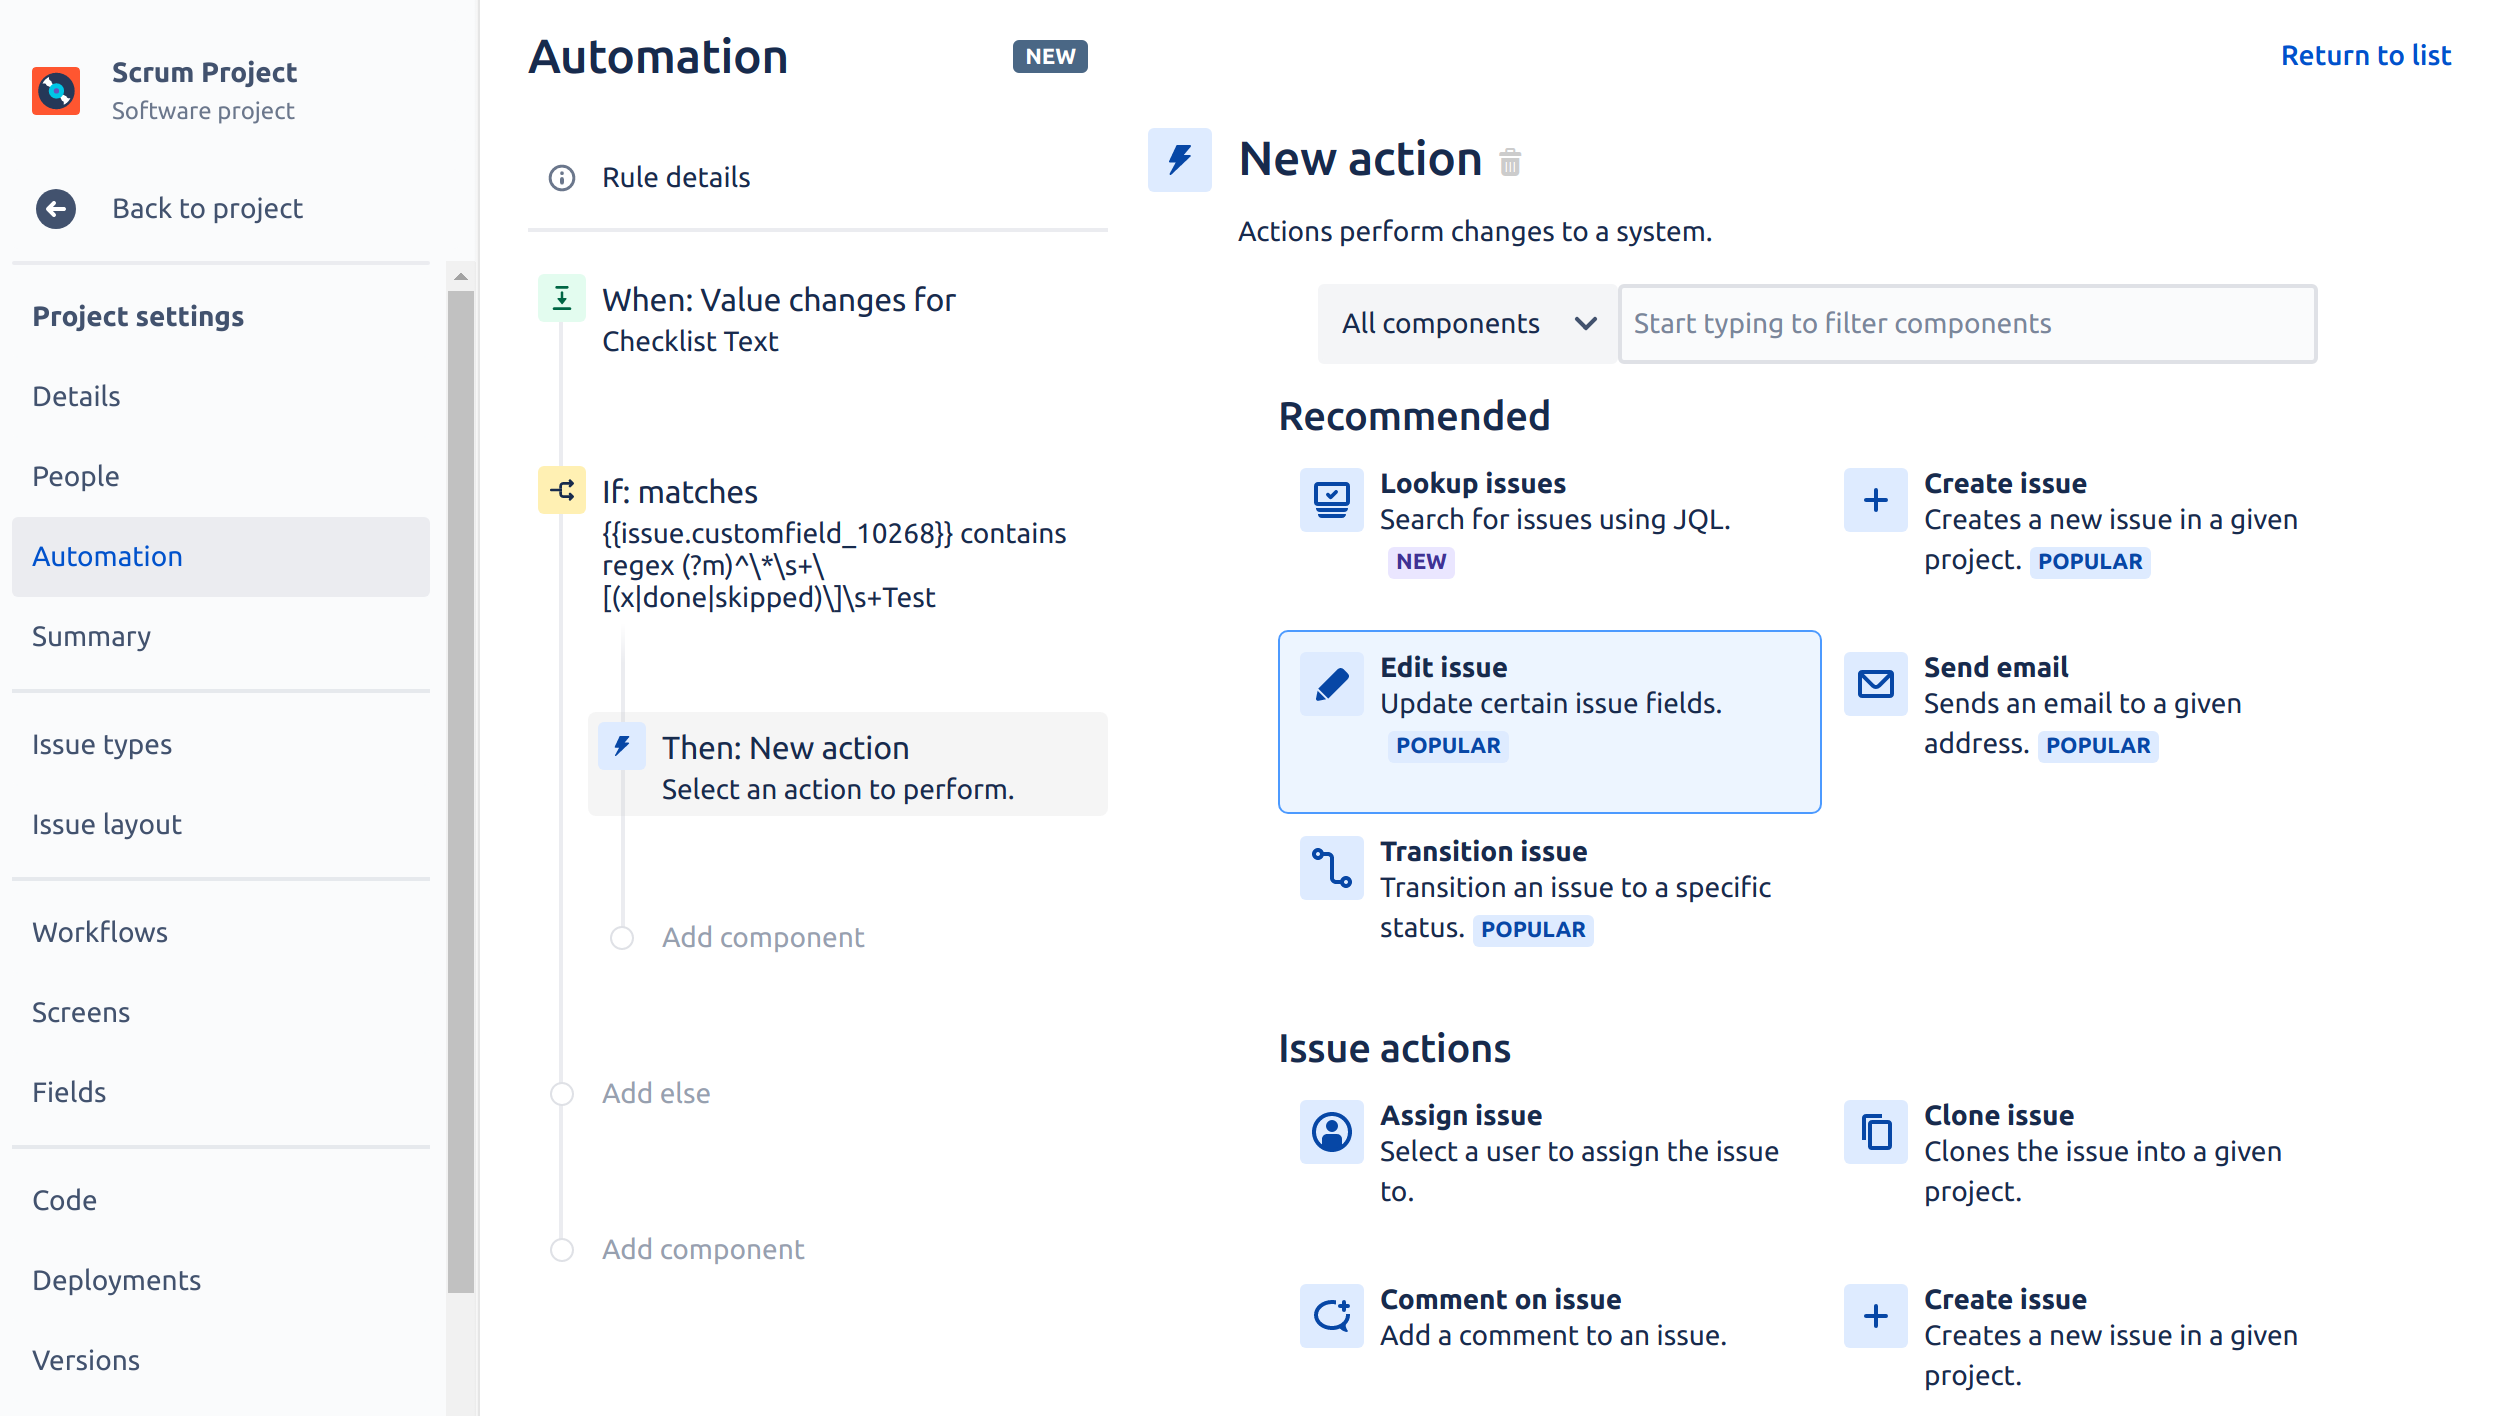
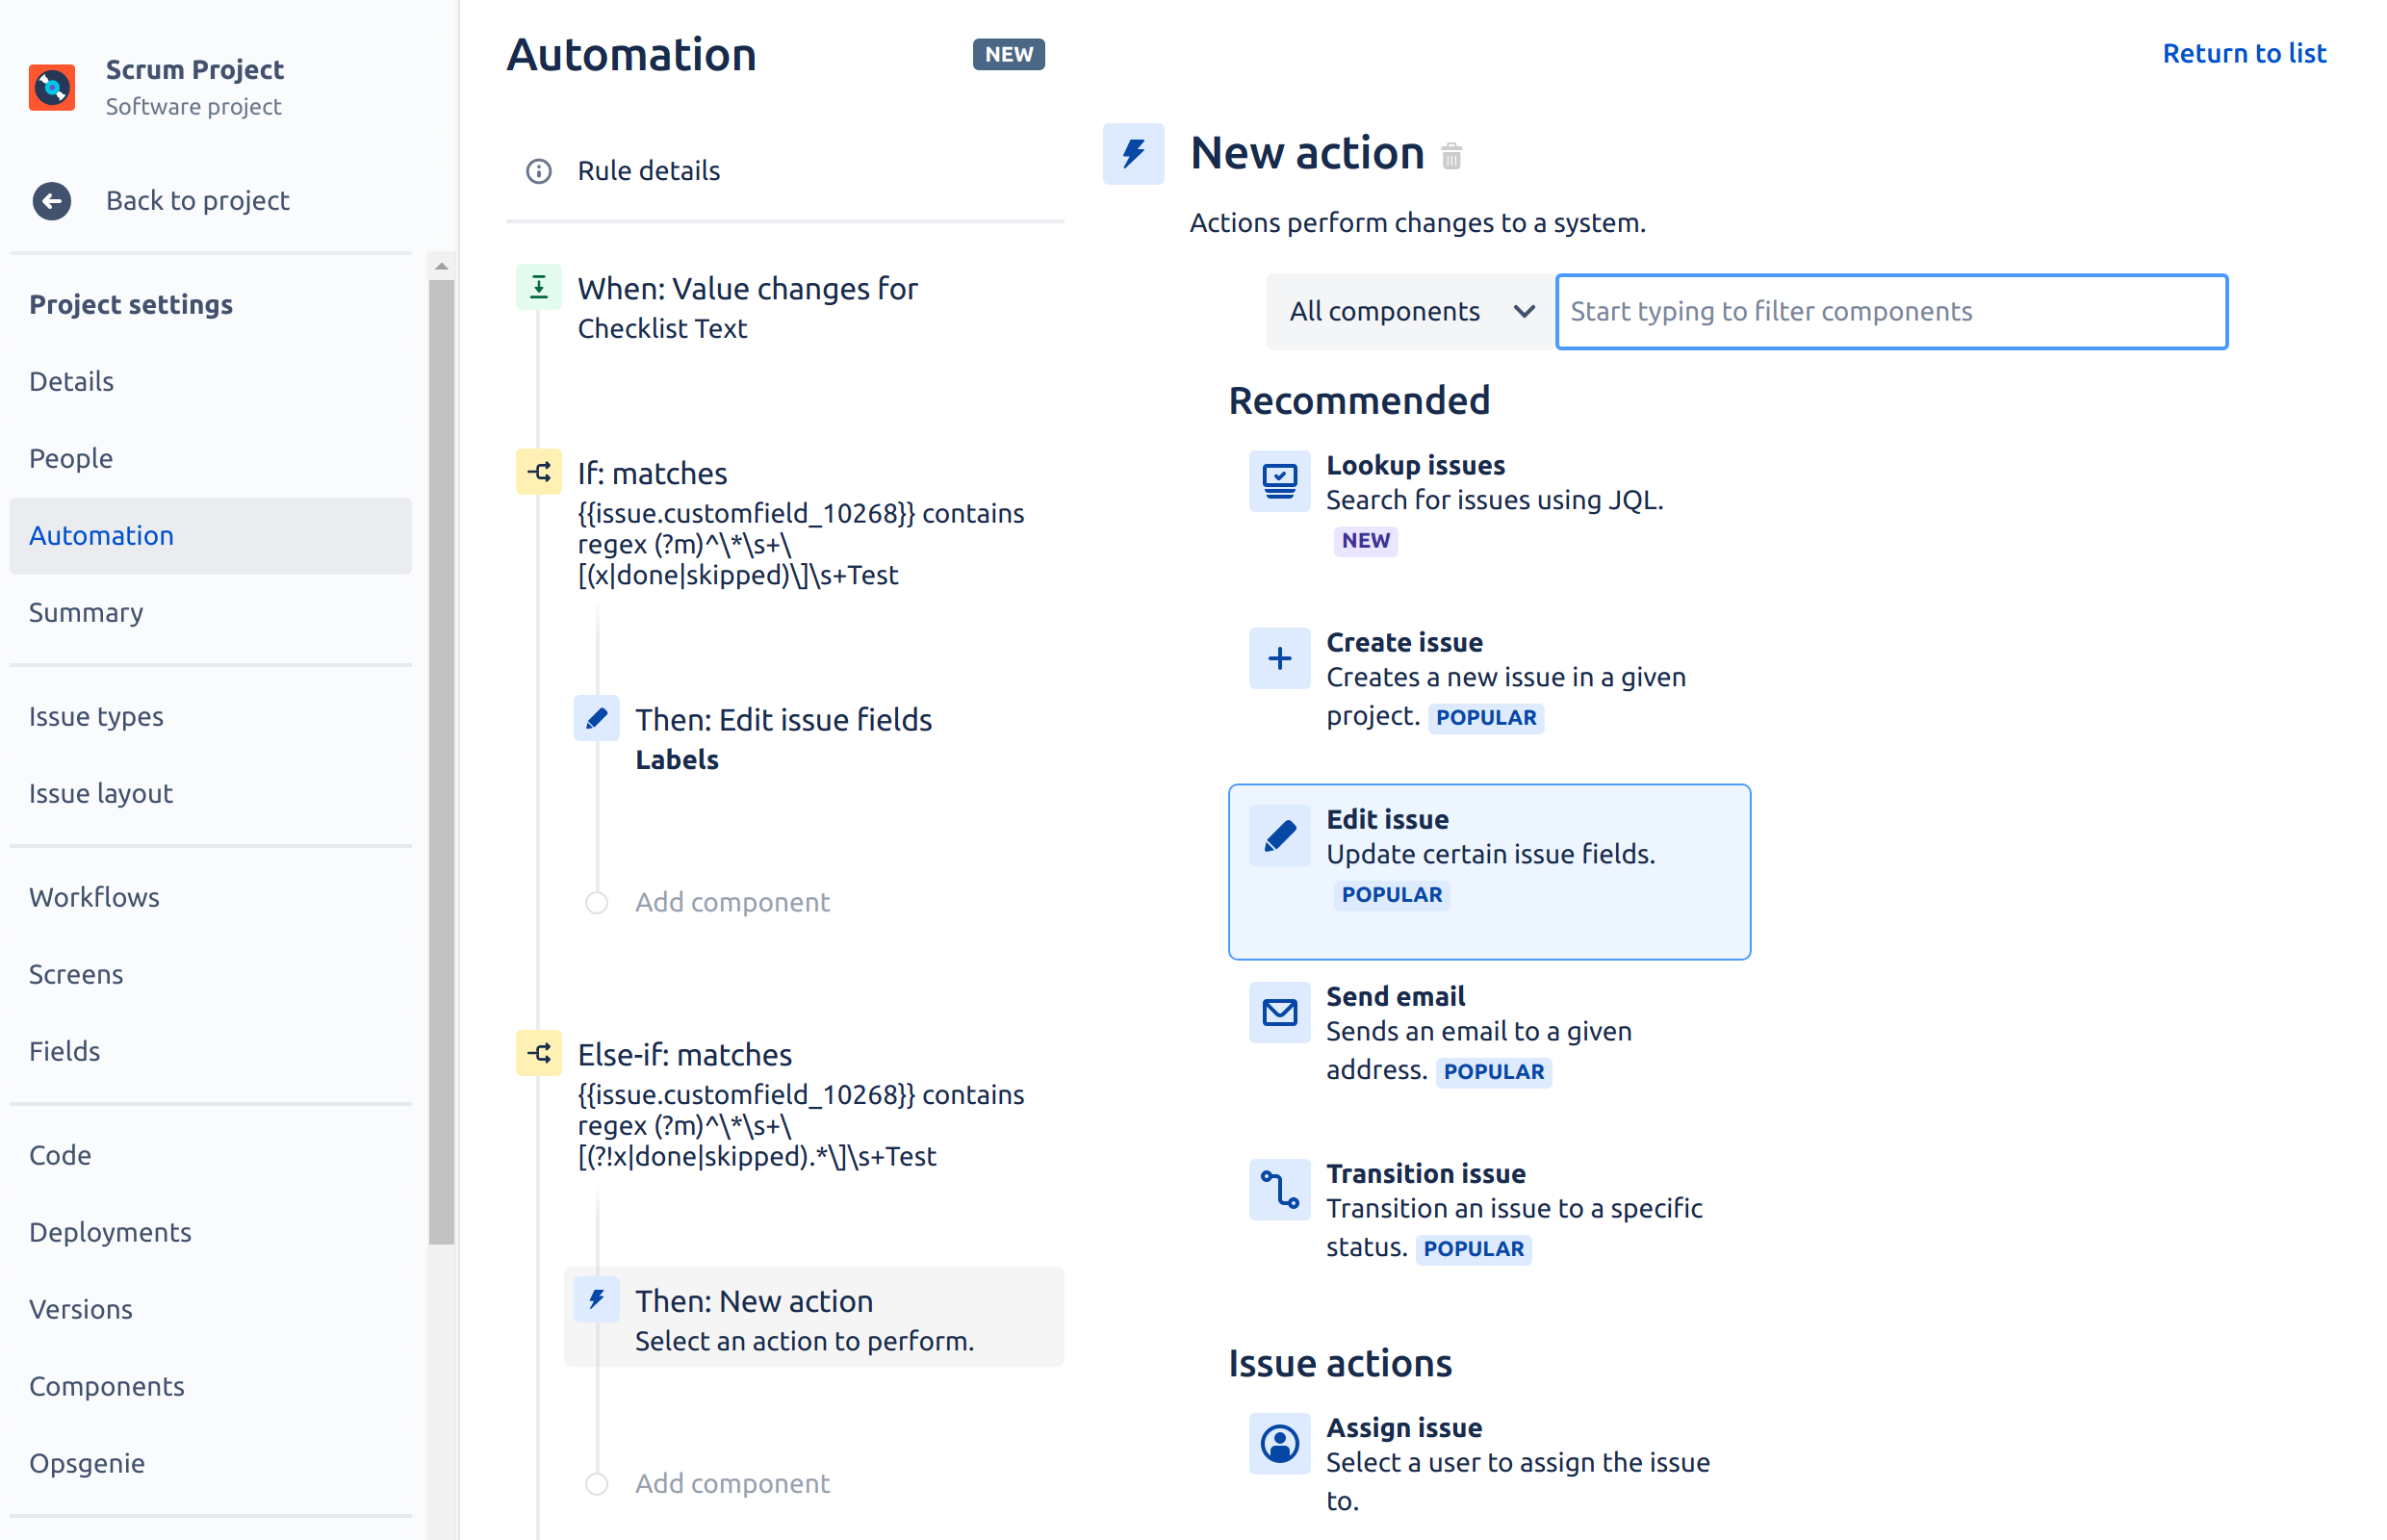
- On the New action page select Edit issue option:
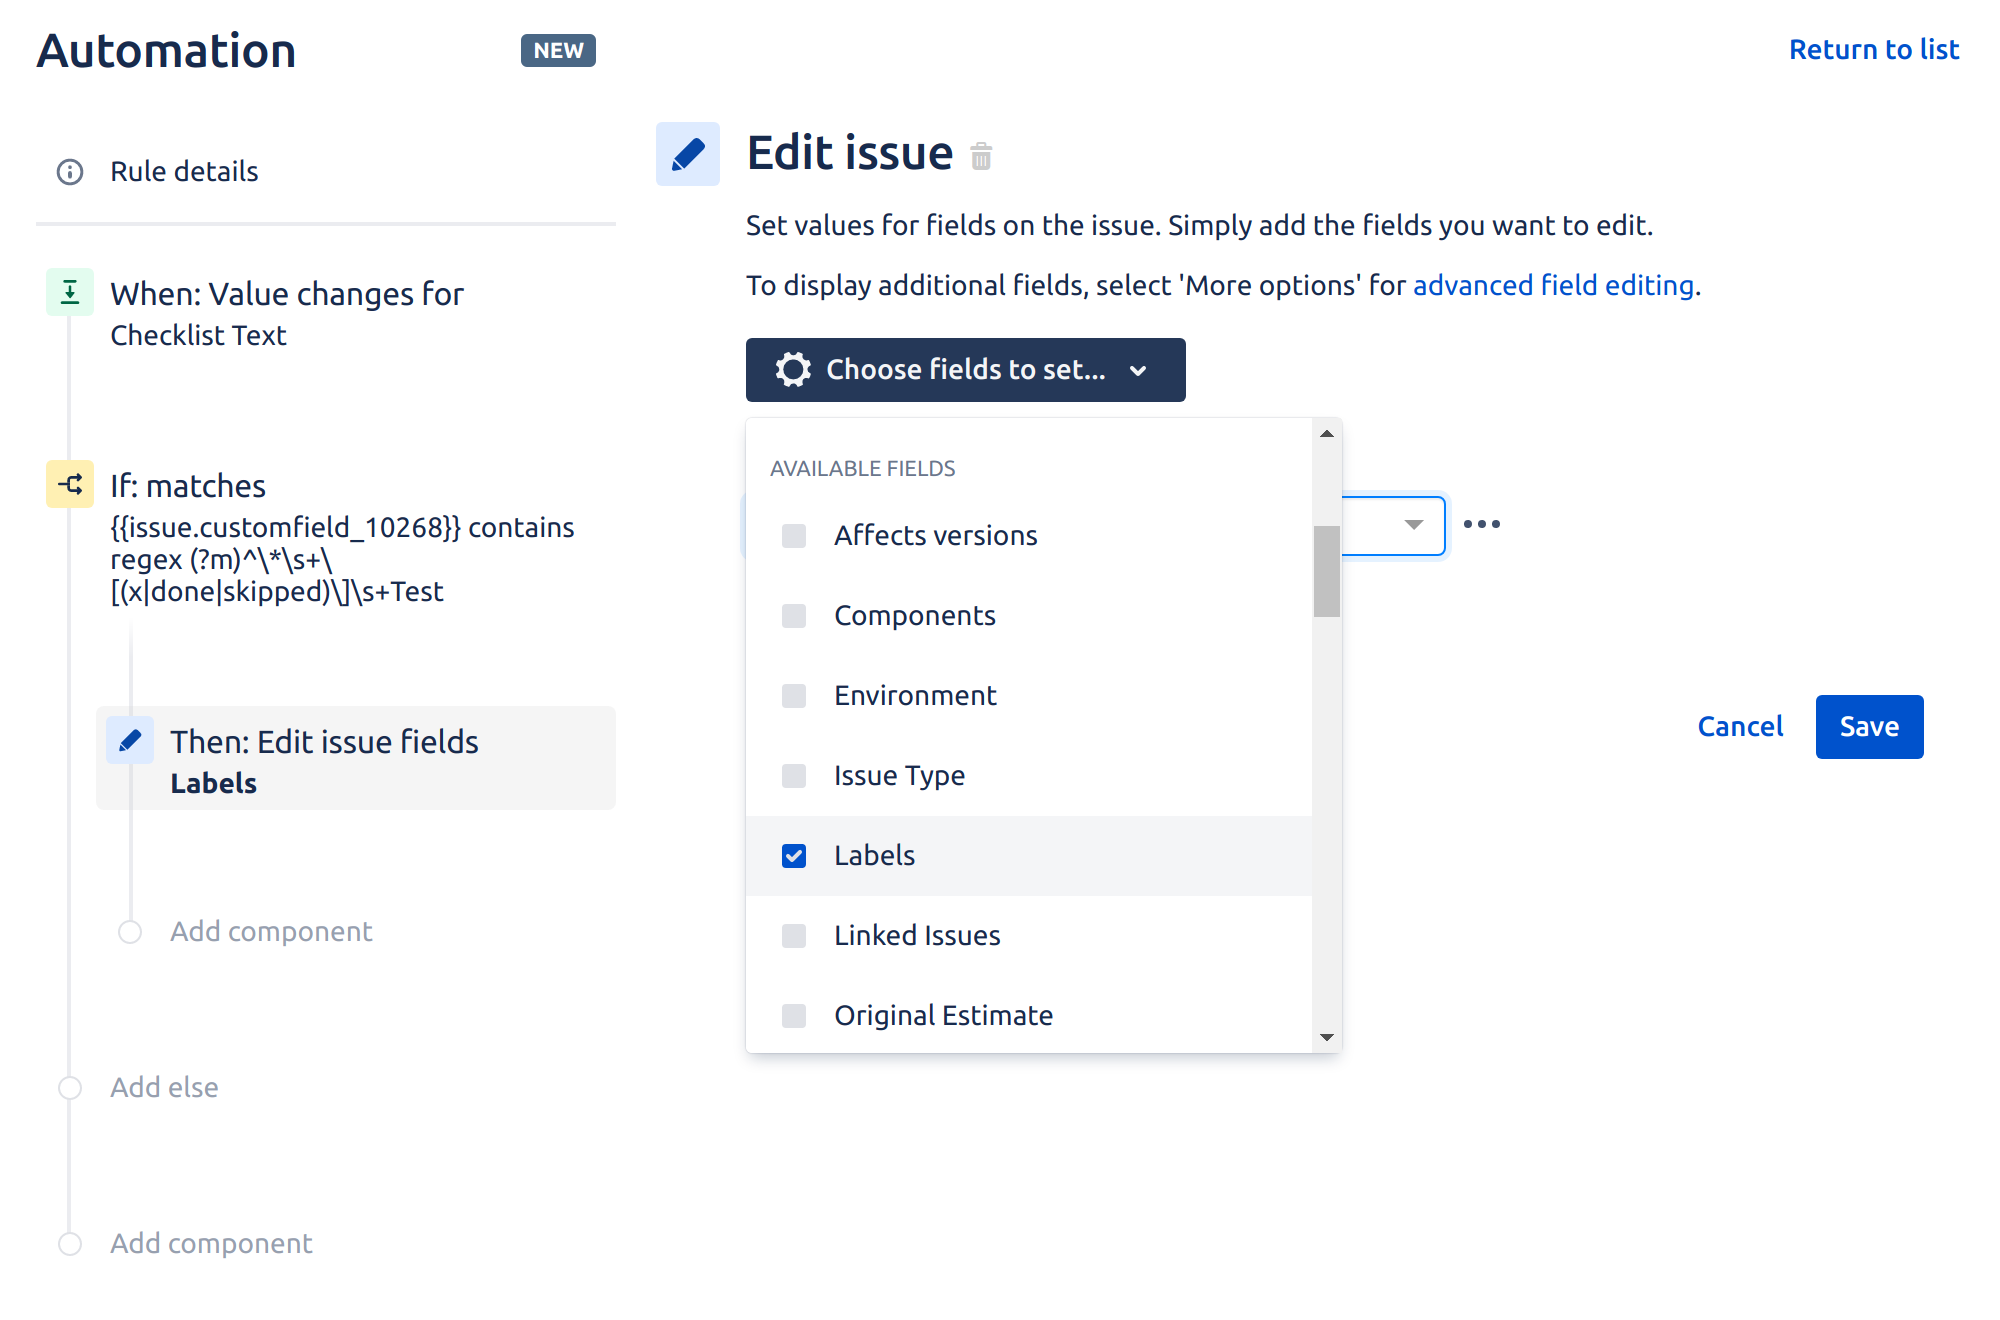
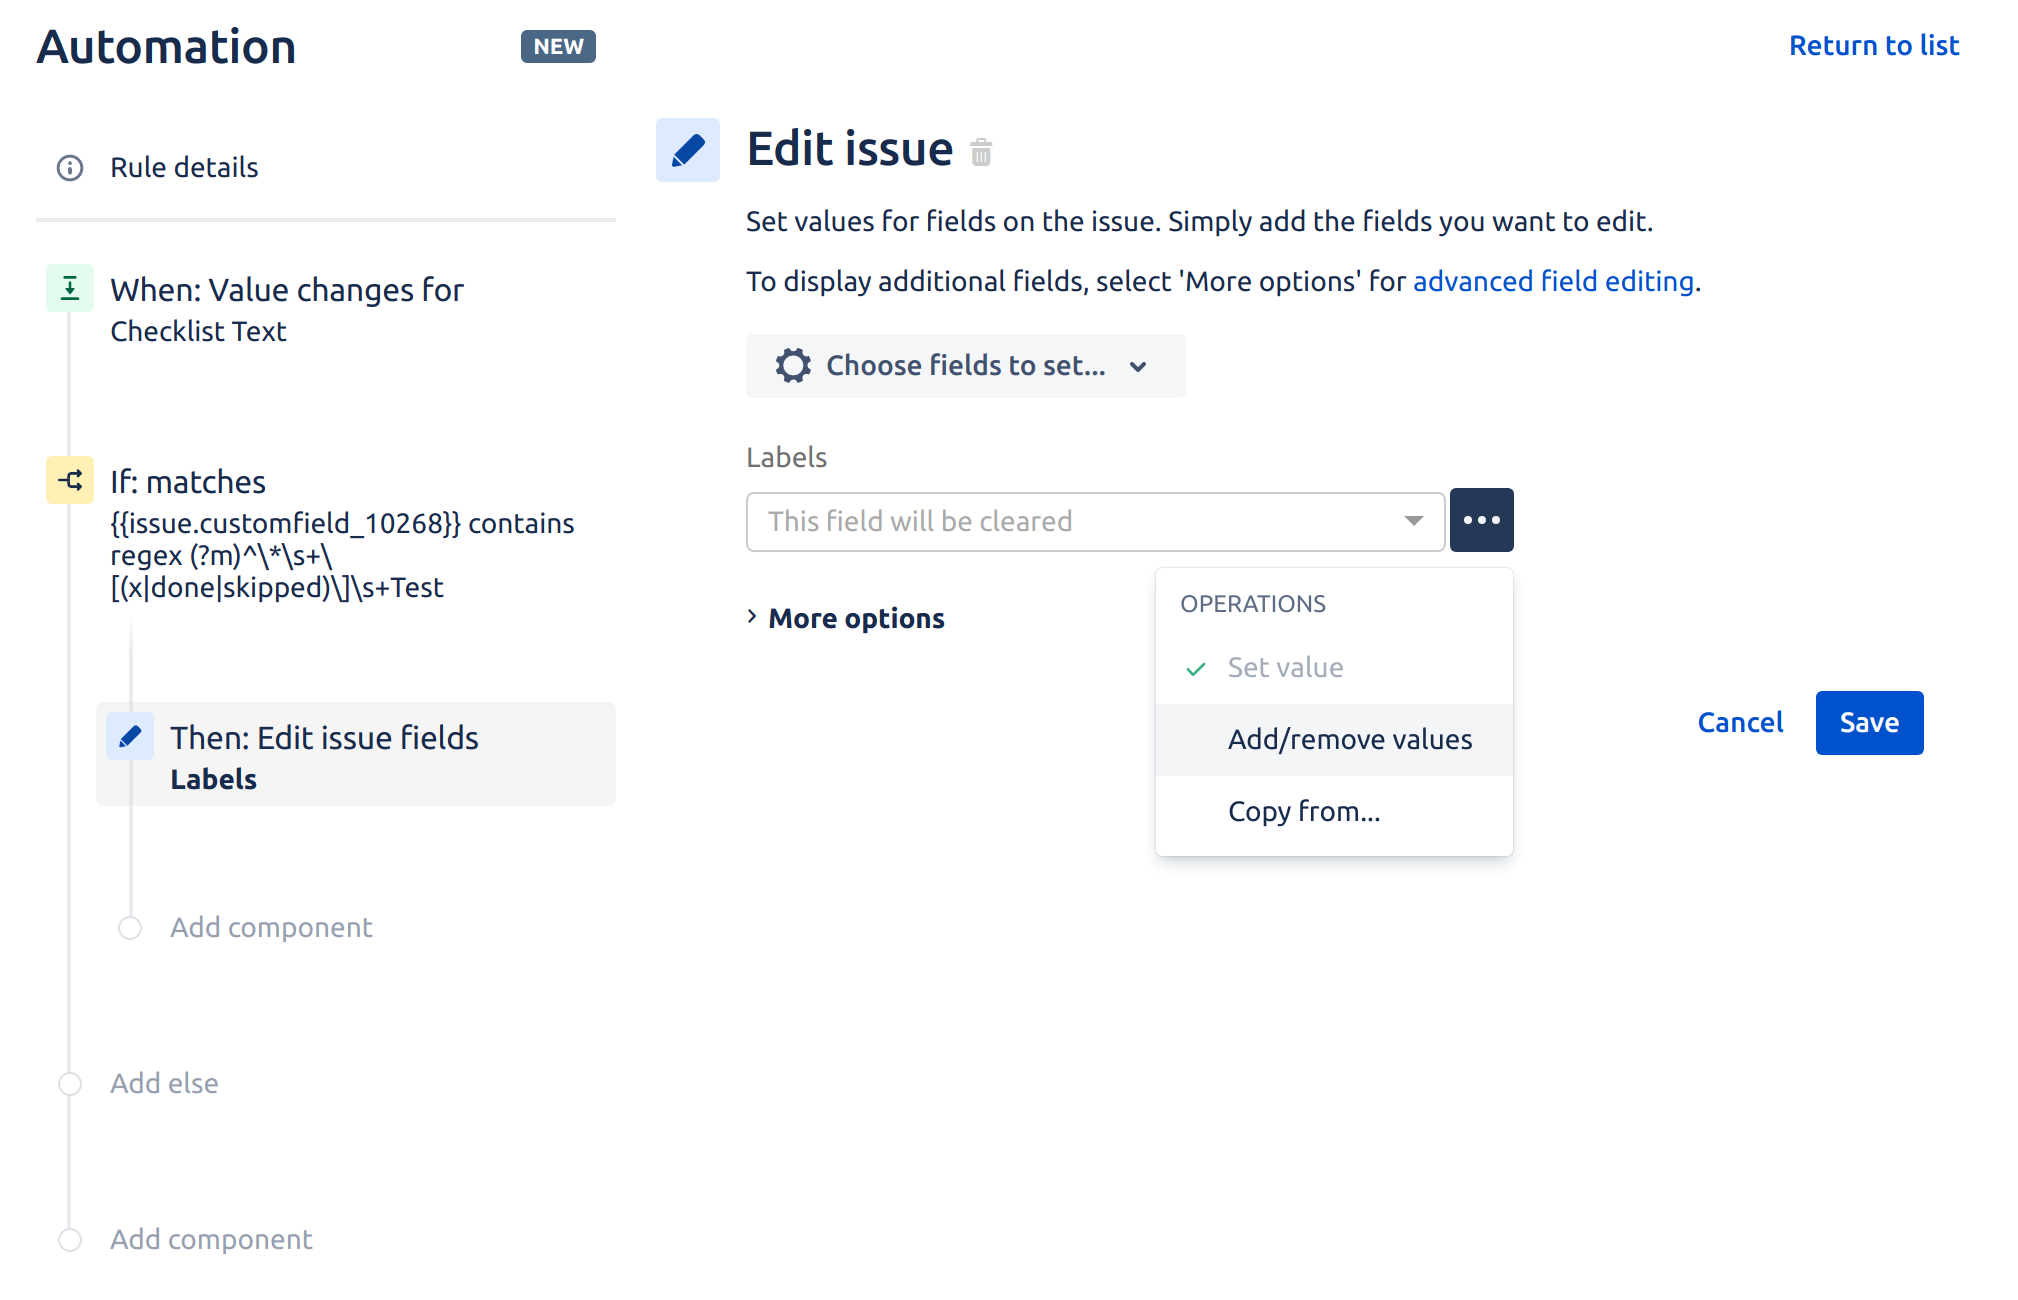
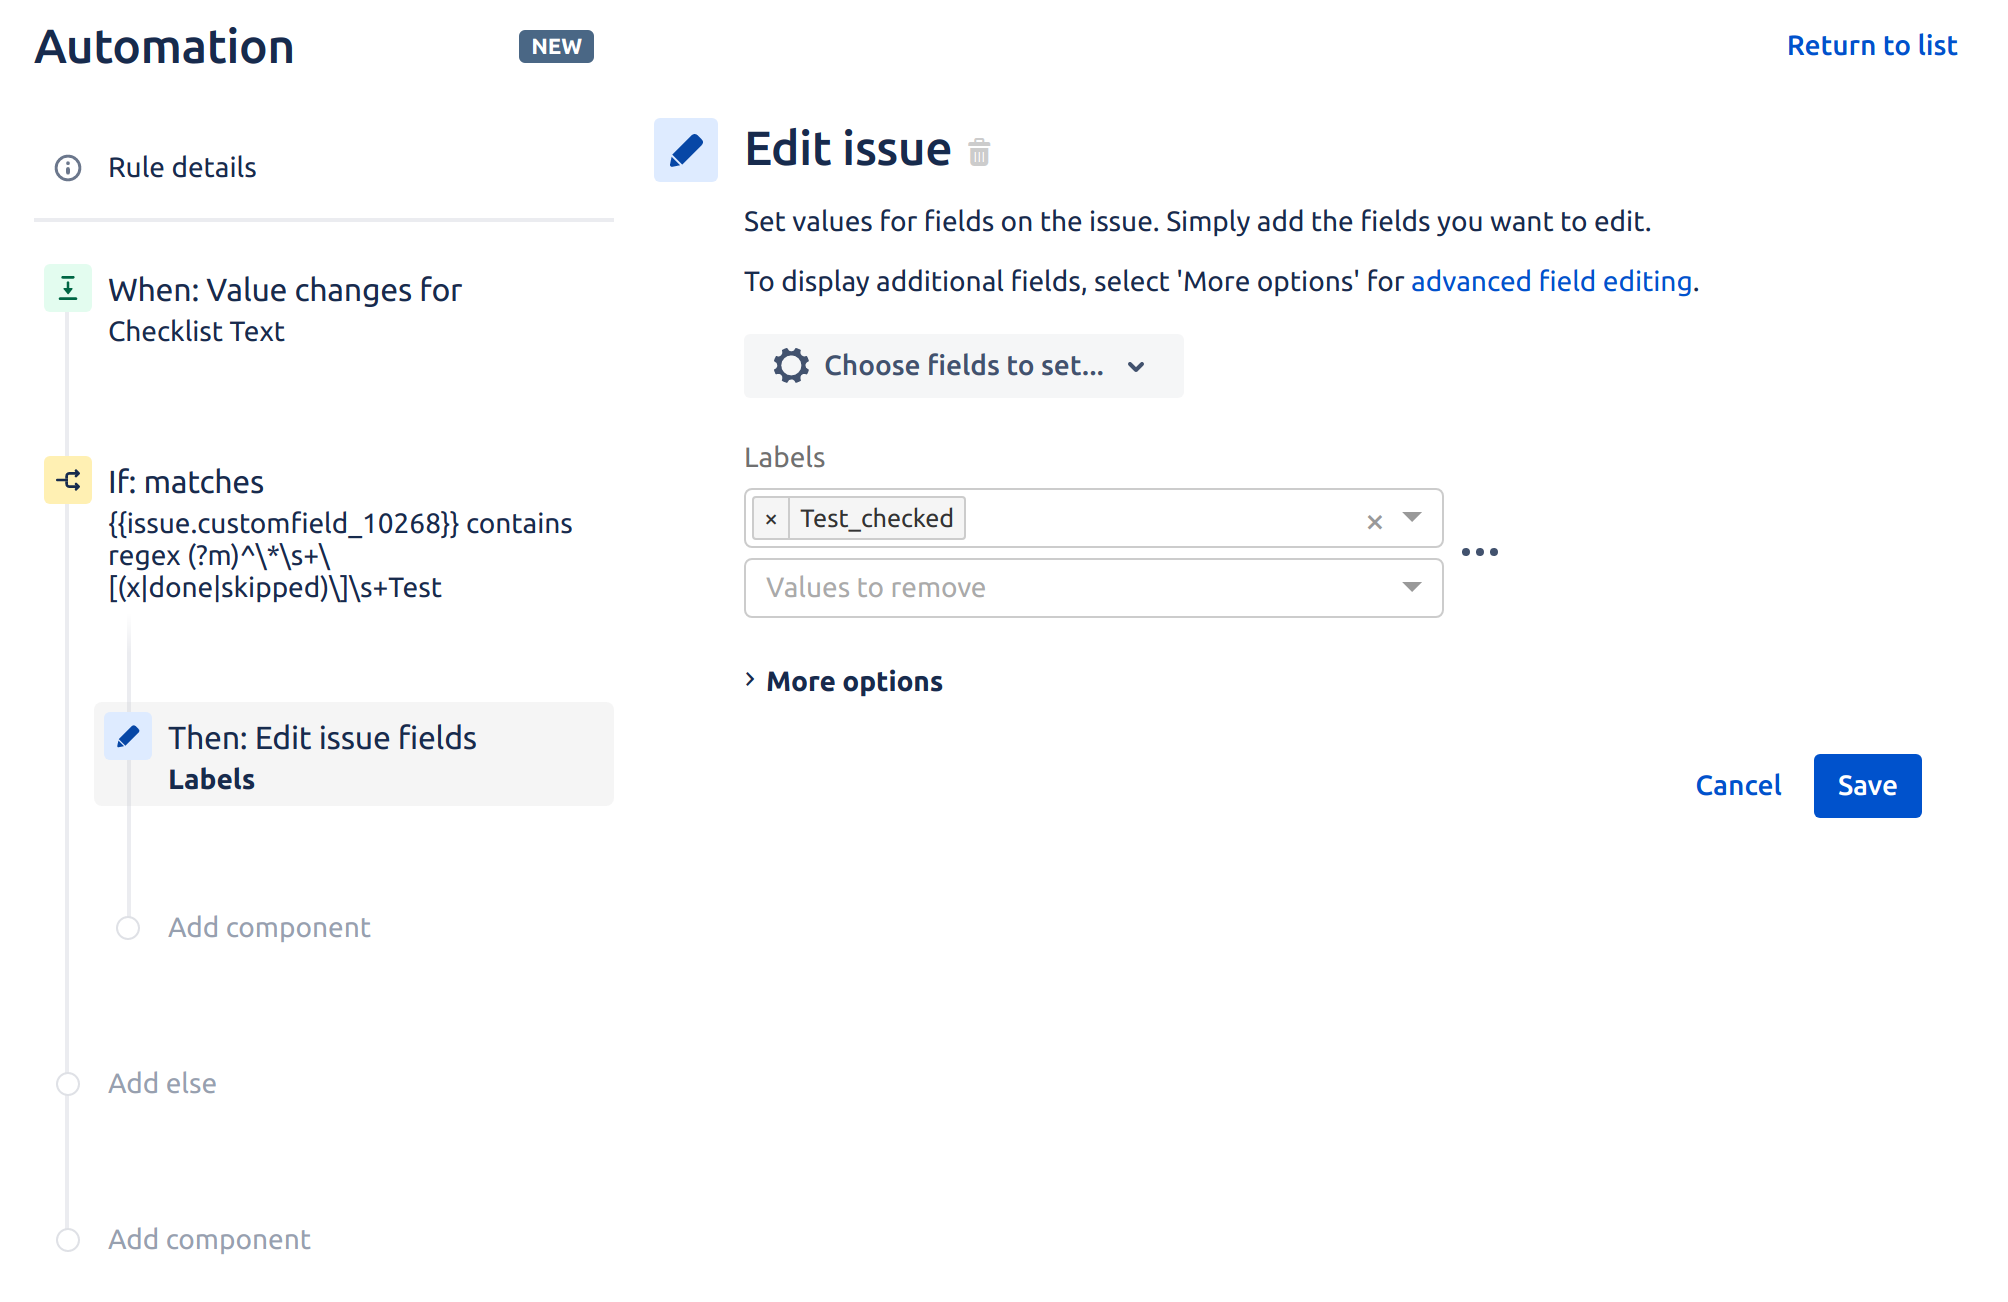
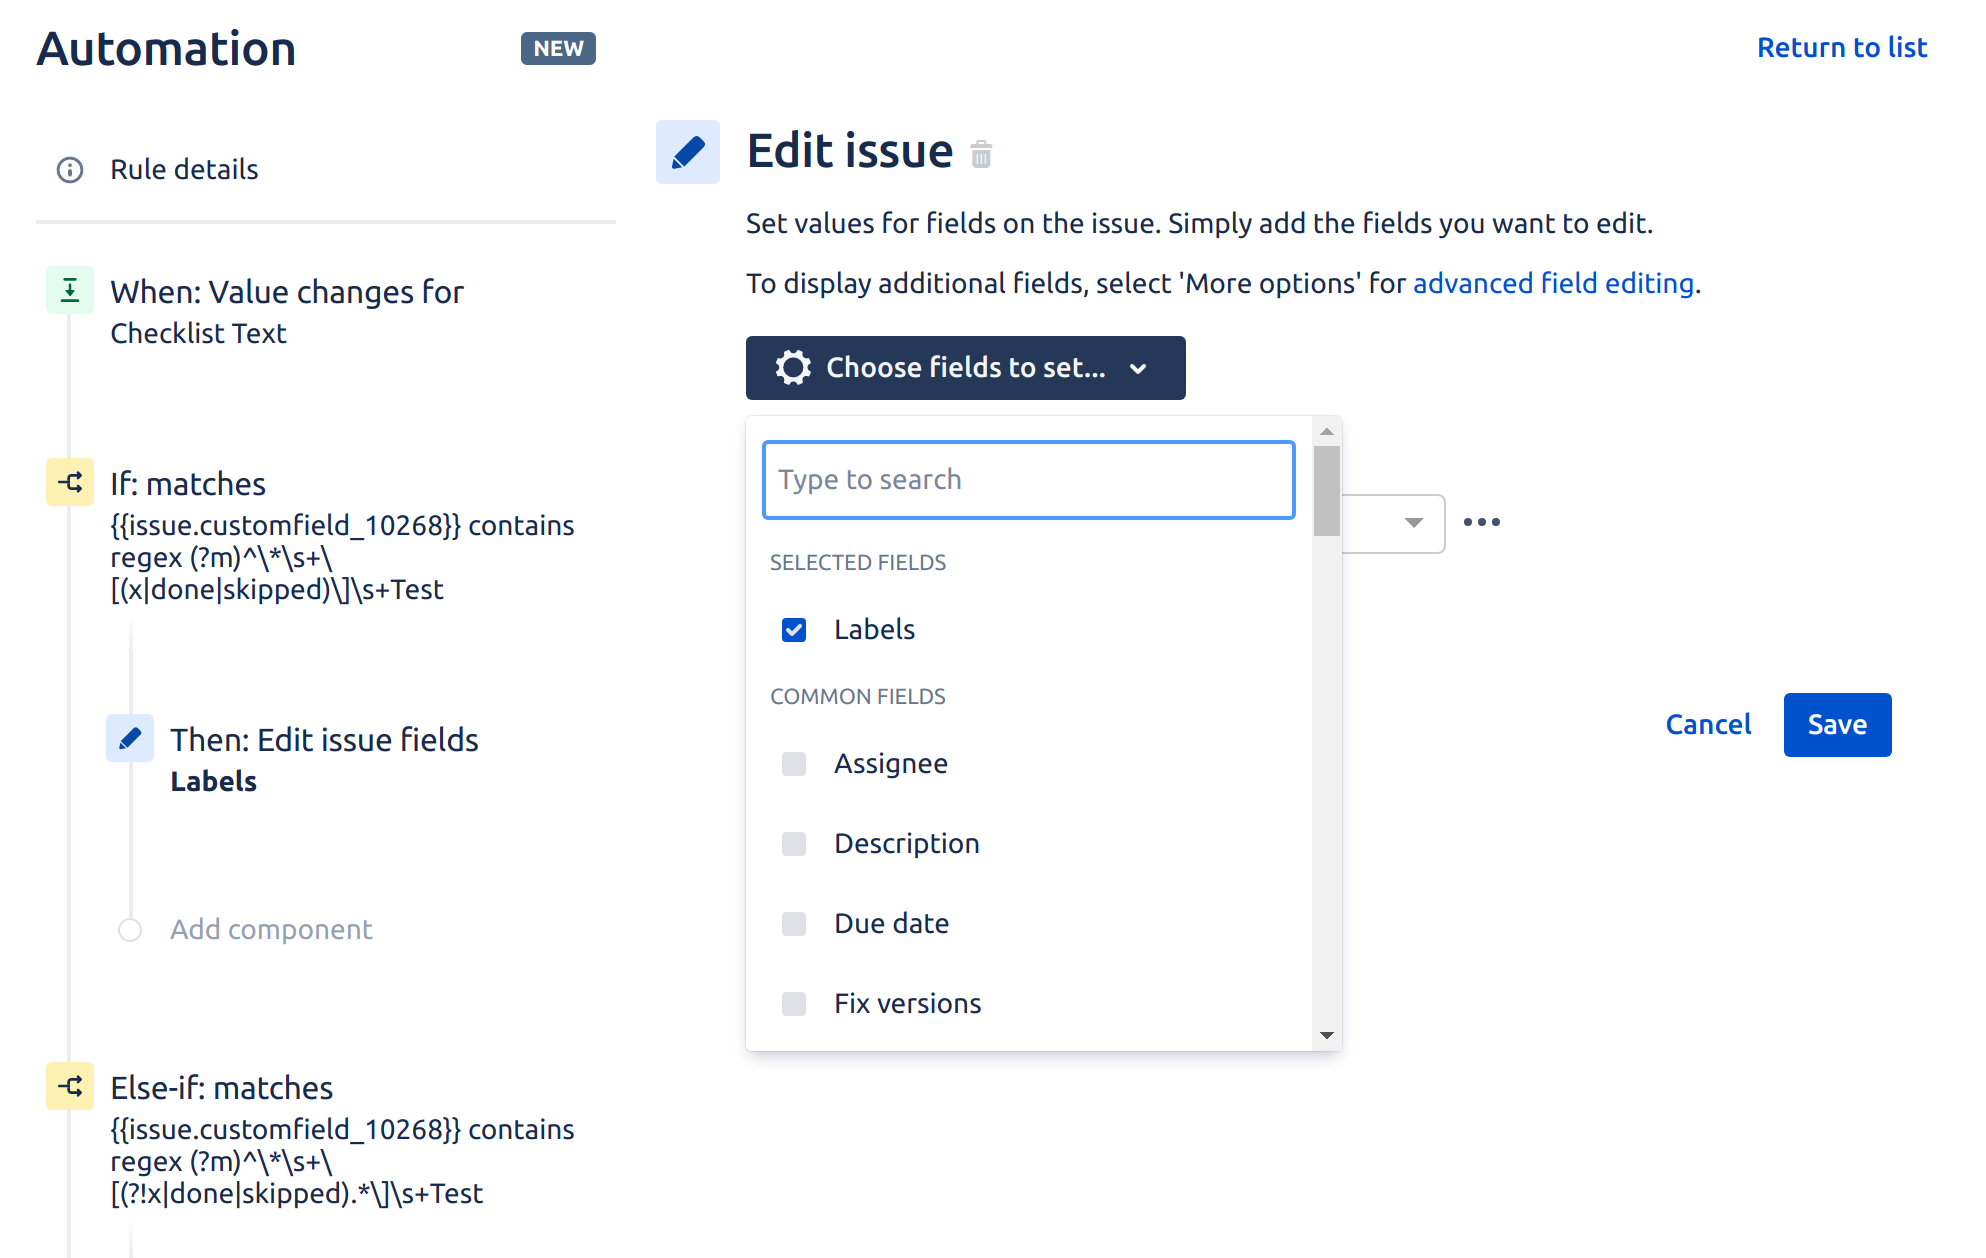
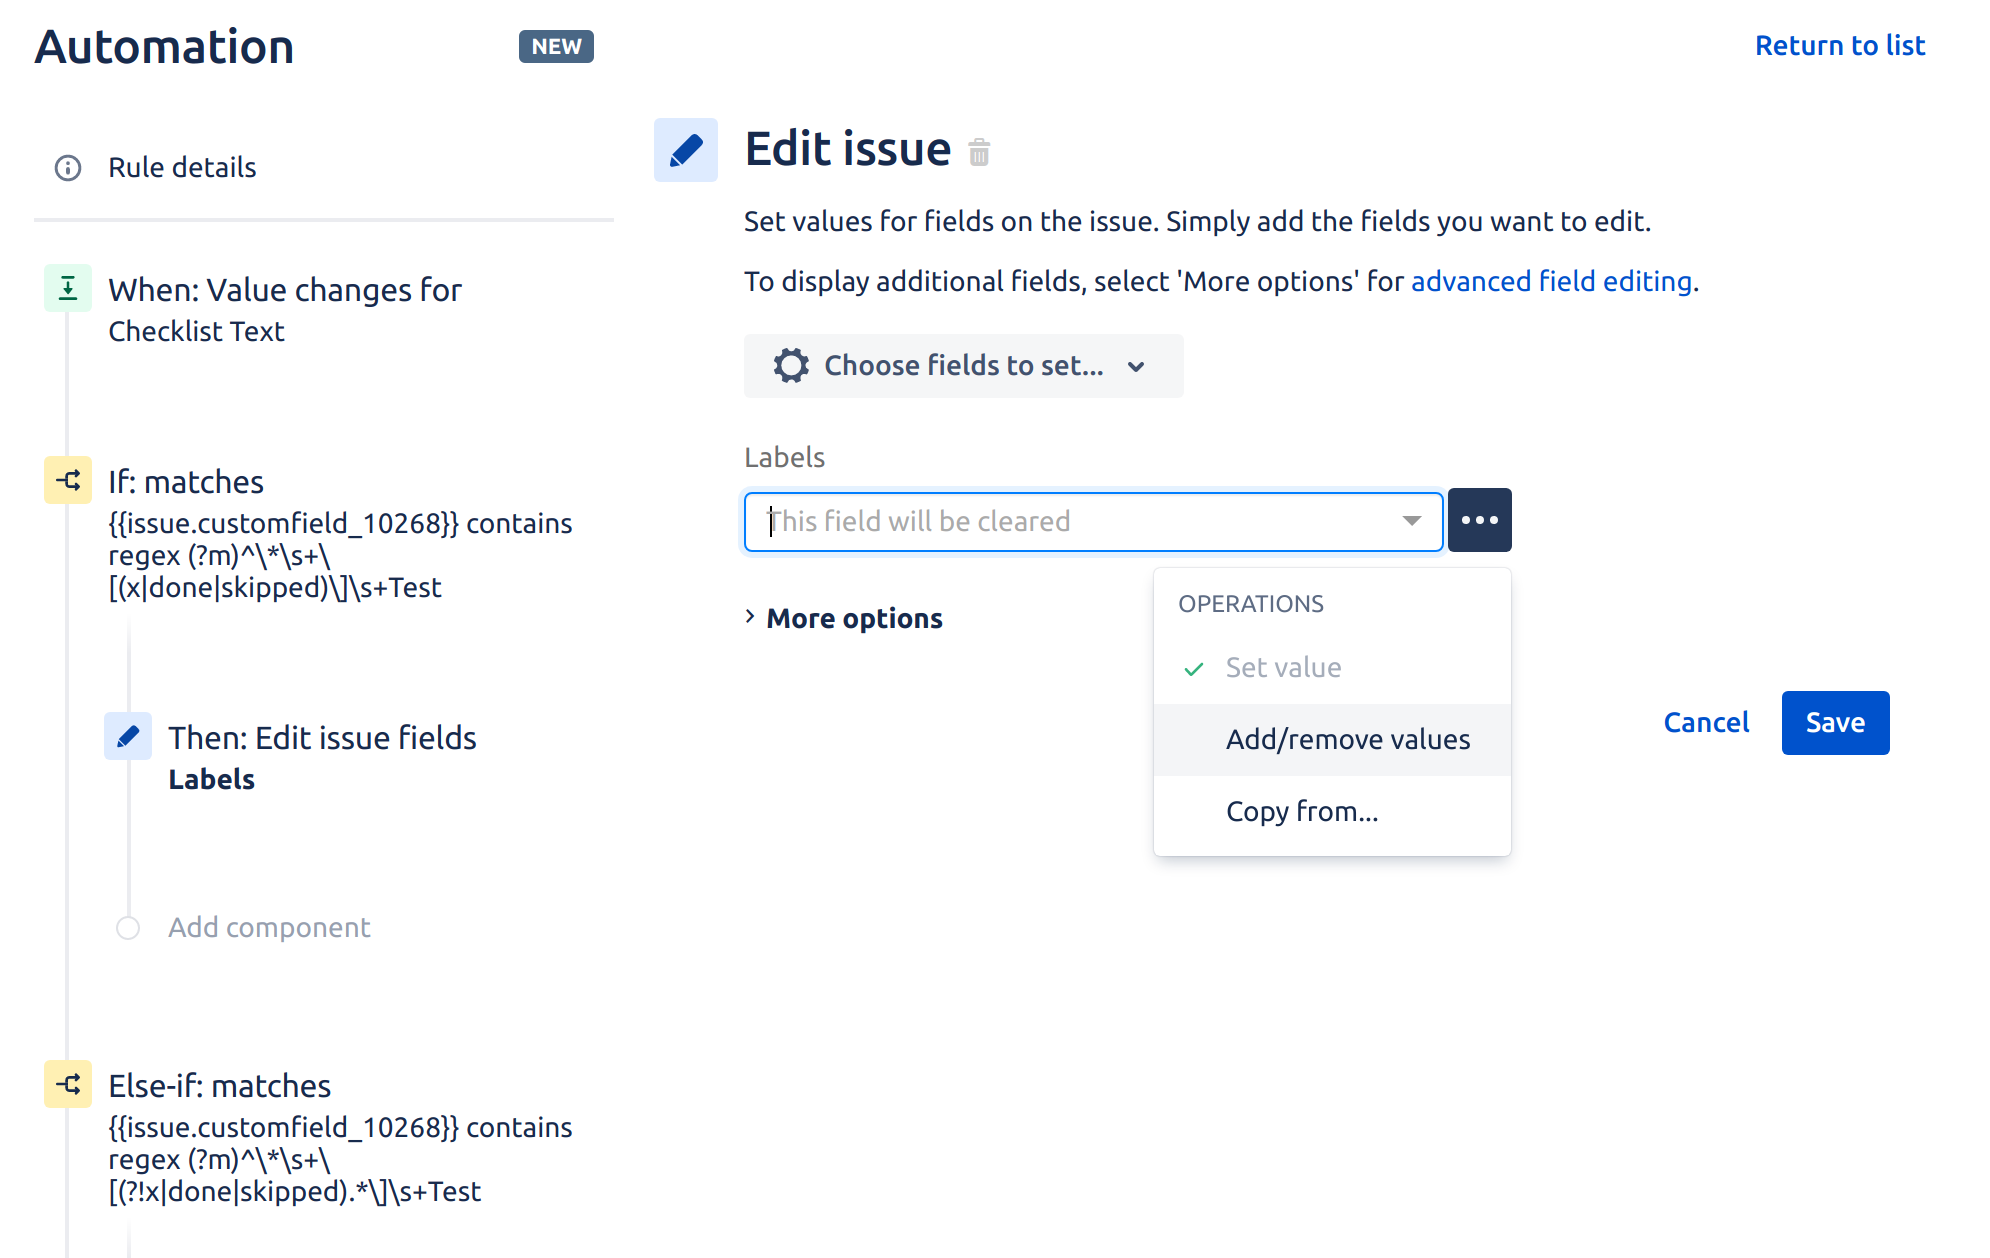
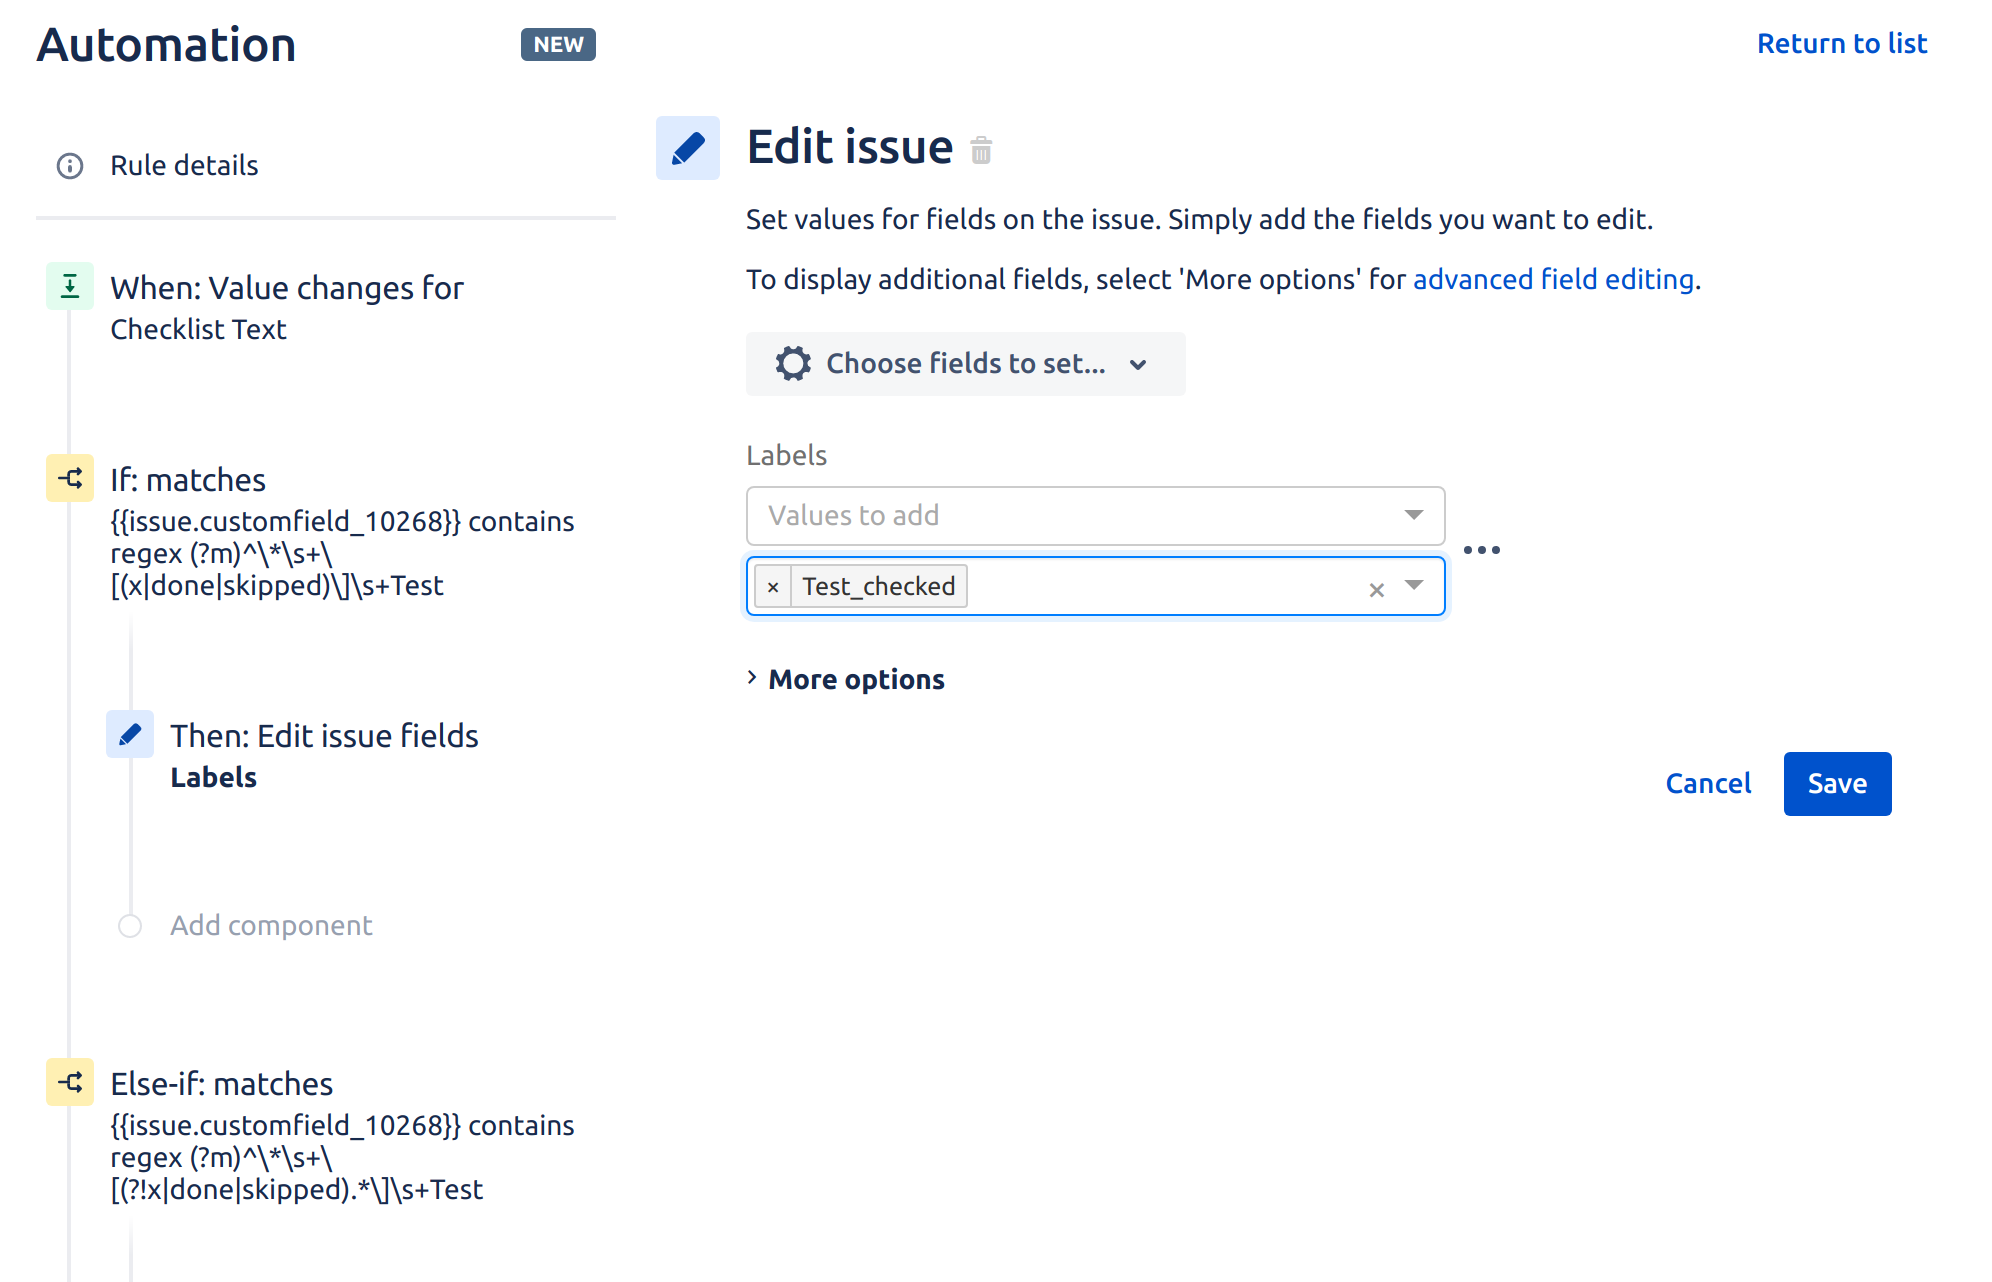
- On the Edit issue page select Label field from the dropdown, change form option to Add/remove values and provide a label that you want to add to an issue:
Press Save when ready. - On the Add component page select Add else option:
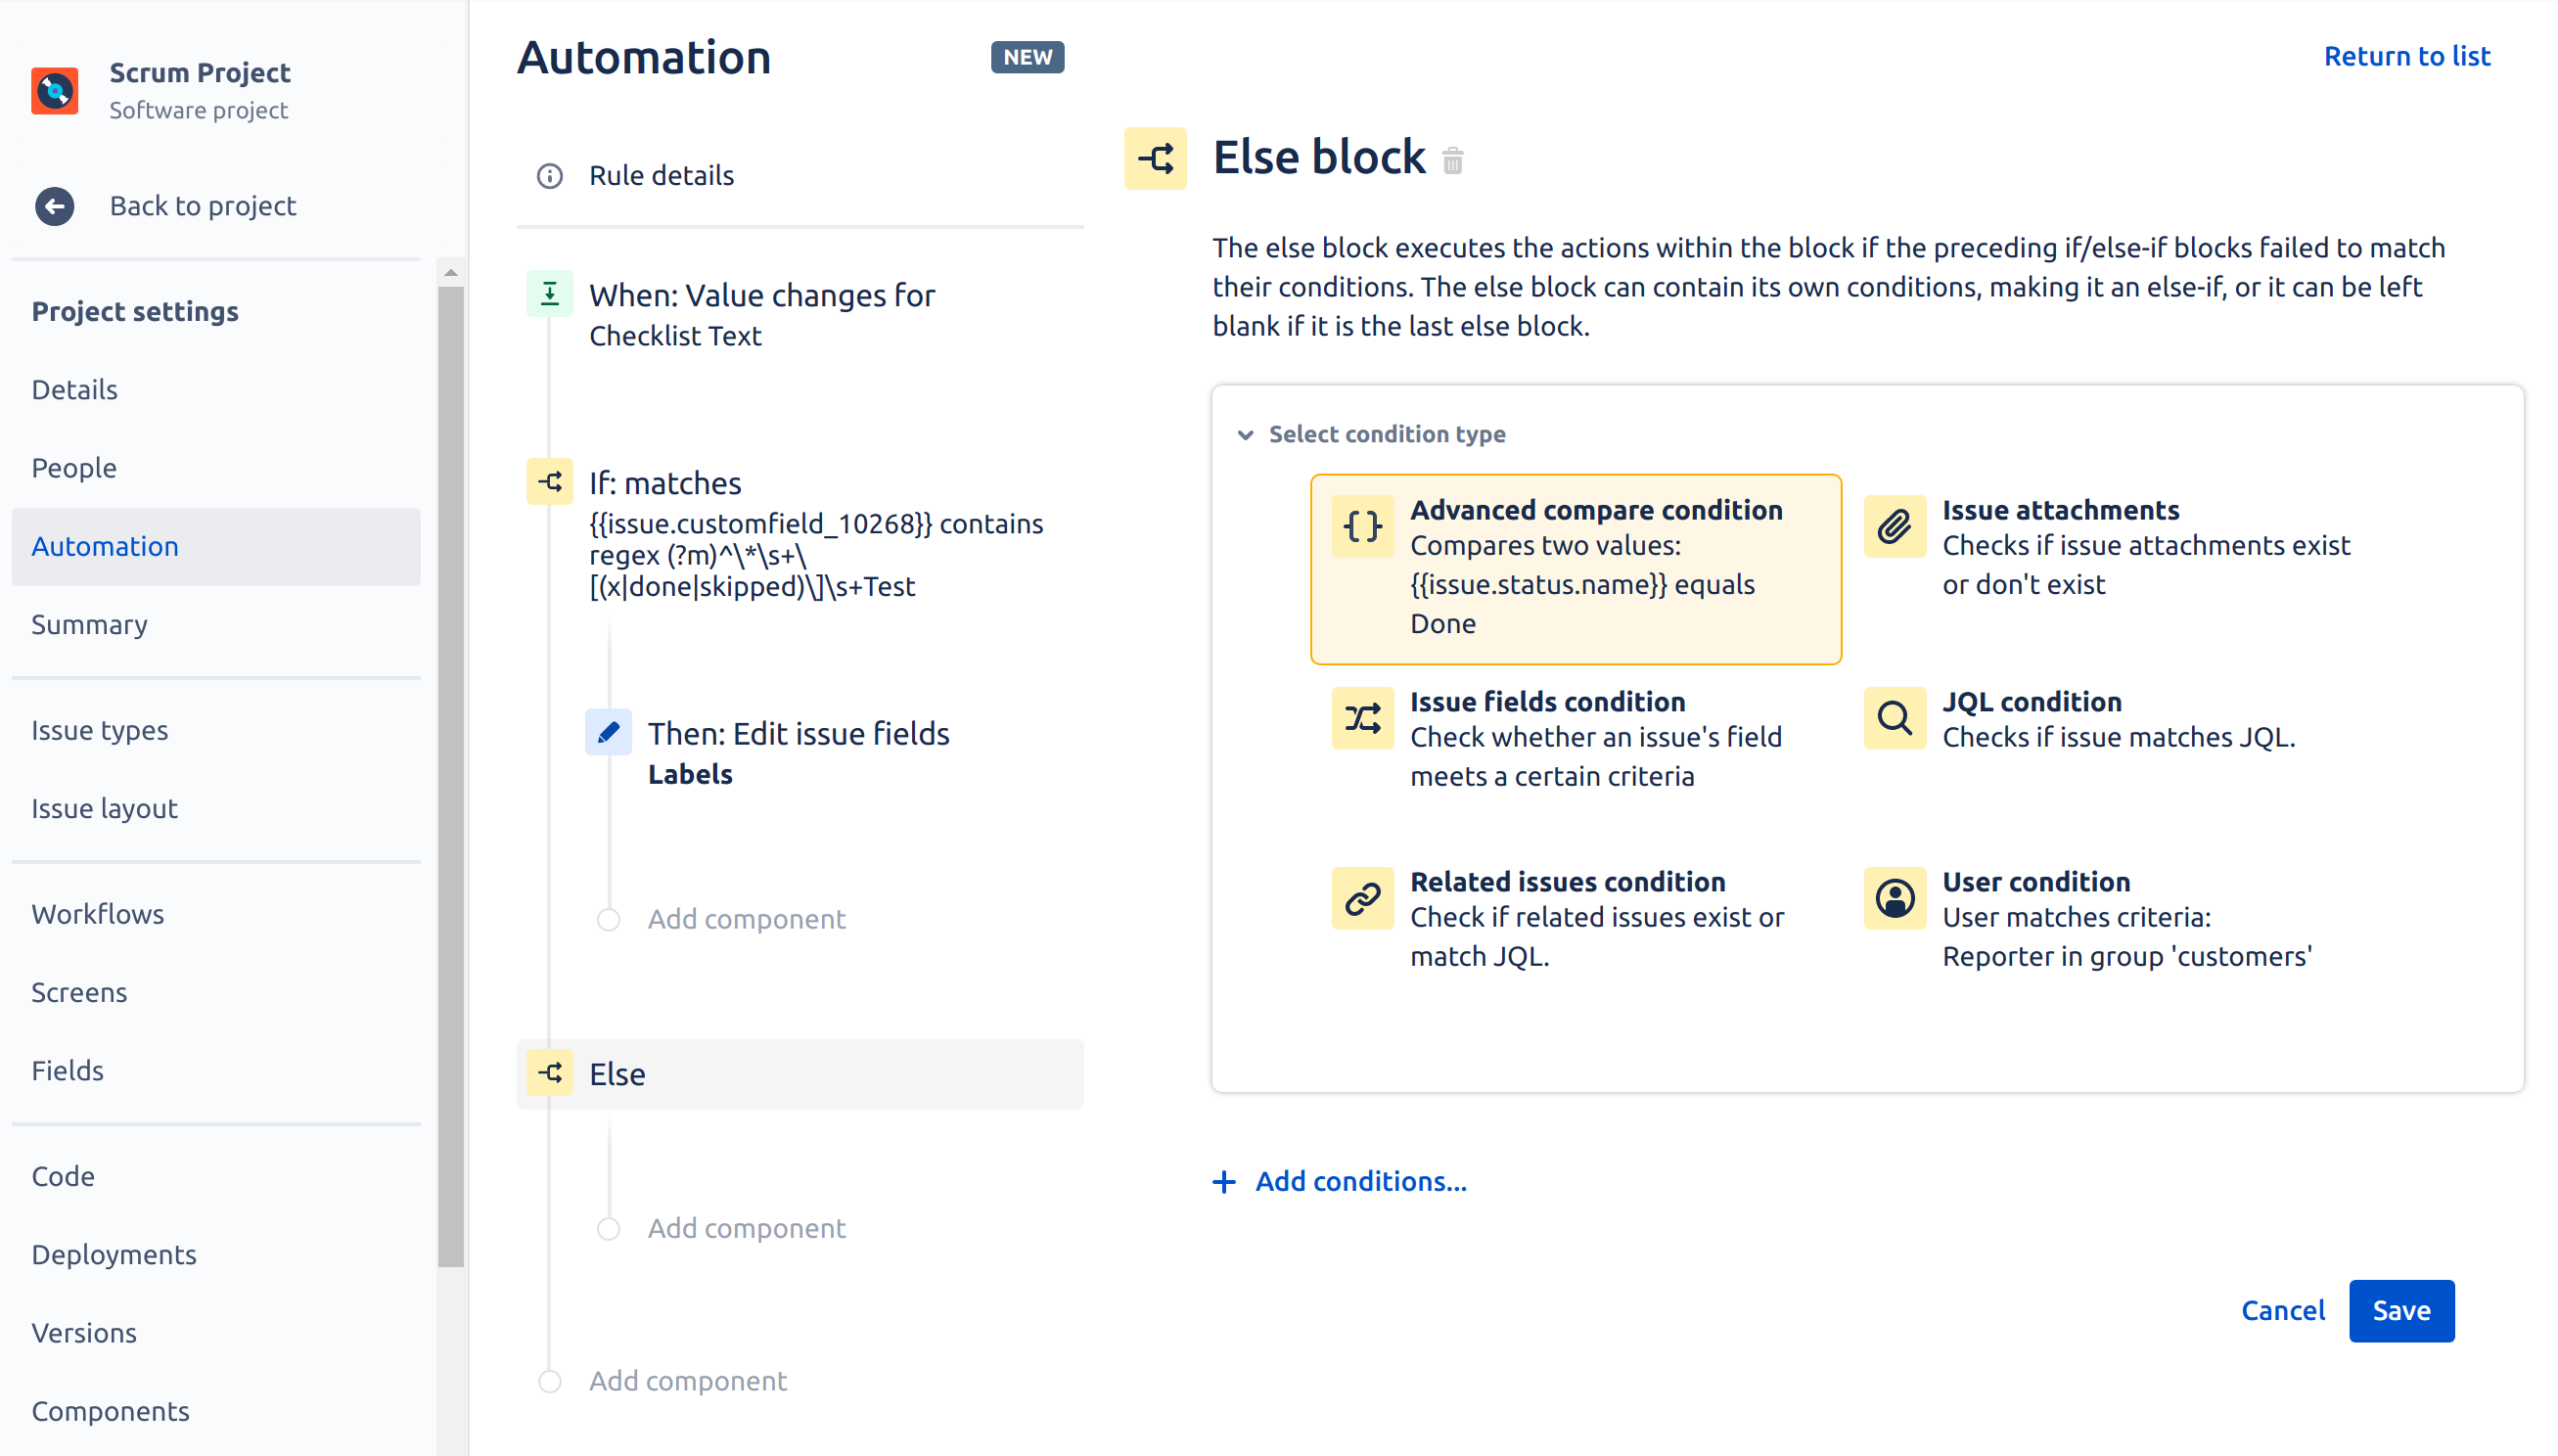
- On the Else block page press Add conditions... link and next select Advanced compare condition:
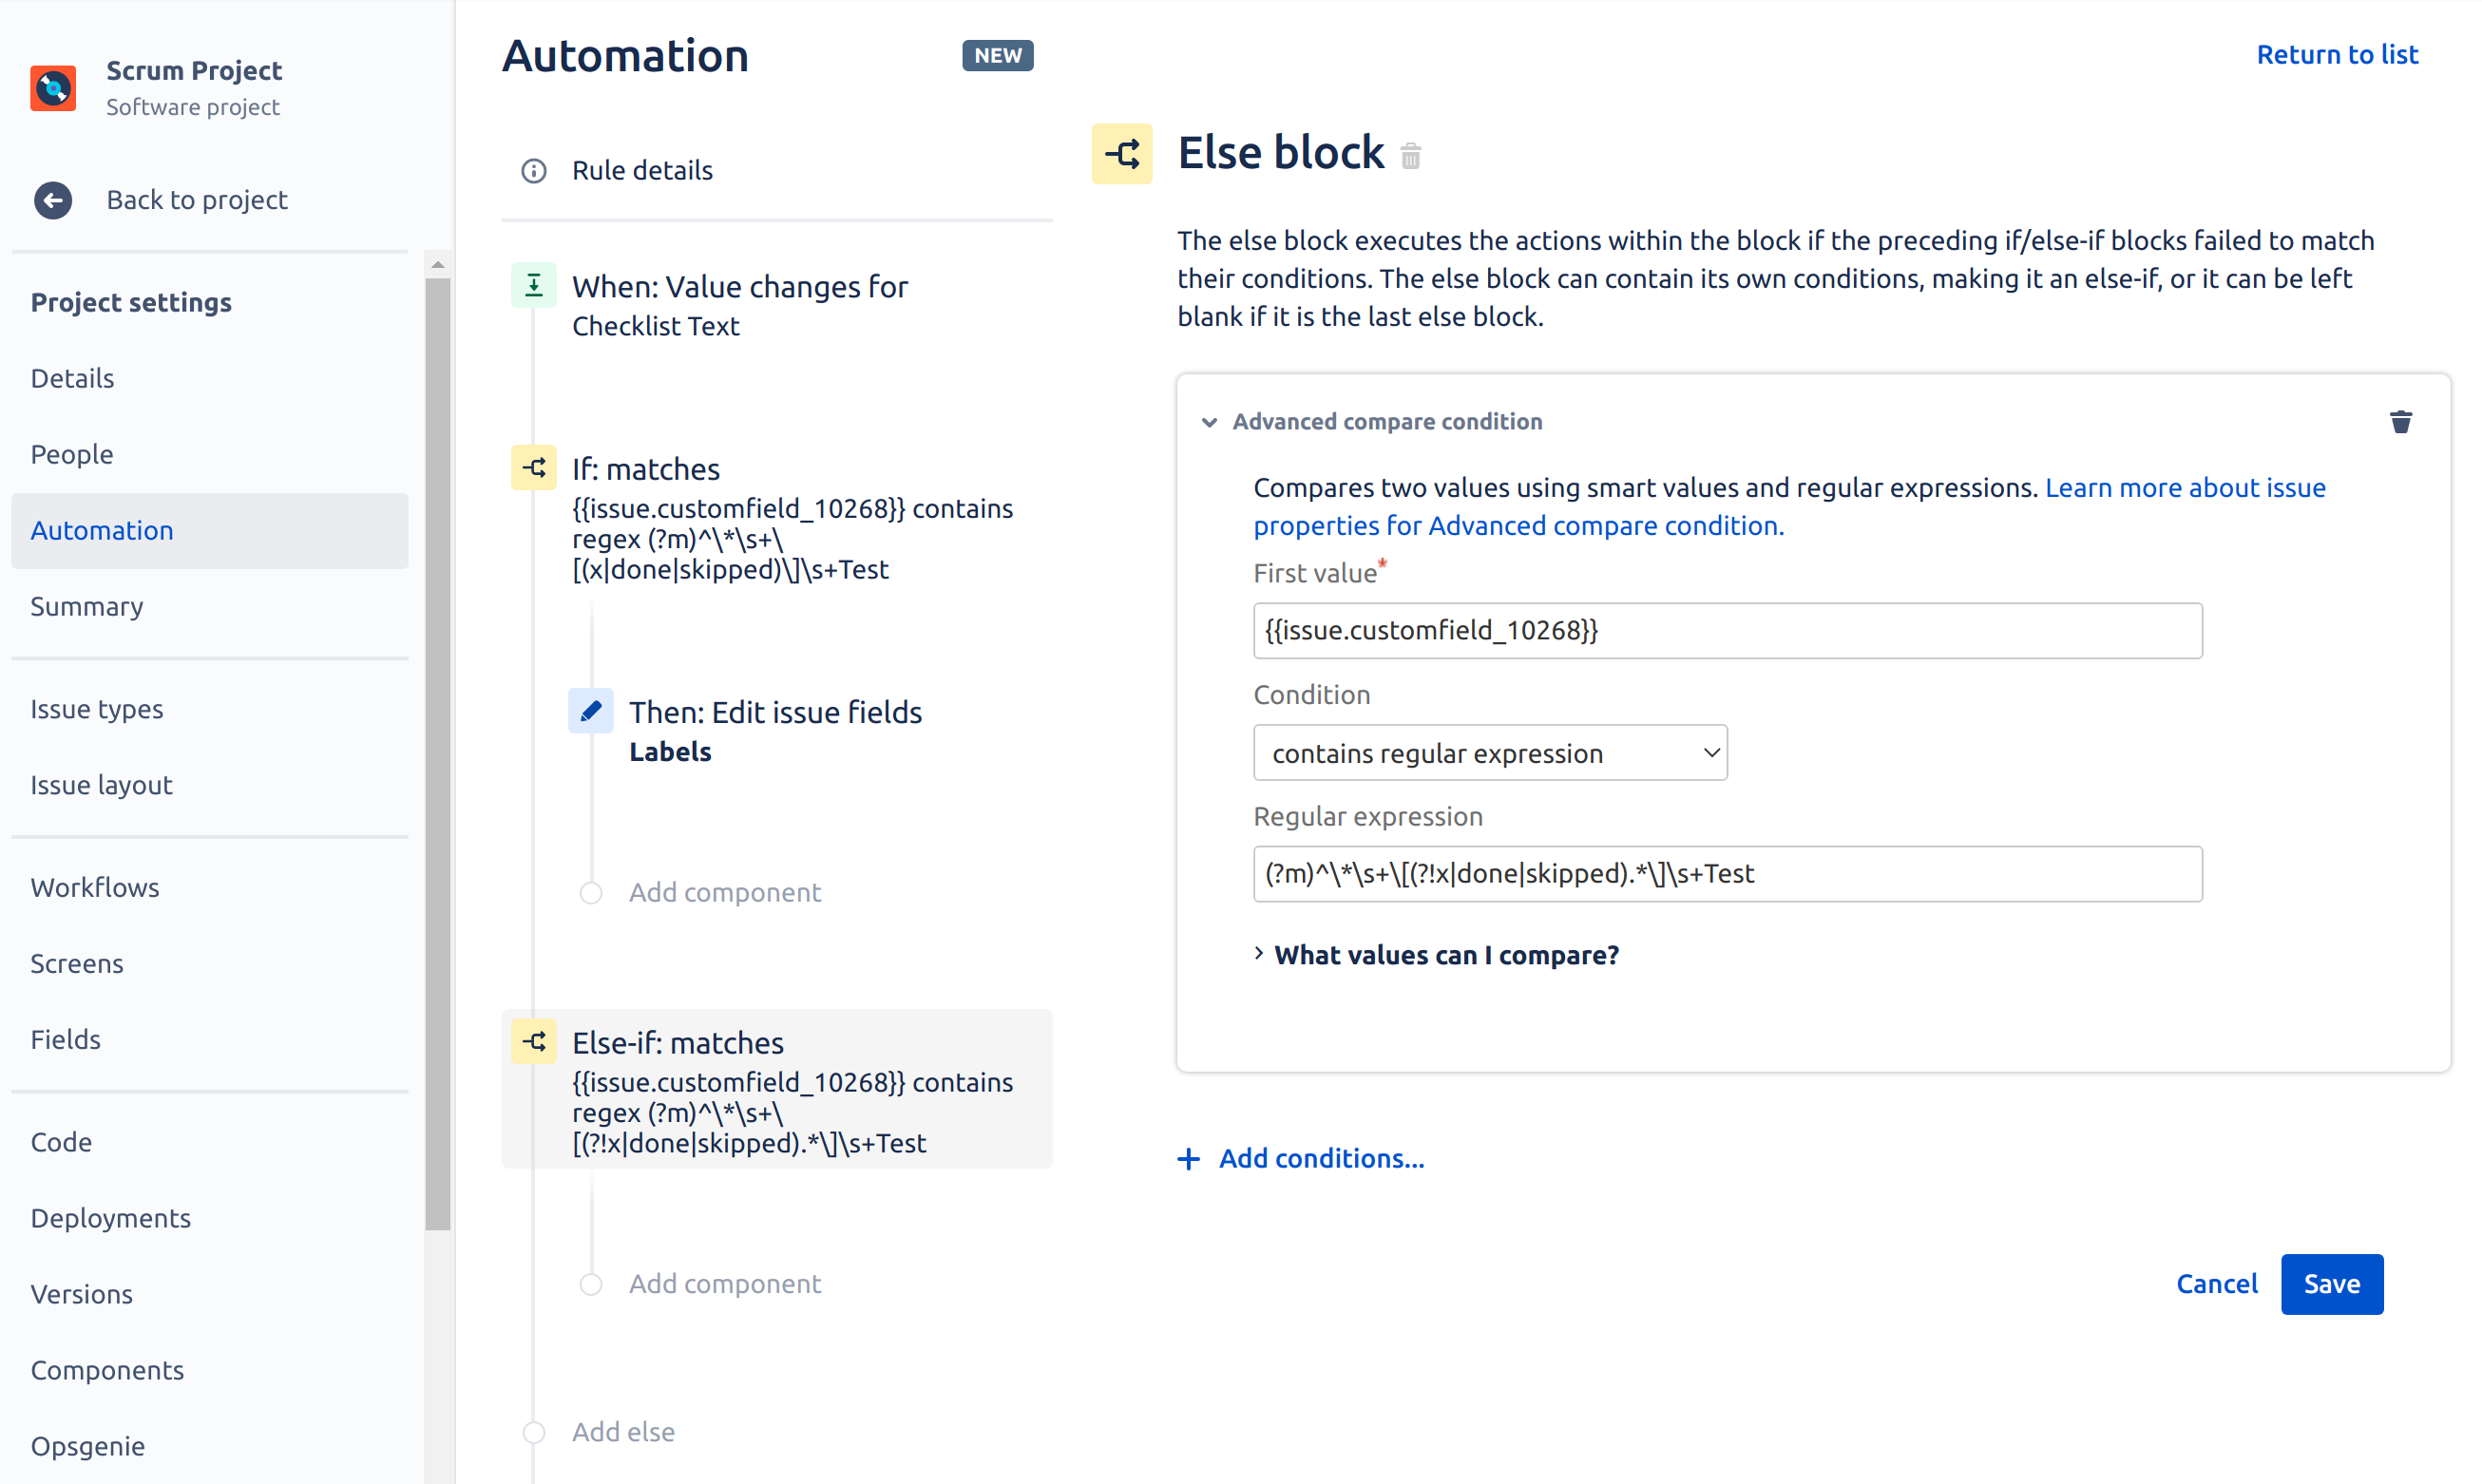
- On the next Else block page enter following details in the form:
{{issue.customfield_10268}}- contains regular expression
(?m)^\*\s+\[(?!x|done|skipped).*\]\s+Test
Where:
(1) customfield_10268 is an ID of Checklist Text custom field. Read how to find custom field ID.
(2) Test is a text/summary of checklist item that we want to test for unchecked status.
Please note that the regular expression from point (c) differs from the one in (7c)
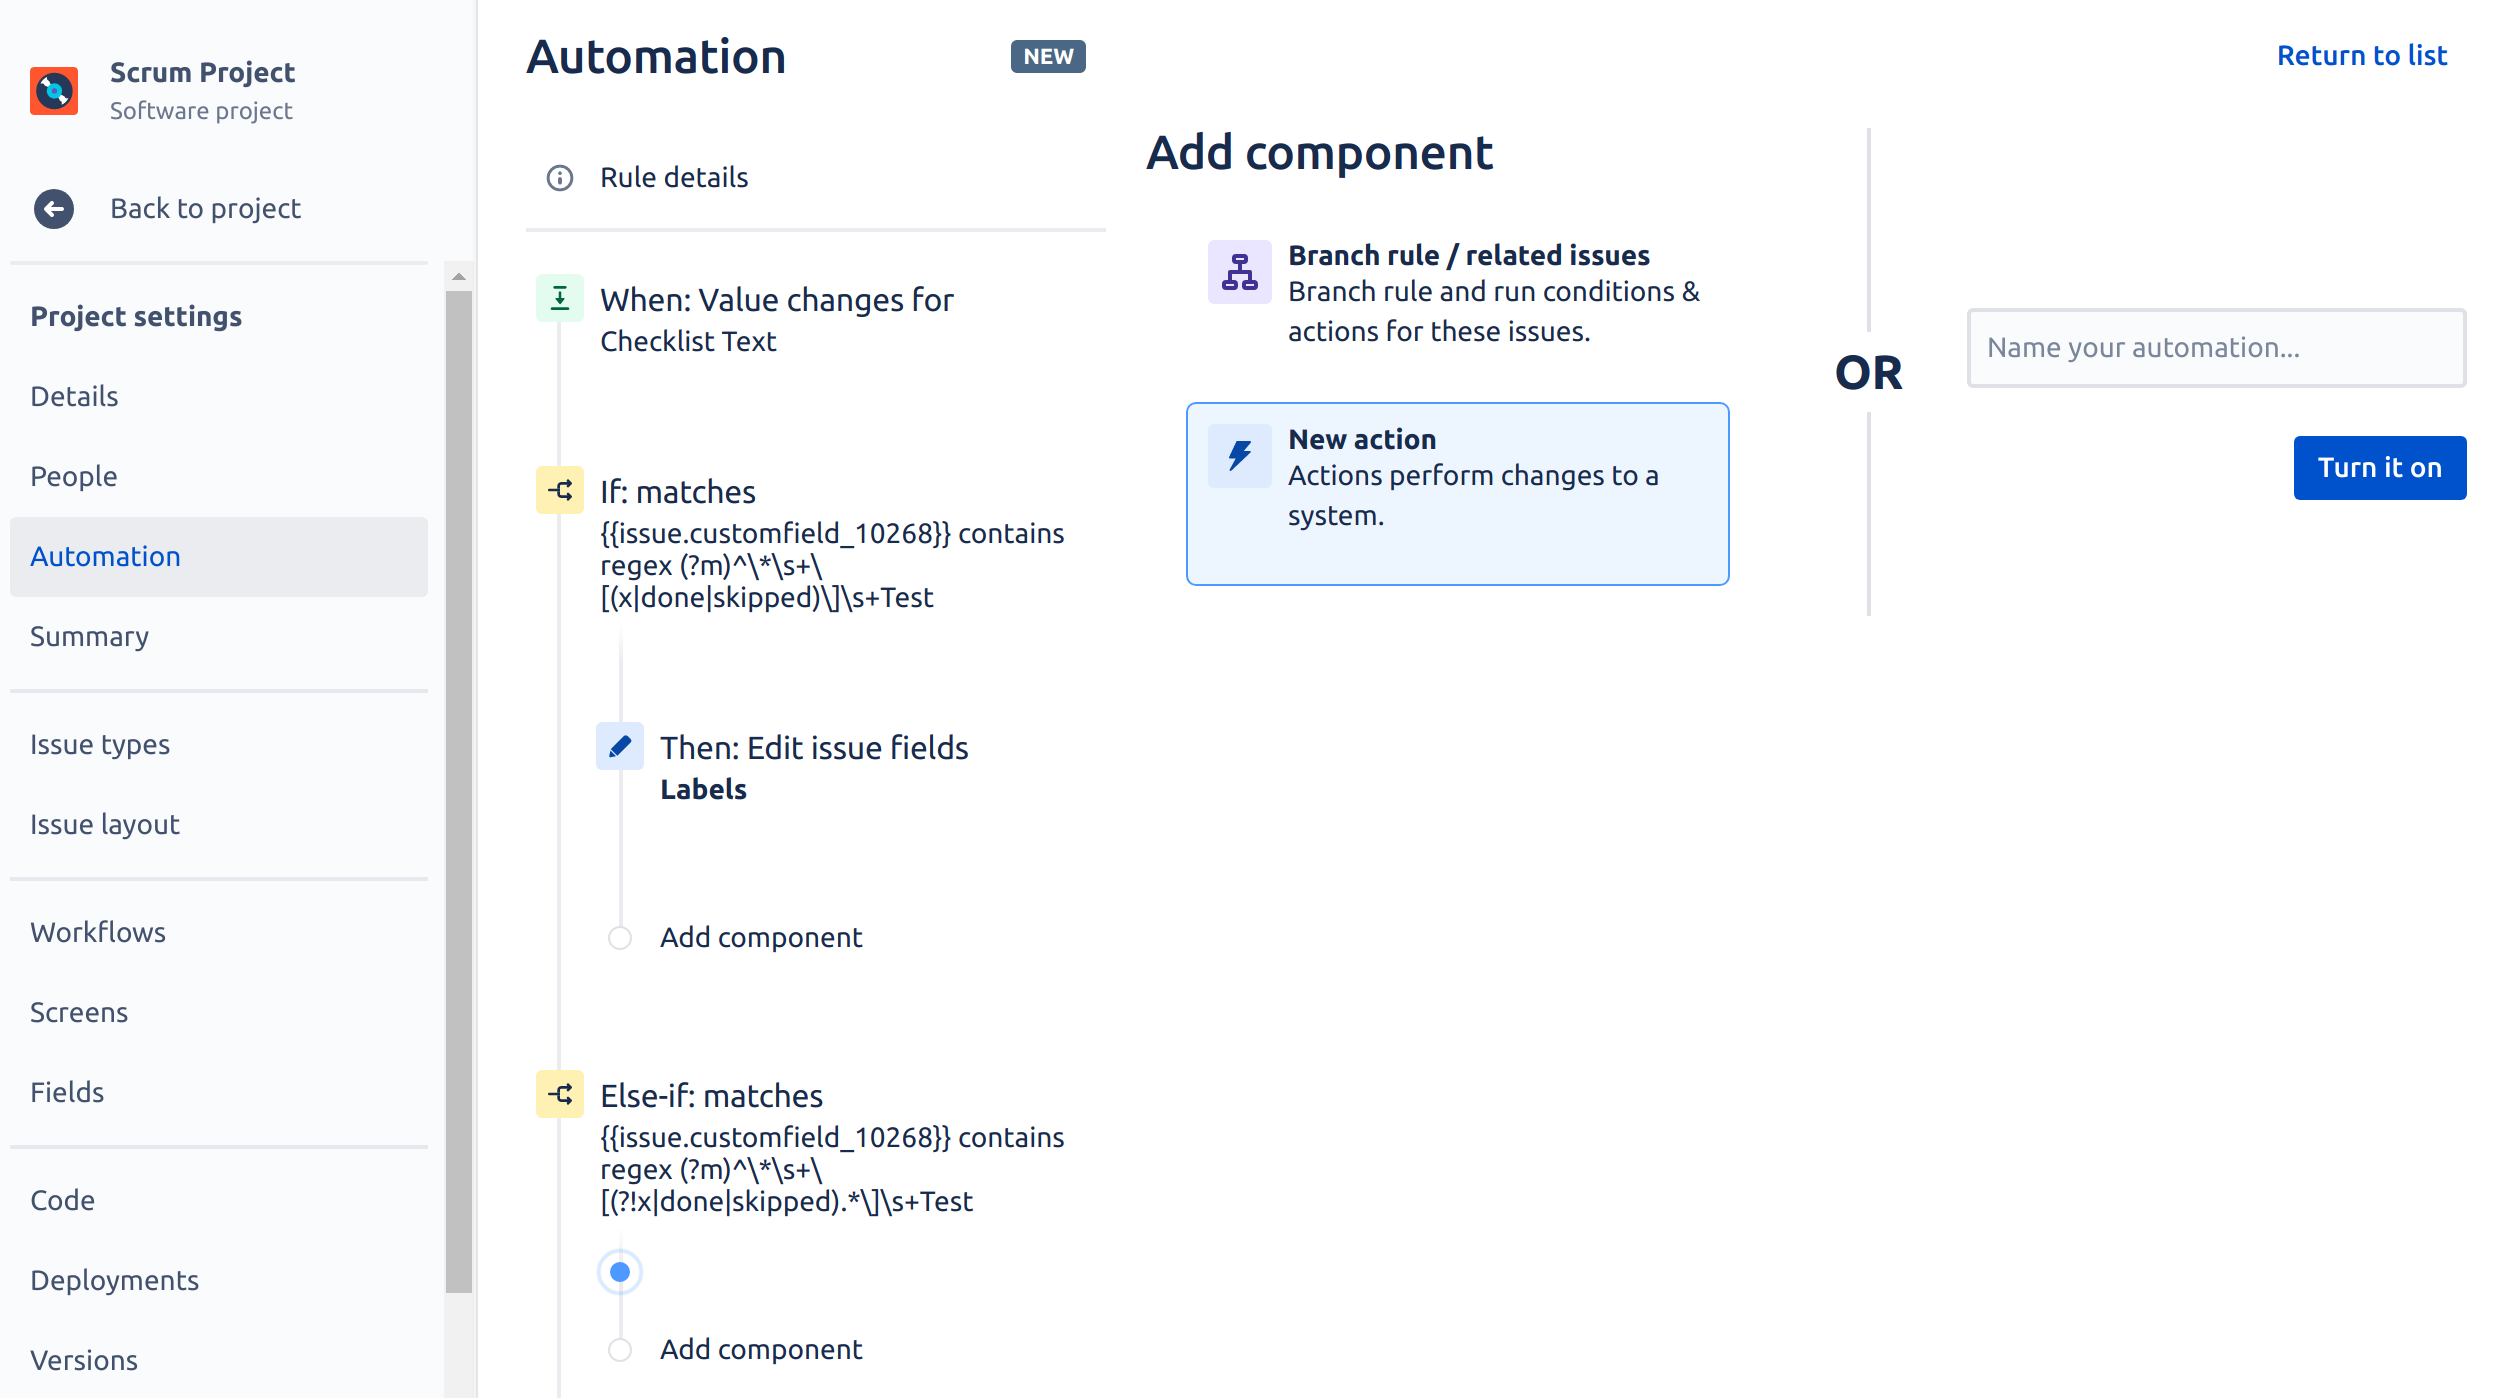
Press Save when finished. - On the New component page select New action option:
- On the New action page select Edit issue option:
- On the Edit issue page select Label field from the dropdown, change form option to Add/remove values and provide a label that you want to remove from an issue:
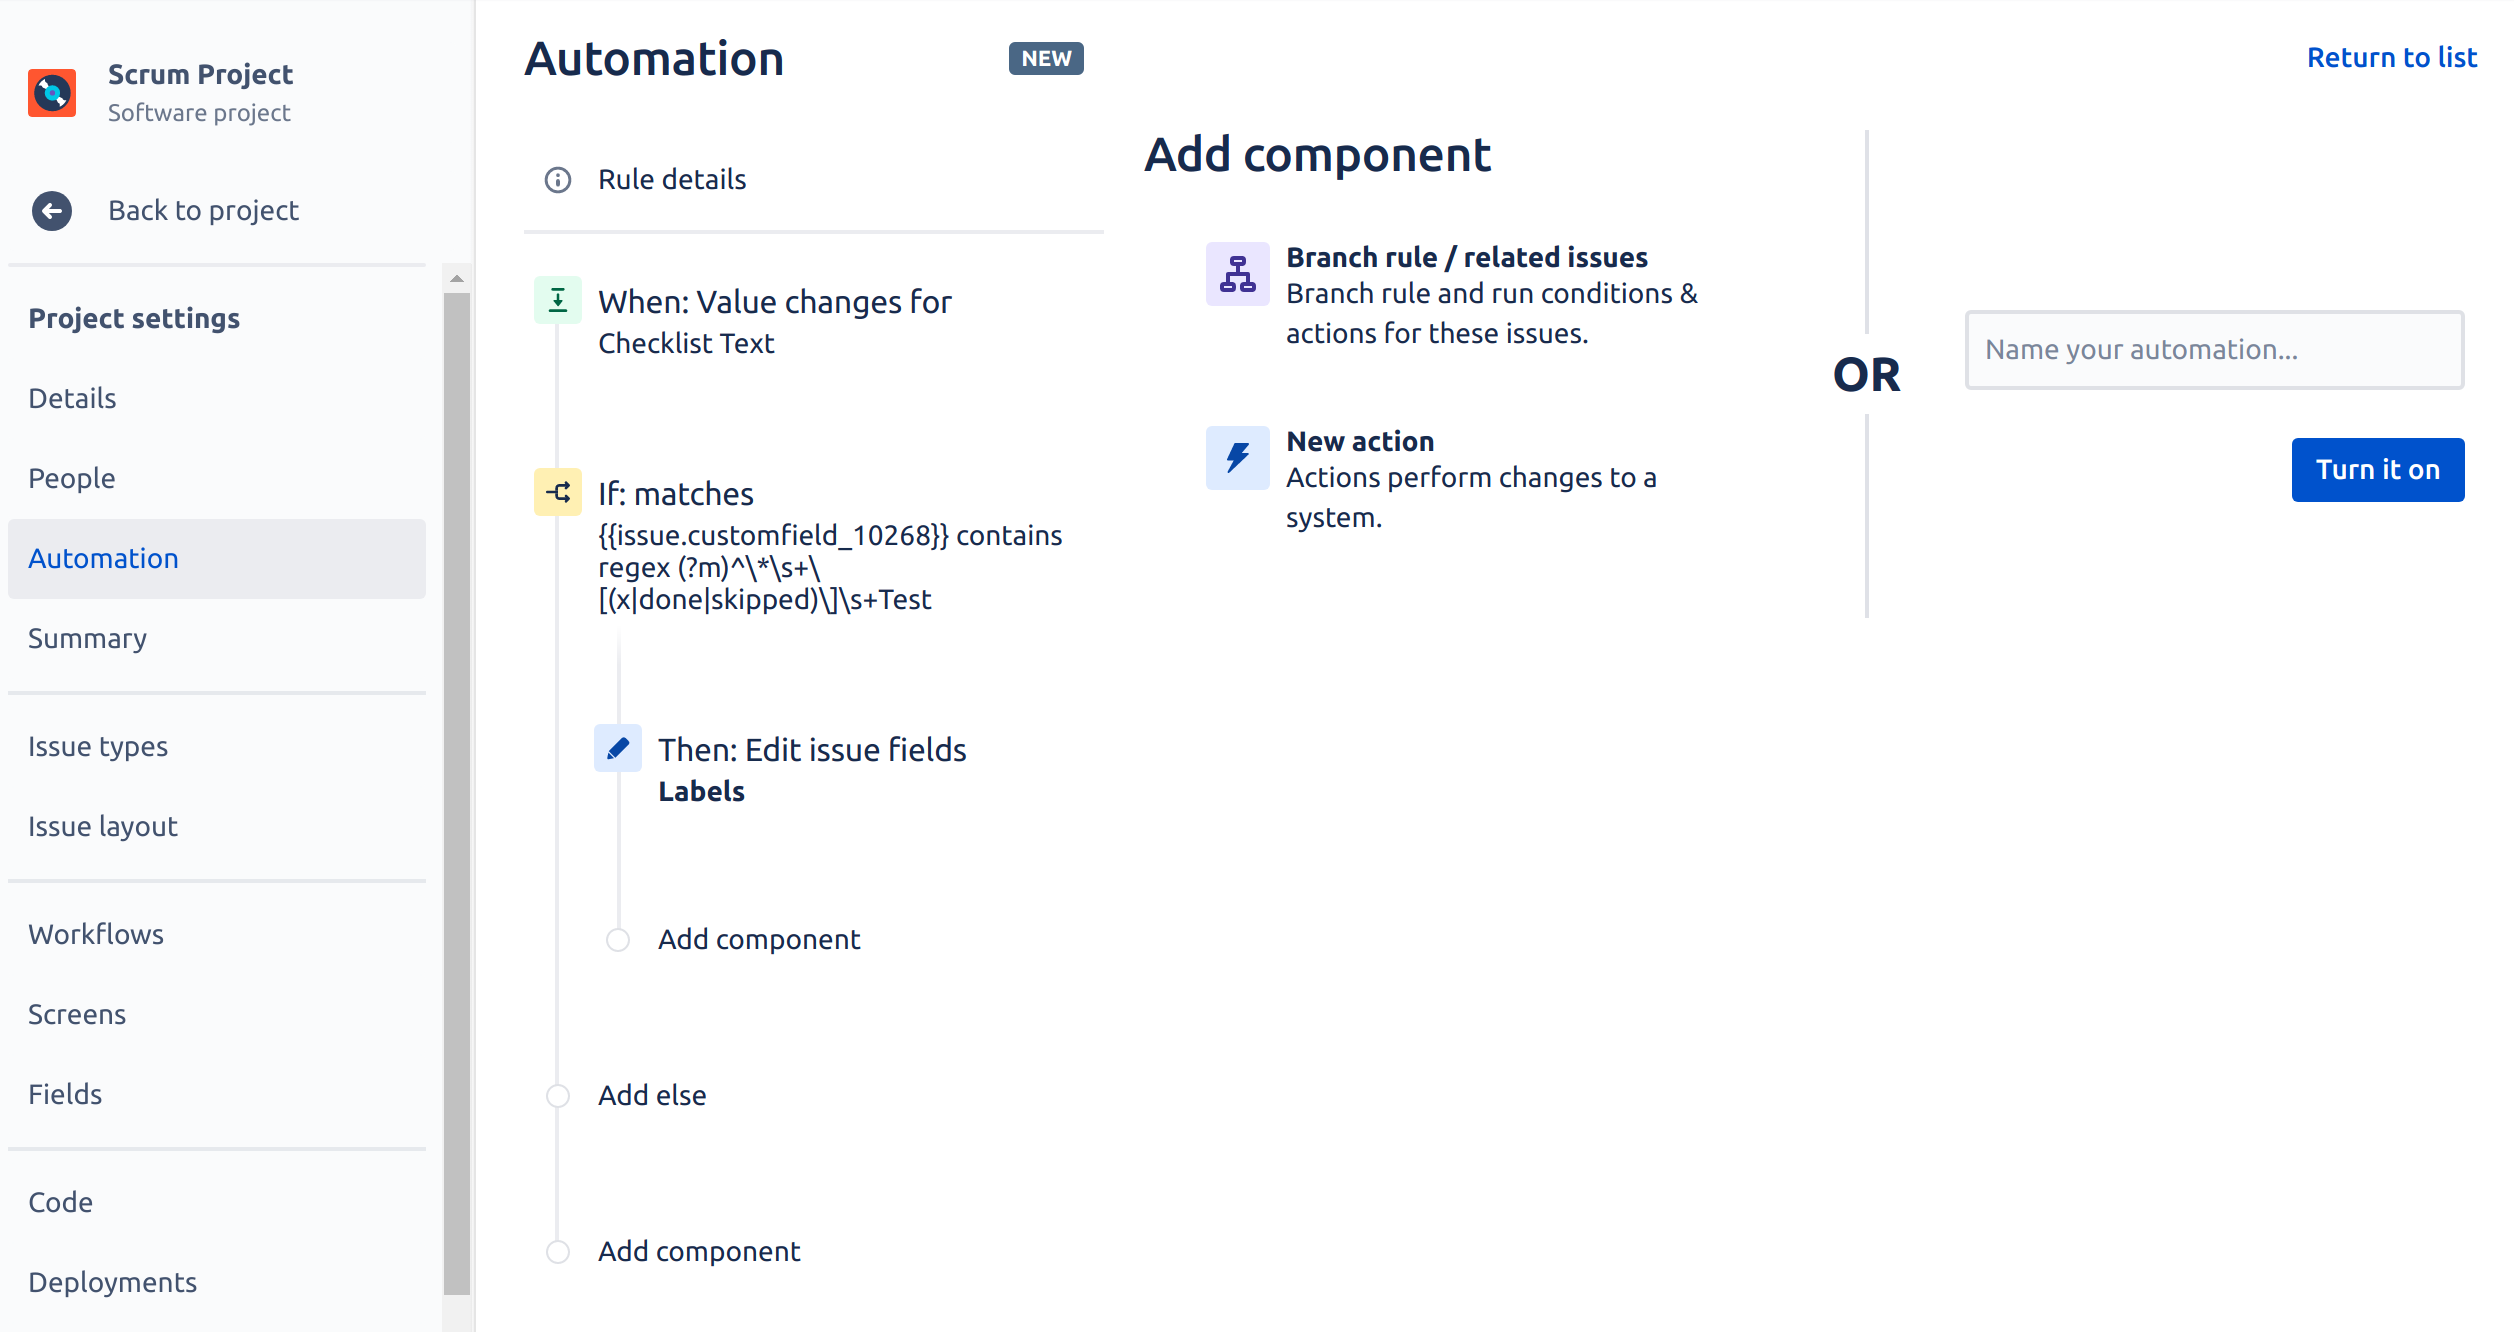
Press Save when ready. - The rule configuration is complete. Provide a name for the rule and press Turn it on button:
- Test the setup and enjoy

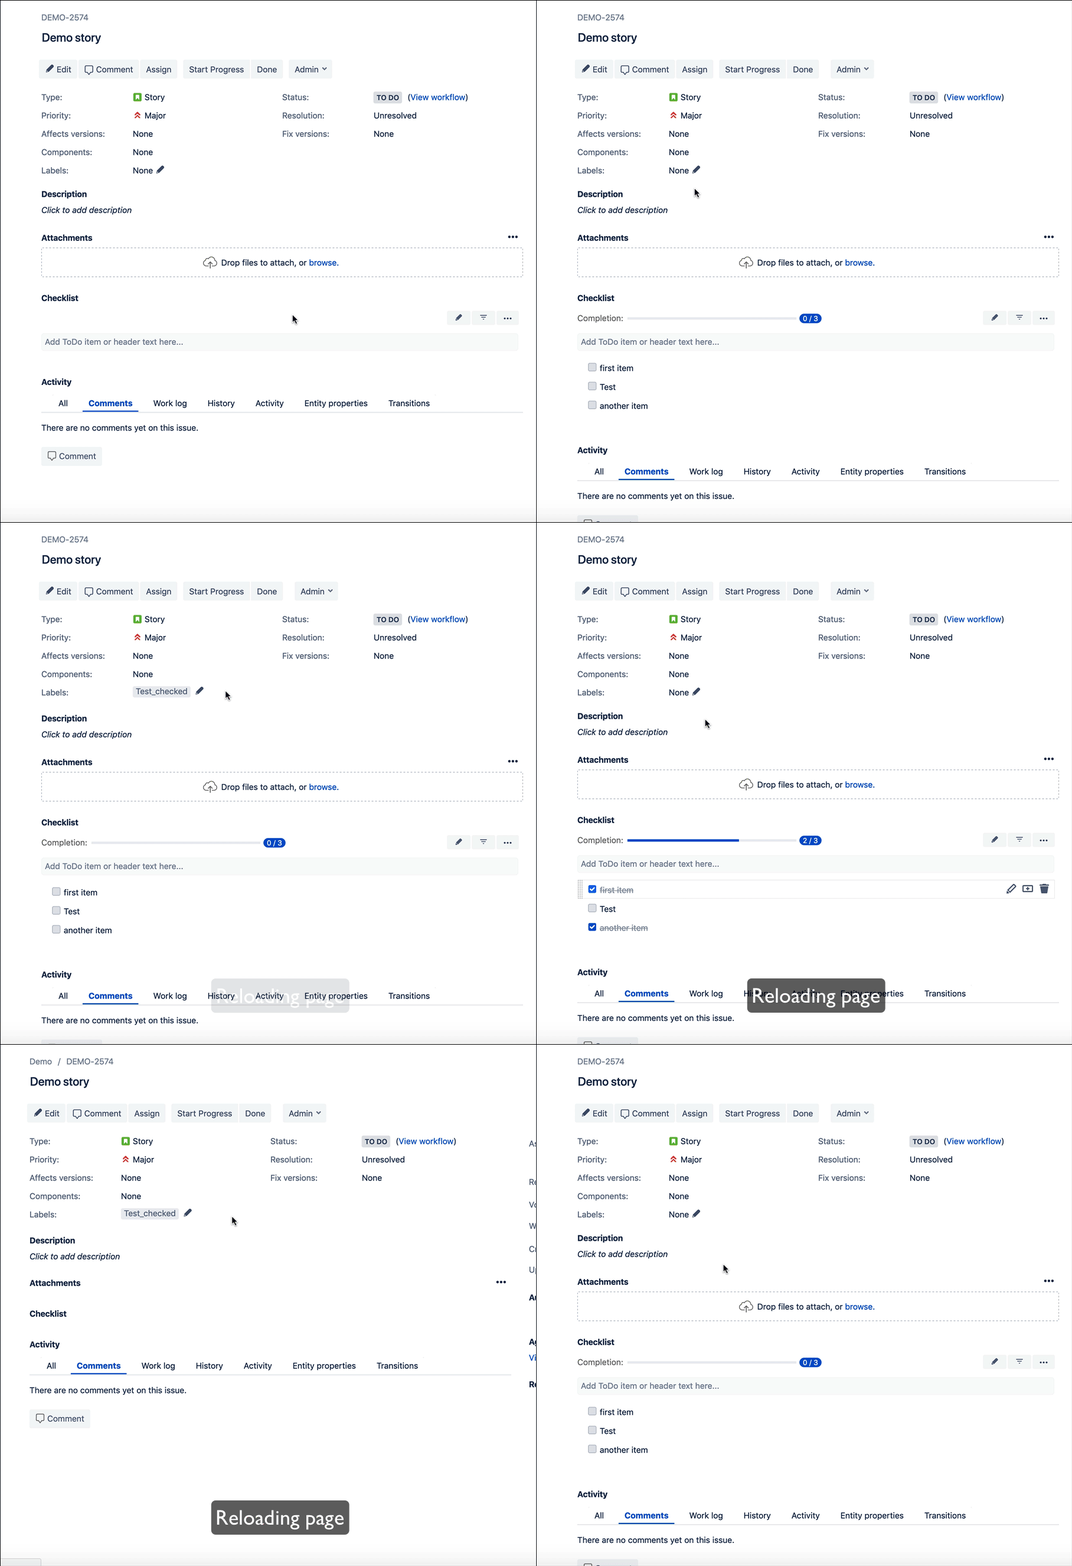
- Go to any issue page, add "Test" item and:
- check the Test item to notice label "Test_checked" added to issue
- uncheck the Test item to notice label "Test_checked" removed from the issue
- check/uncheck other items to notice that label "Text_checked" is not affected
- Go to any issue page, add "Test" item and:
Tip
In point 12 you can skip clicking Add conditions... link and jump directly to point 14. This way label "Test_checked" will be removed not only when Test item becomes unchecked but also when it is deleted.
