Customer View – Checklist items and checklist progress can be made visible to Jira Service Management customers in Issue Checklist Pro. (Not available in Issue Checklist Free).
Agent view – Jira Service Management agents can see and work with the checklist in the same way as in other types of Jira projects (checklist must be enabled in the project).
Enable Checklists on the Portal
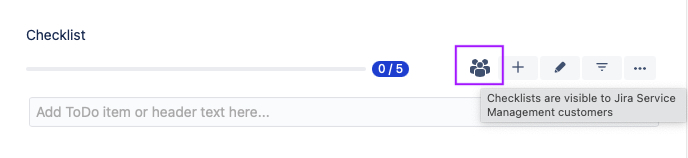
If Issue Checklist for Jira is enabled in a Service Management project, agents will be able to see and work with the checklist in the same way as in other types of Jira projects. With Issue Checklist for Jira PRO you can display checklist progress, as well as a read-only copy of the checklist on the customer portal. To show checklist progress on the JSM portal, navigate to Project settings > Issue Checklist Pro. Use the toggle to enable Checklist Progress on the JSM portal. Once enabled, the progress of the checklist will be visible by default to JSM customers. (The checklist progress bar is not visible for an empty checklist.) The checklist menu gives agents the option to override this setting on individual JSM requests. To show checklist progress on the JSM portal, navigate to Project settings > Issue Checklist Pro. Use the toggle to make a read-only copy of the checklist visible on the JSM portal. (The checklist panel is not visible for an empty checklist.) The checklist menu gives agents the option to override this setting on individual JSM requests. Note that when this feature is enabled a people icon will be displayed on the agent view to alert agents that information in the checklist is visible to customers. You can set a Default Template that will be automatically added whenever a request of the indicated request type is created. Default Templates are defined per project and request type, allowing you to set different default templates for each type within each project. To set a default template: Navigate to the templates page either by selecting Checklist from the left project nav bar or by selecting Manage templates from the … menu for the Checklist. Click Set default for the appropriate template. Select the Issue types and/or request types you want the template to be applied to. Note that cloned checklist takes precedence over a default checklist. If an issue with a checklist is cloned, the default template will not applied. Every Jira workflow contains an Issue Created post-function by default. This is required for default templates to work and should not be removed. 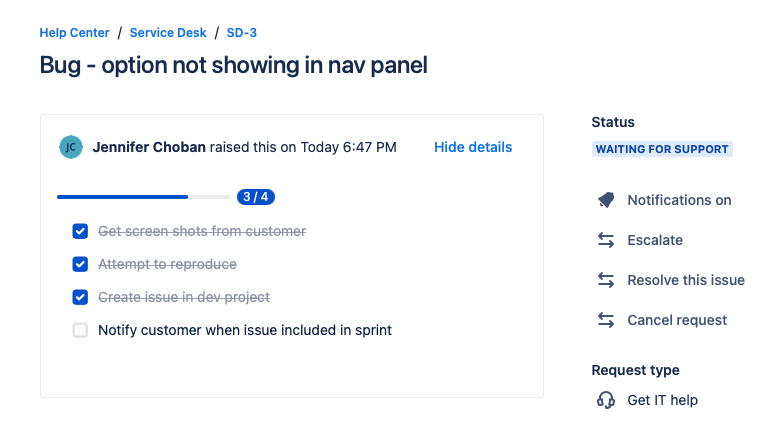
Show Checklist Progress

Show Checklists


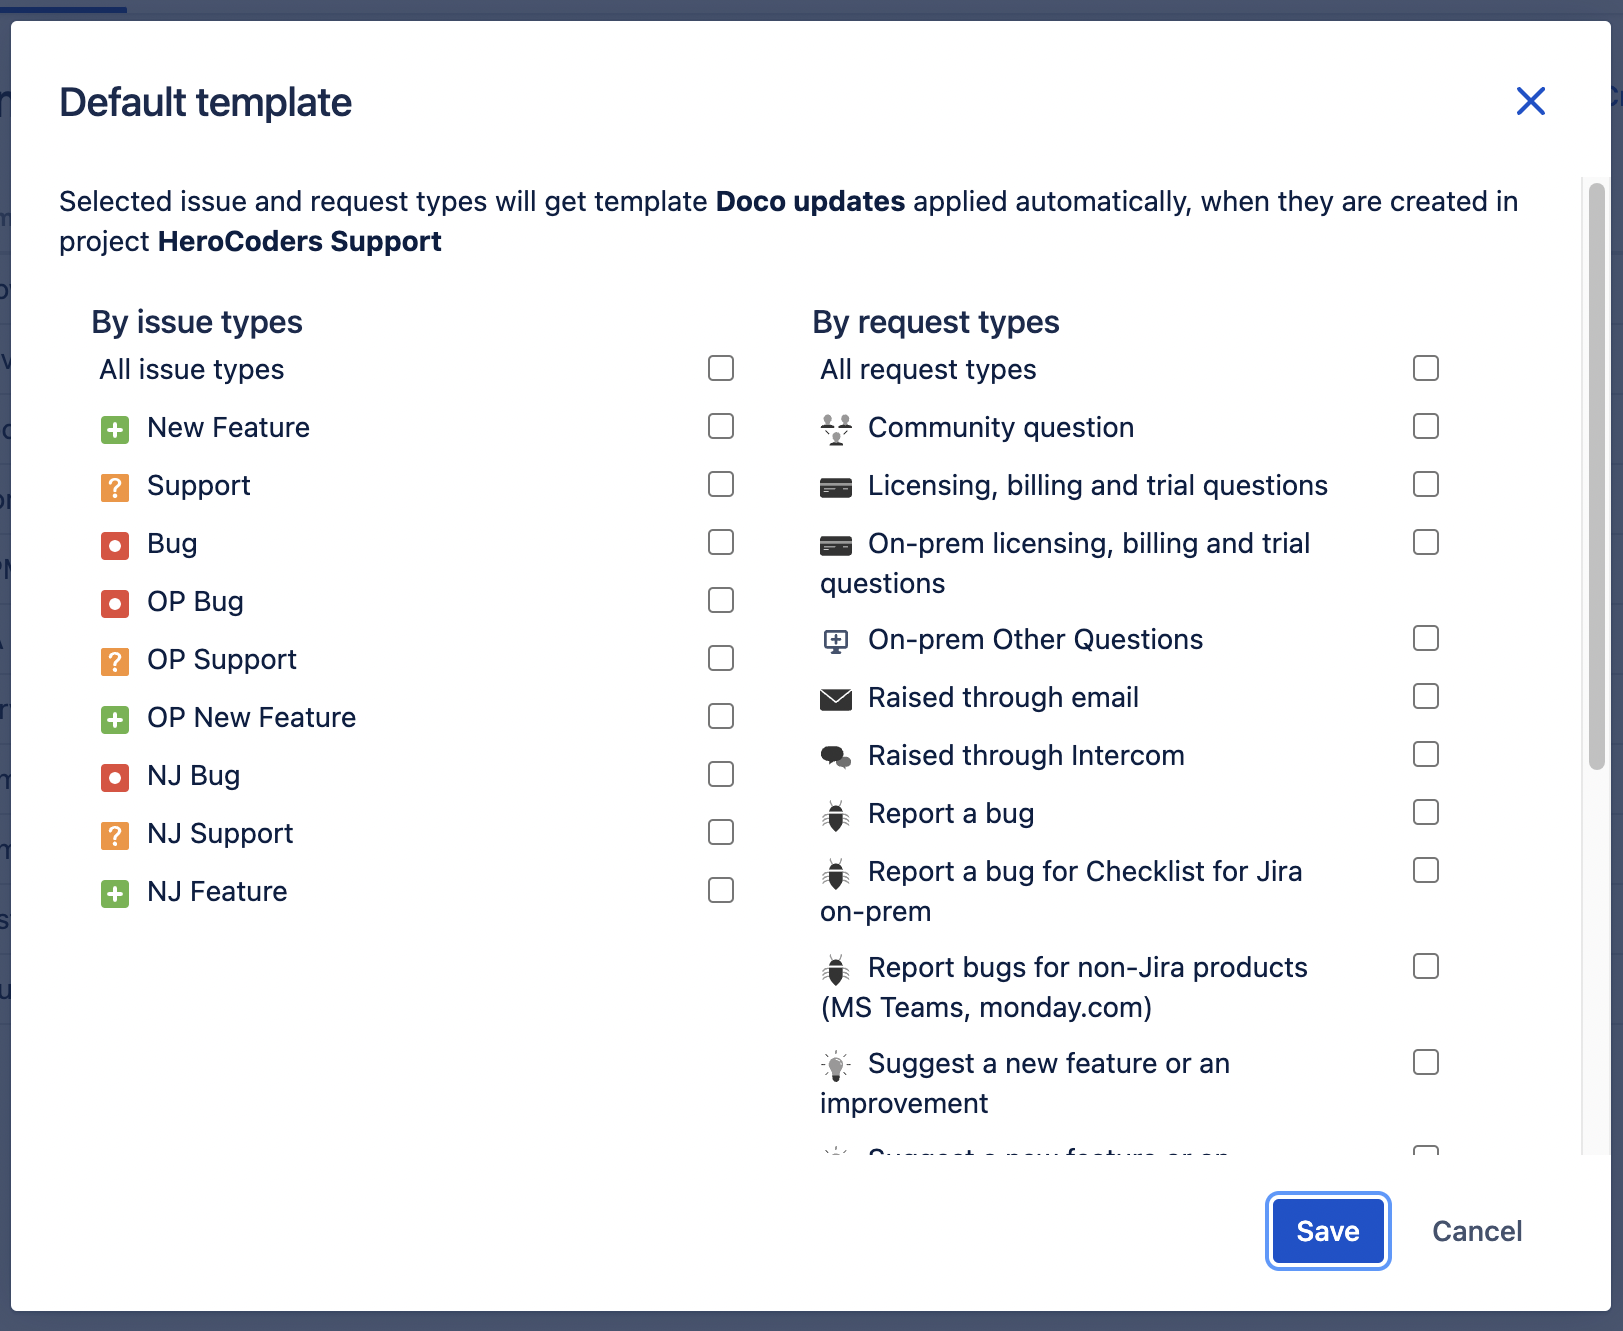
Set Default Checklist per Request Type


Set a Default Checklist for a Request Type
You can set a Default Template that will be automatically added whenever an issue or request of the indicated type is created. Default Templates are defined per project and issue type / request type, allowing you to set different default templates for each type within each project.
Templates can also be added to issues from the via automation or the REST API.
Default Template is not applied when issue / request type is changed later in “issue update” operation.
You must have project administrator permission to set default templates.
To set a default template:
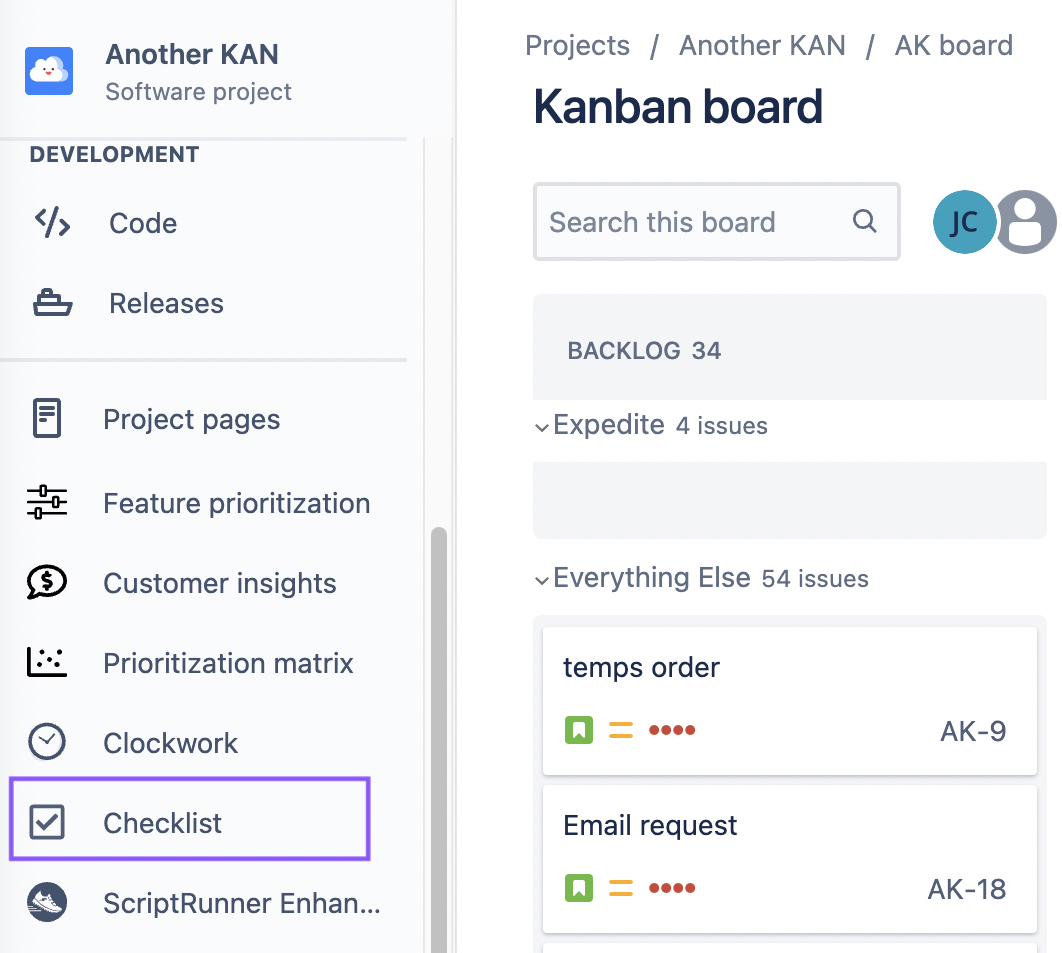
Navigate to the templates page either by selecting Checklist from the left project nav bar or by selecting Manage templates from the … menu for the Checklist.

Click Set default for the appropriate template.
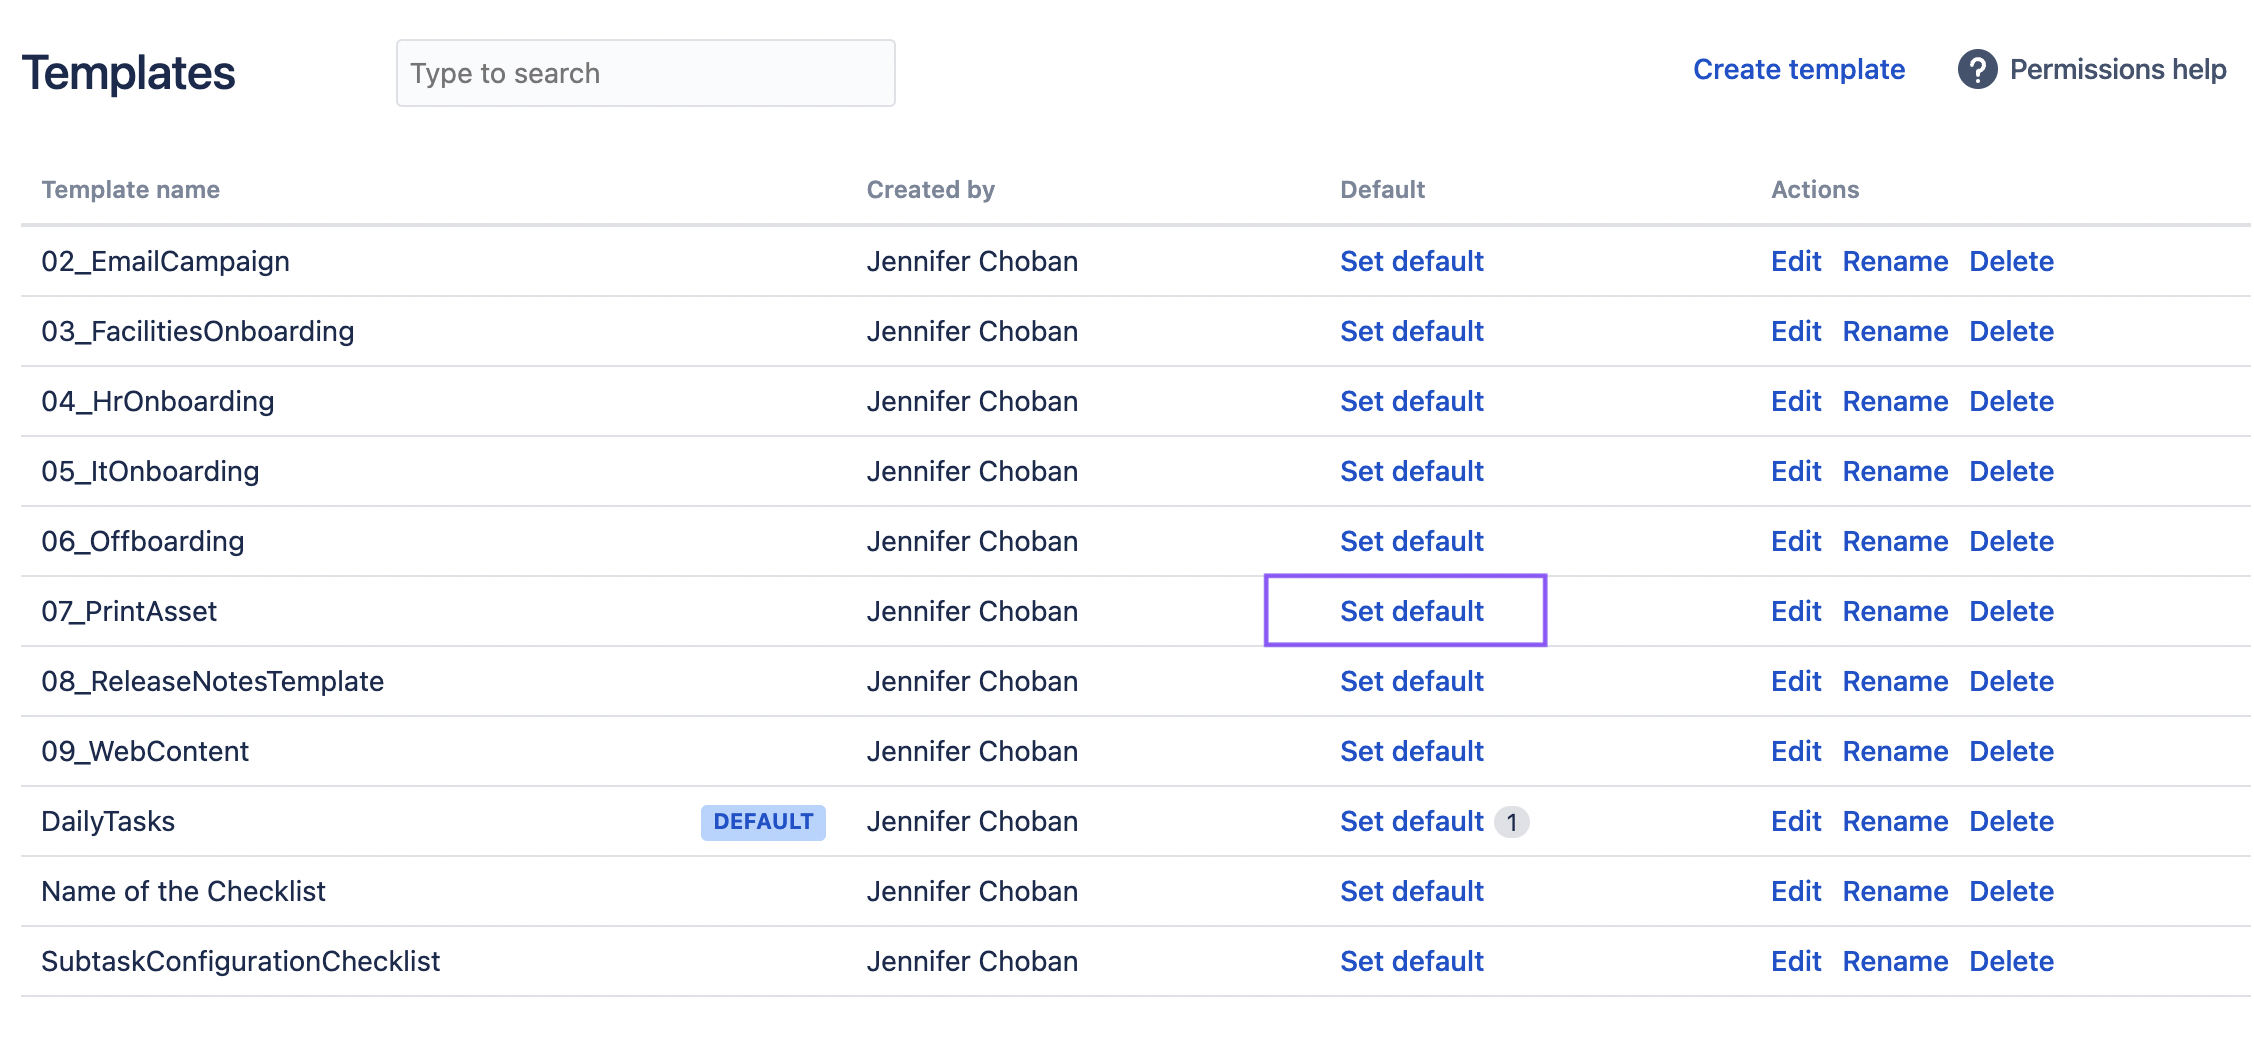
Select the Issue types and/or request types you want the template to be applied to.
Note that cloned checklist takes precedence over a default checklist. If an issue with a checklist is cloned, the default template will not applied.
Every Jira workflow contains an Issue Created post-function by default. This is required for default templates to work and should not be removed.