| Note |
|---|
Checklist for Jira | Enterprise works differently than Checklist for Jira Server/DC. Learn more here. |
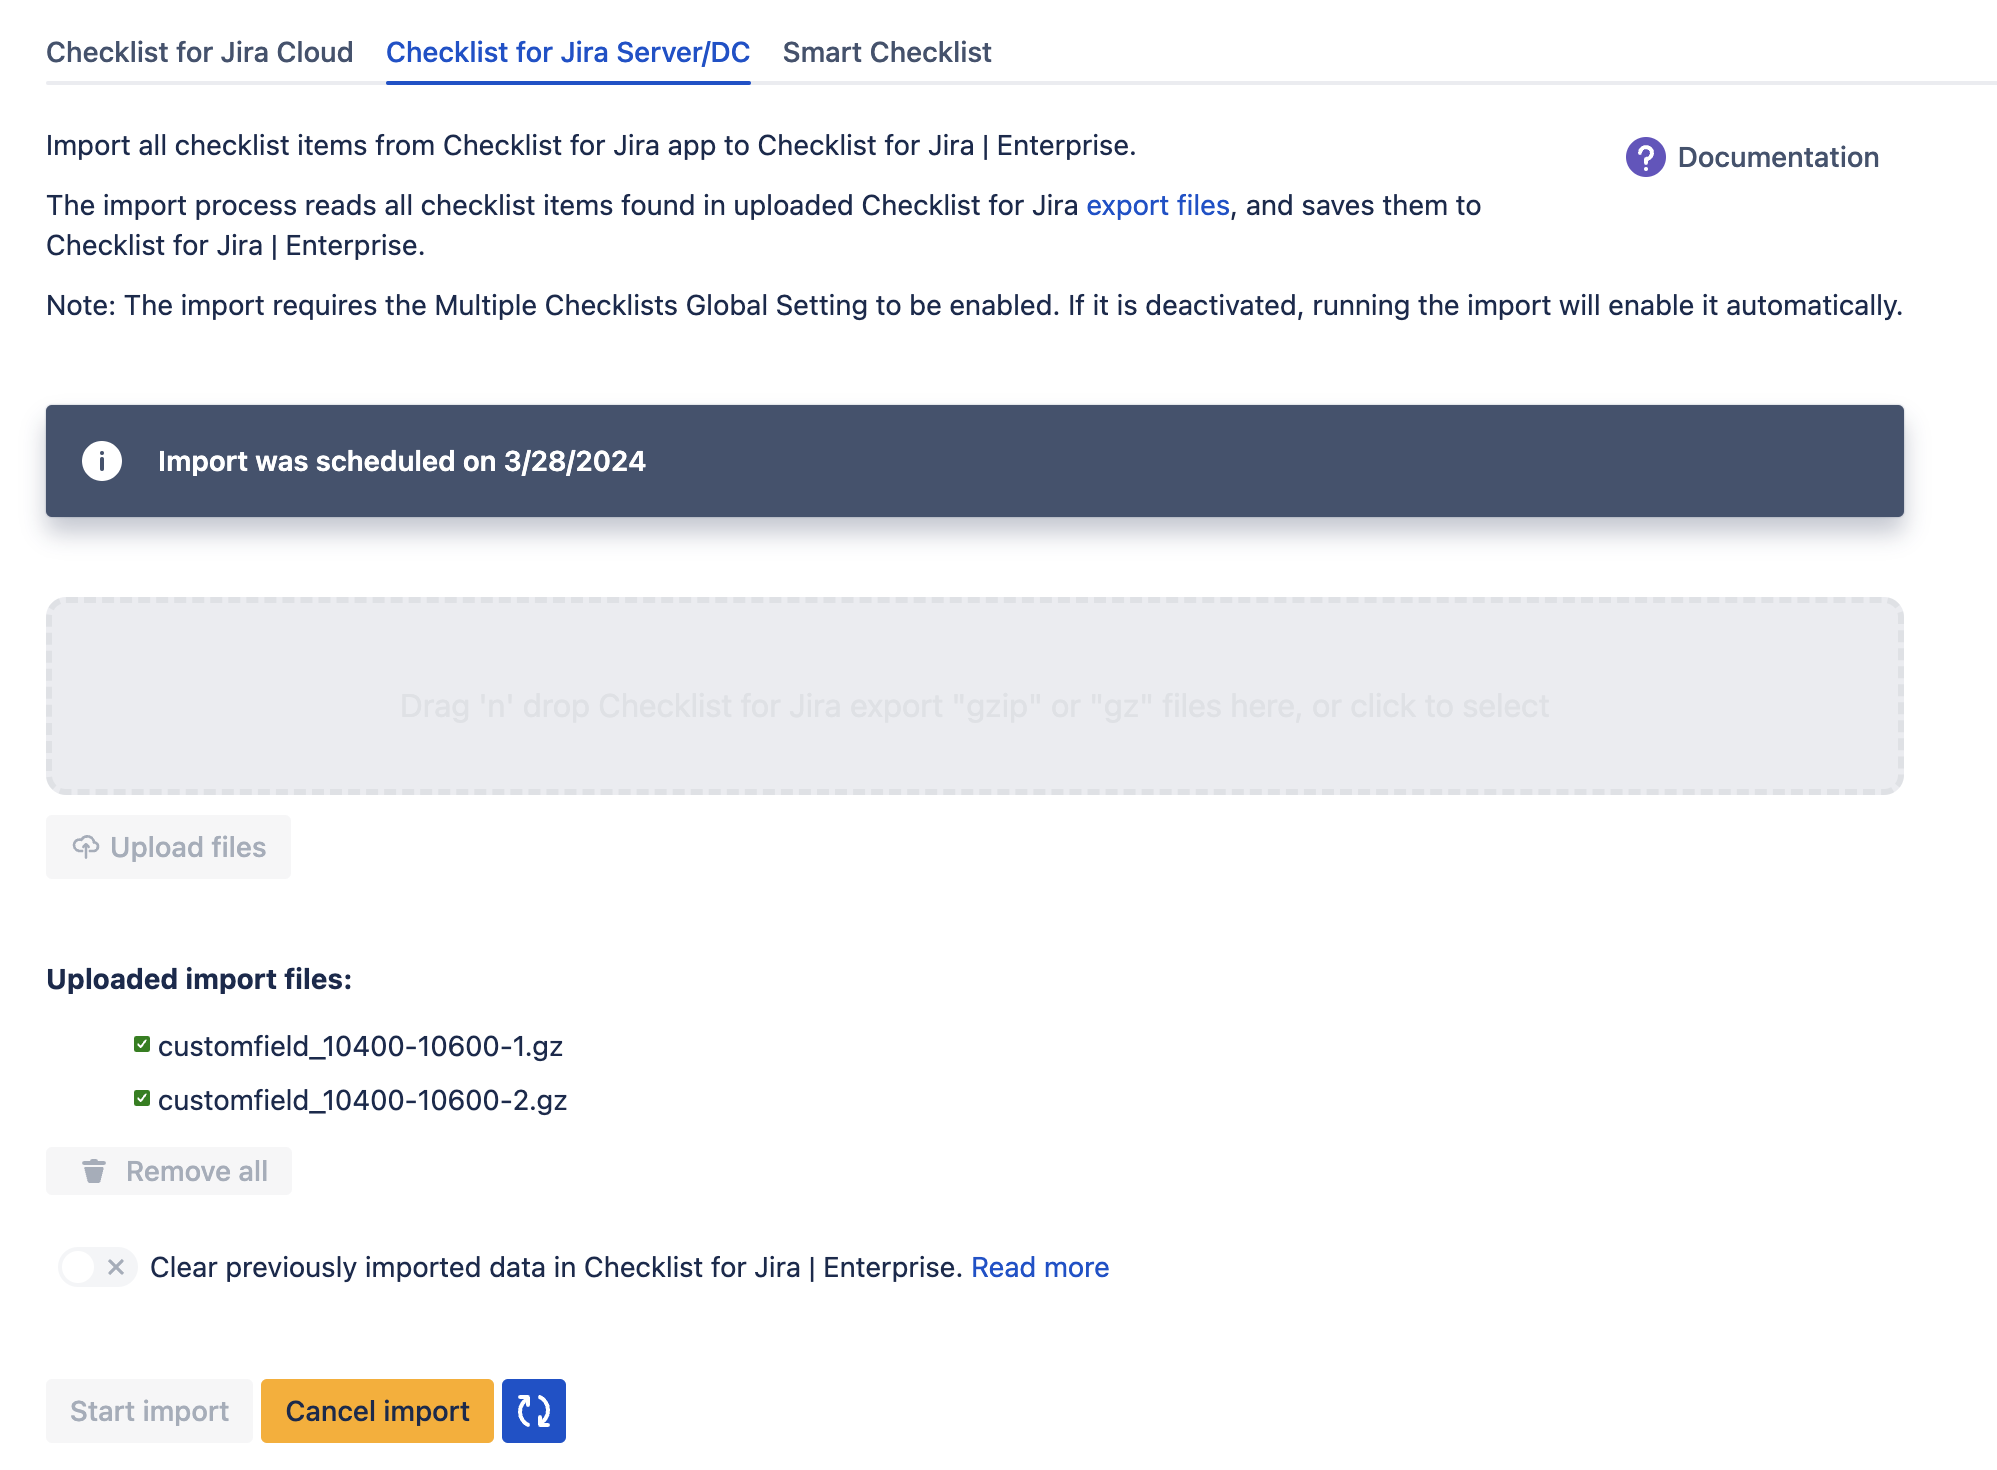
This import process will load checklist data files created by the Checklist for Jira on-prem export feature and copy them to Checklist for Jira | Enterprise. Use the Checklist for Jira Export feature to generate the files that will be loaded into Issue Checklist. Navigate to Jira Settings > Apps and select Import under the Checklist for Jira | Enterprise heading. Select the Checklist for Jira Server/DC tab.
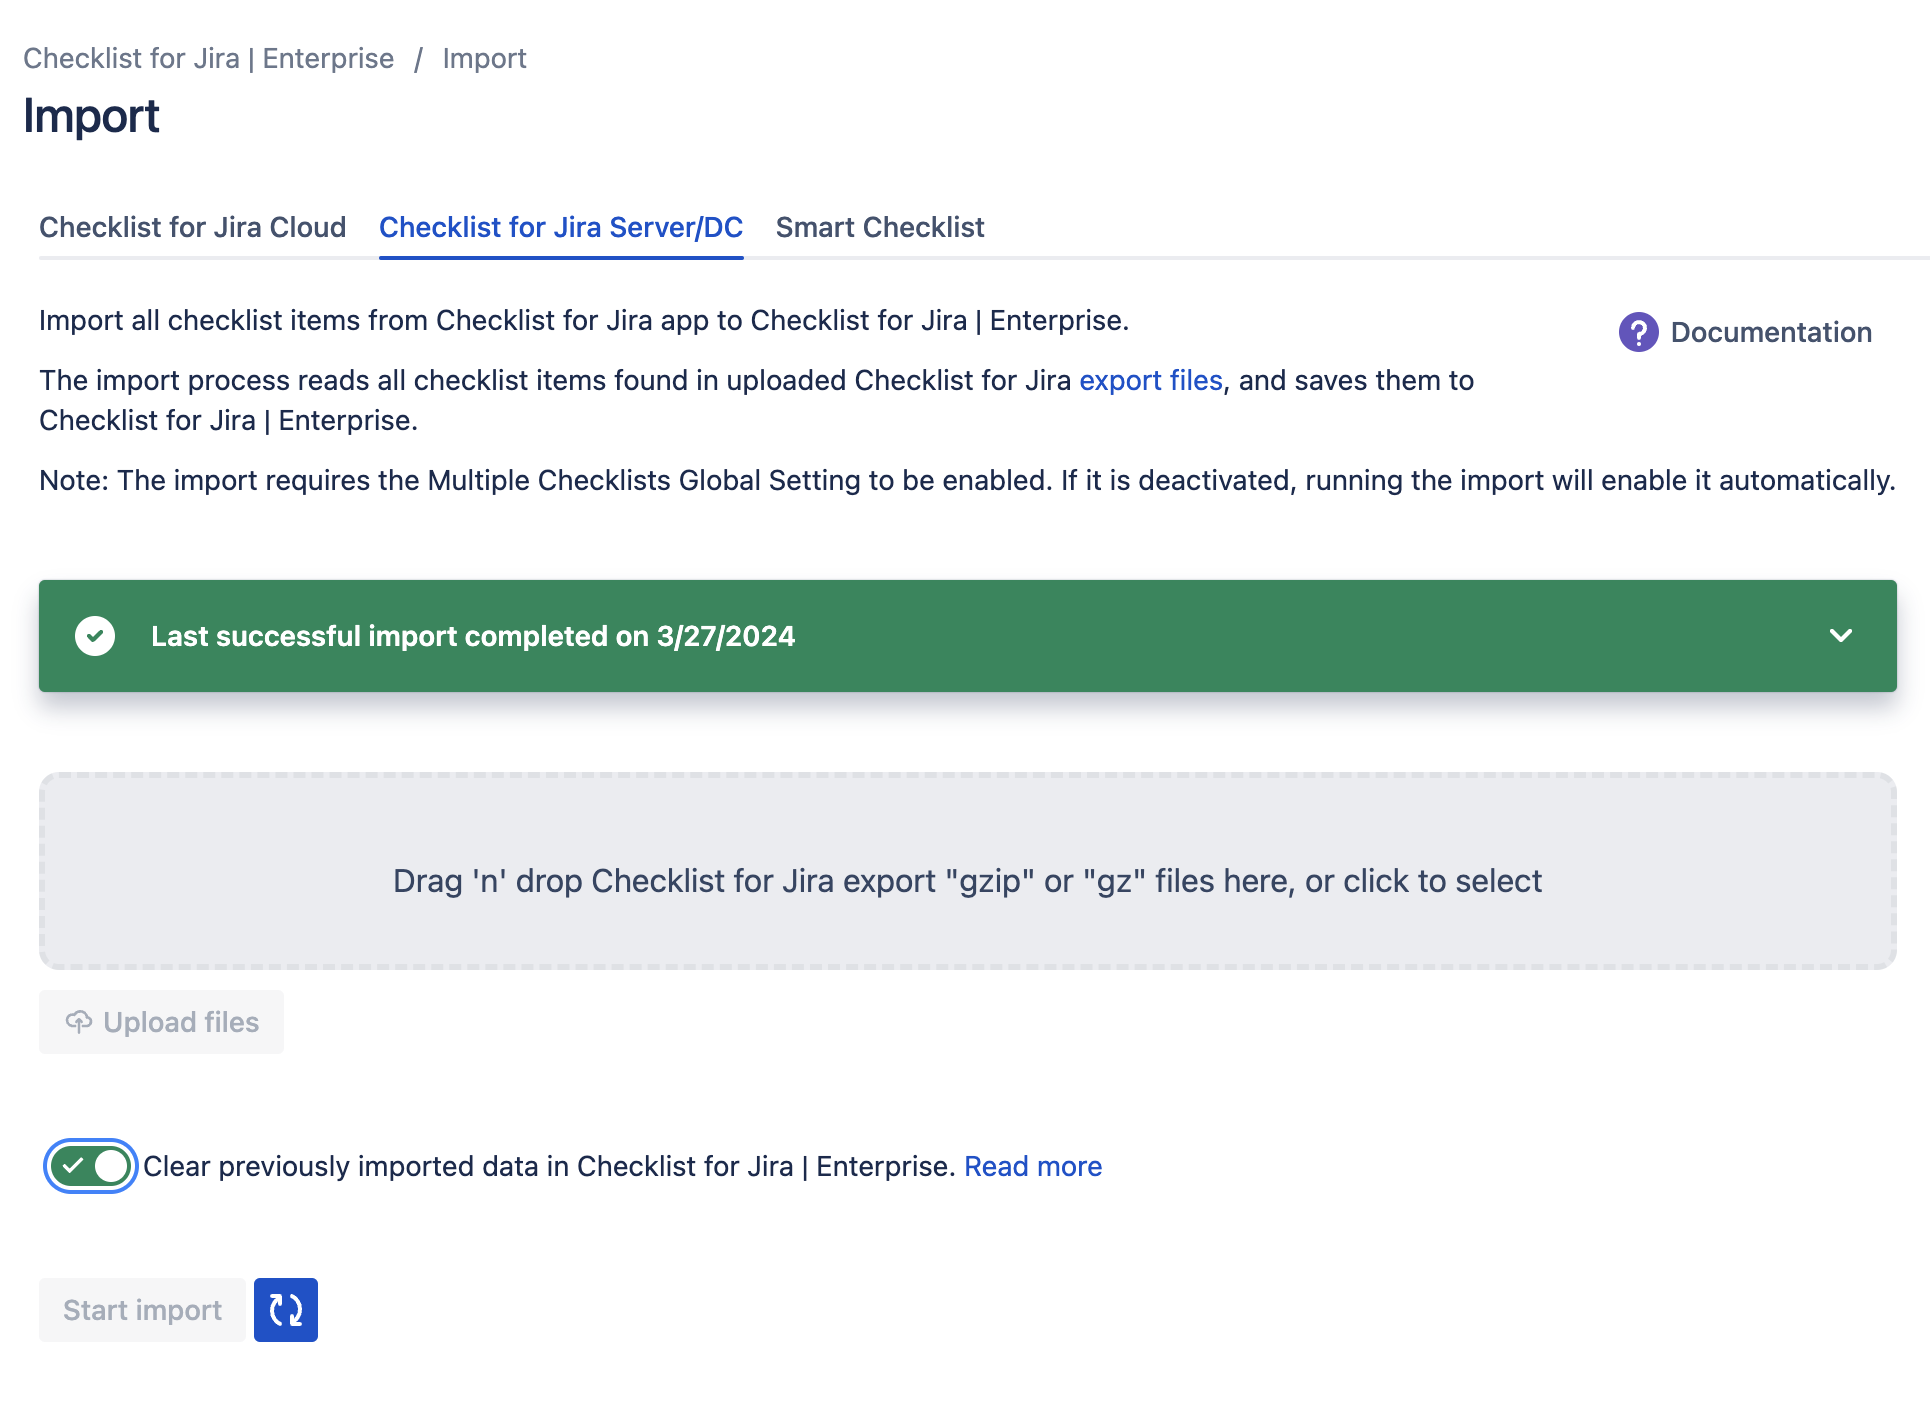 Locate the files generated during the Checklist for Jira Server export process and drag them to the upload area. Alternatively, you can also click the area and select the files from your computer.
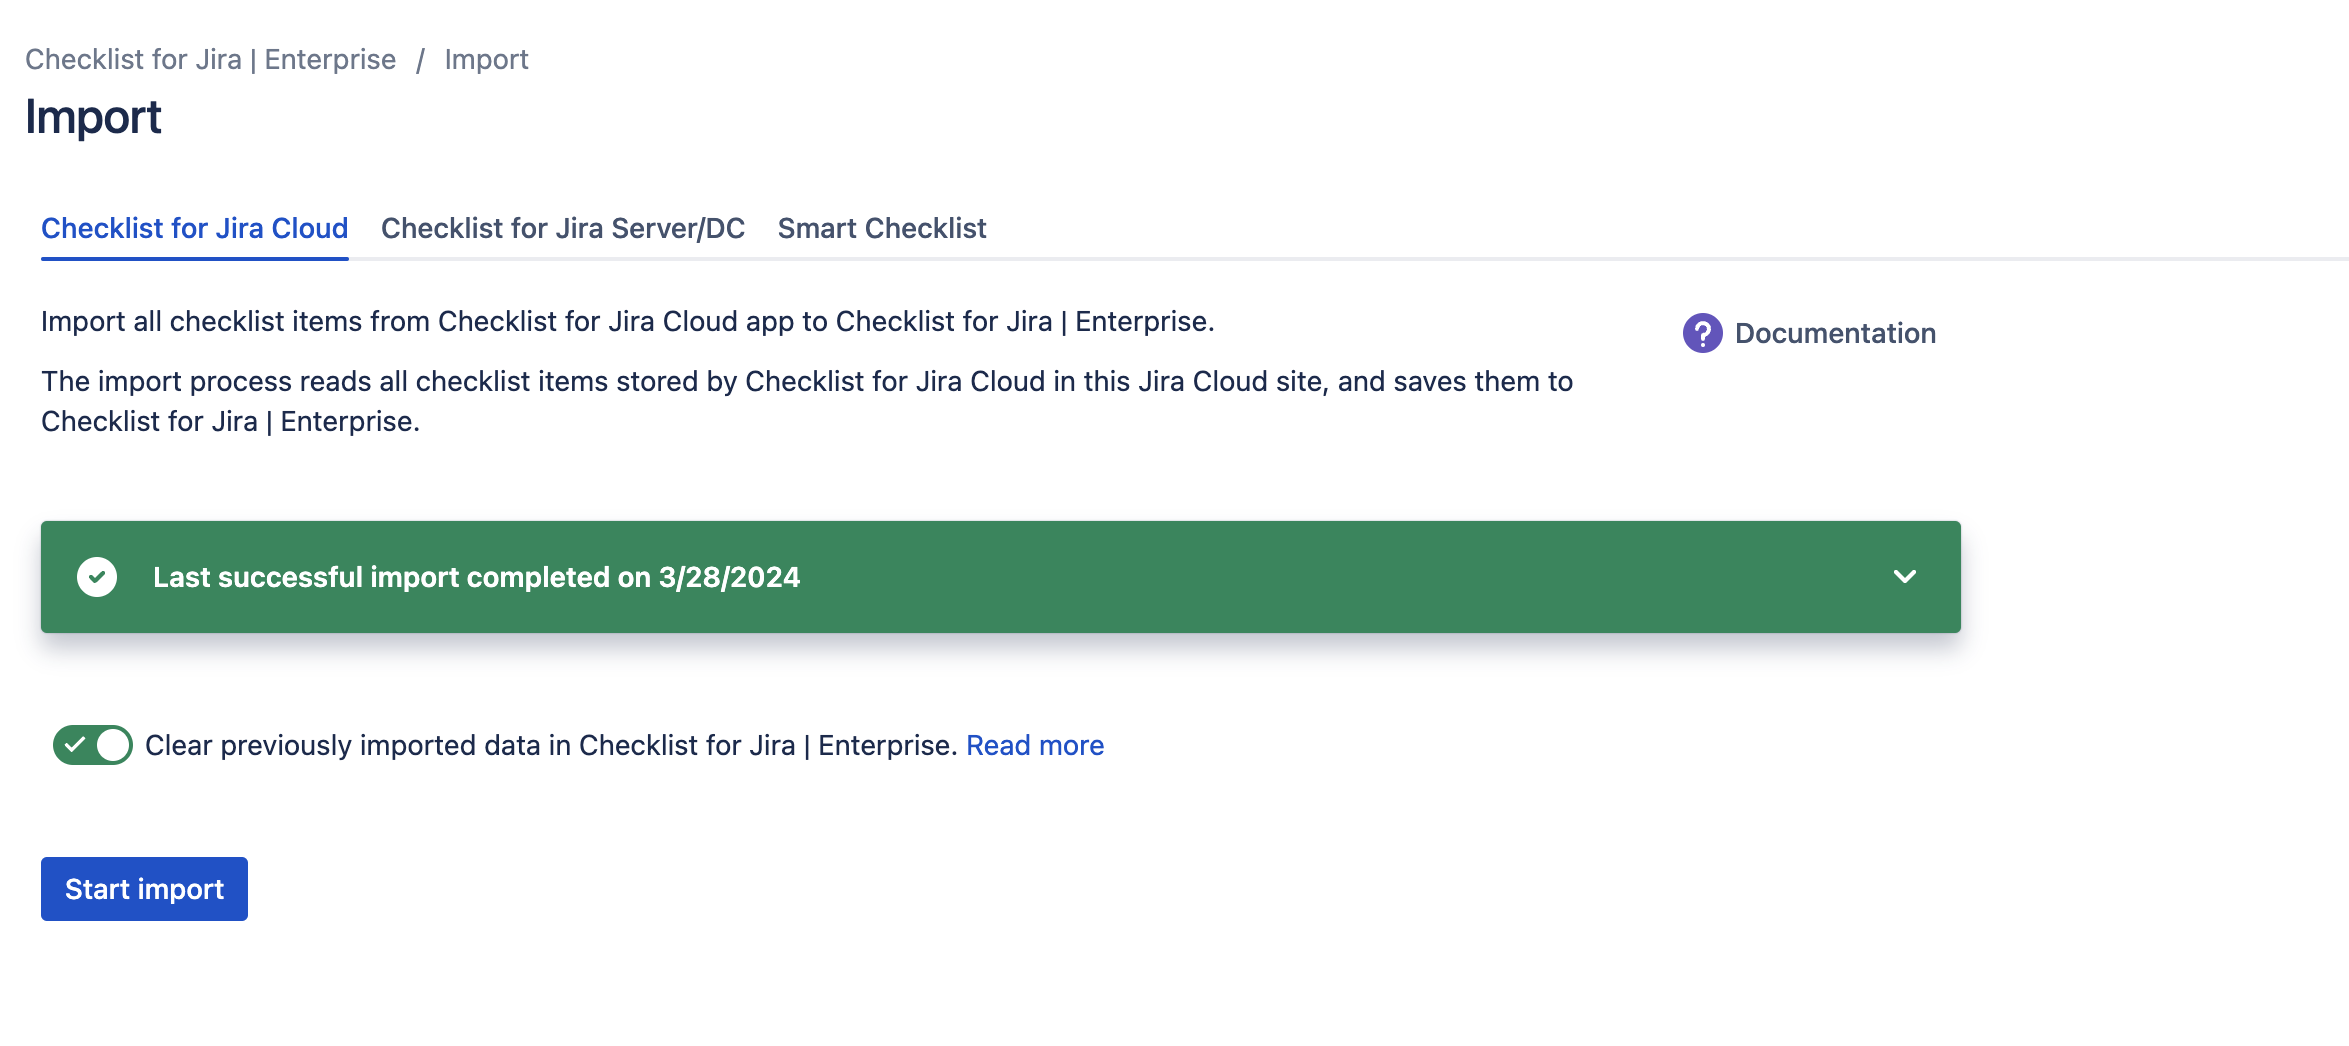
 When all the files generated during the Export process are in the list, click Upload files. Determine if you want to overwrite or append to previously imported checklists. The import process is designed to allow for incremental imports, and does not prevent duplicates. If you perform an import without enabling Clear previously imported data, any previously imported items may appear as duplicates in subsequent imports. Use the Clear previously imported data toggle to indicate if you want to: Clear previously imported data (Toggle enabled)
Replace any previously imported data from Checklist for Jira on-prem with the items being imported from the currently uploaded files. It is recommended that you enable the toggle if you attempt to perform an import more than once. Data to be replaced includes: Append imported checklist items to already existing checklists (Toggle disabled)
Imported checklist items will be appended to the existing checklist(s) on the issue. If you will import the same checklist Checklist Field but for other project(s), duplicate Global Checklist will appear. It’s recommended to import a checklist Custom Field configuration for all projects at once.
We recommend waiting to work on checklists until the import is finalized. In case of doubts, please contact our support. 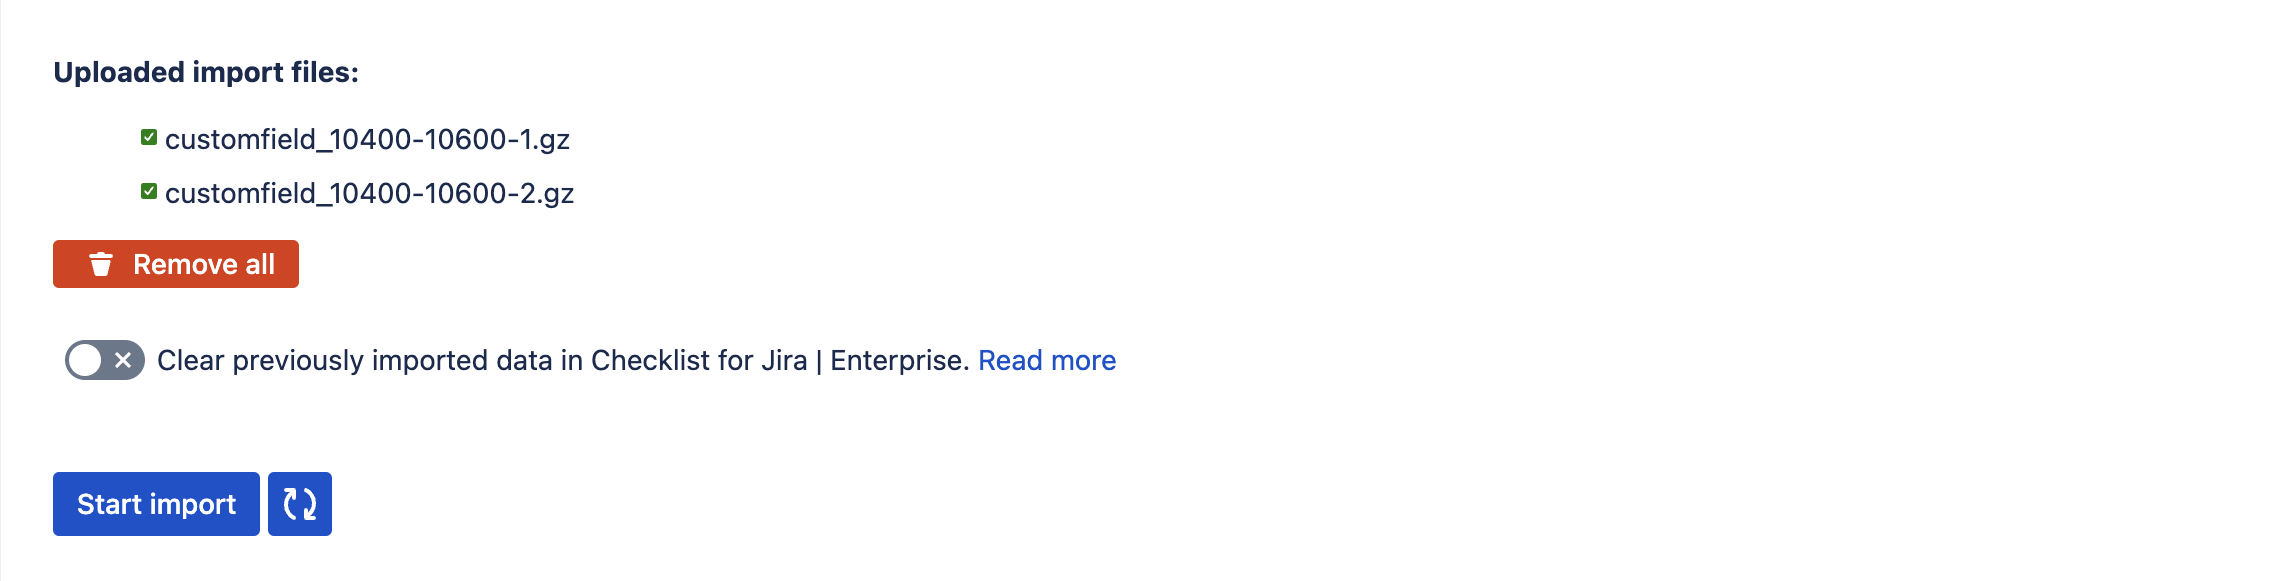
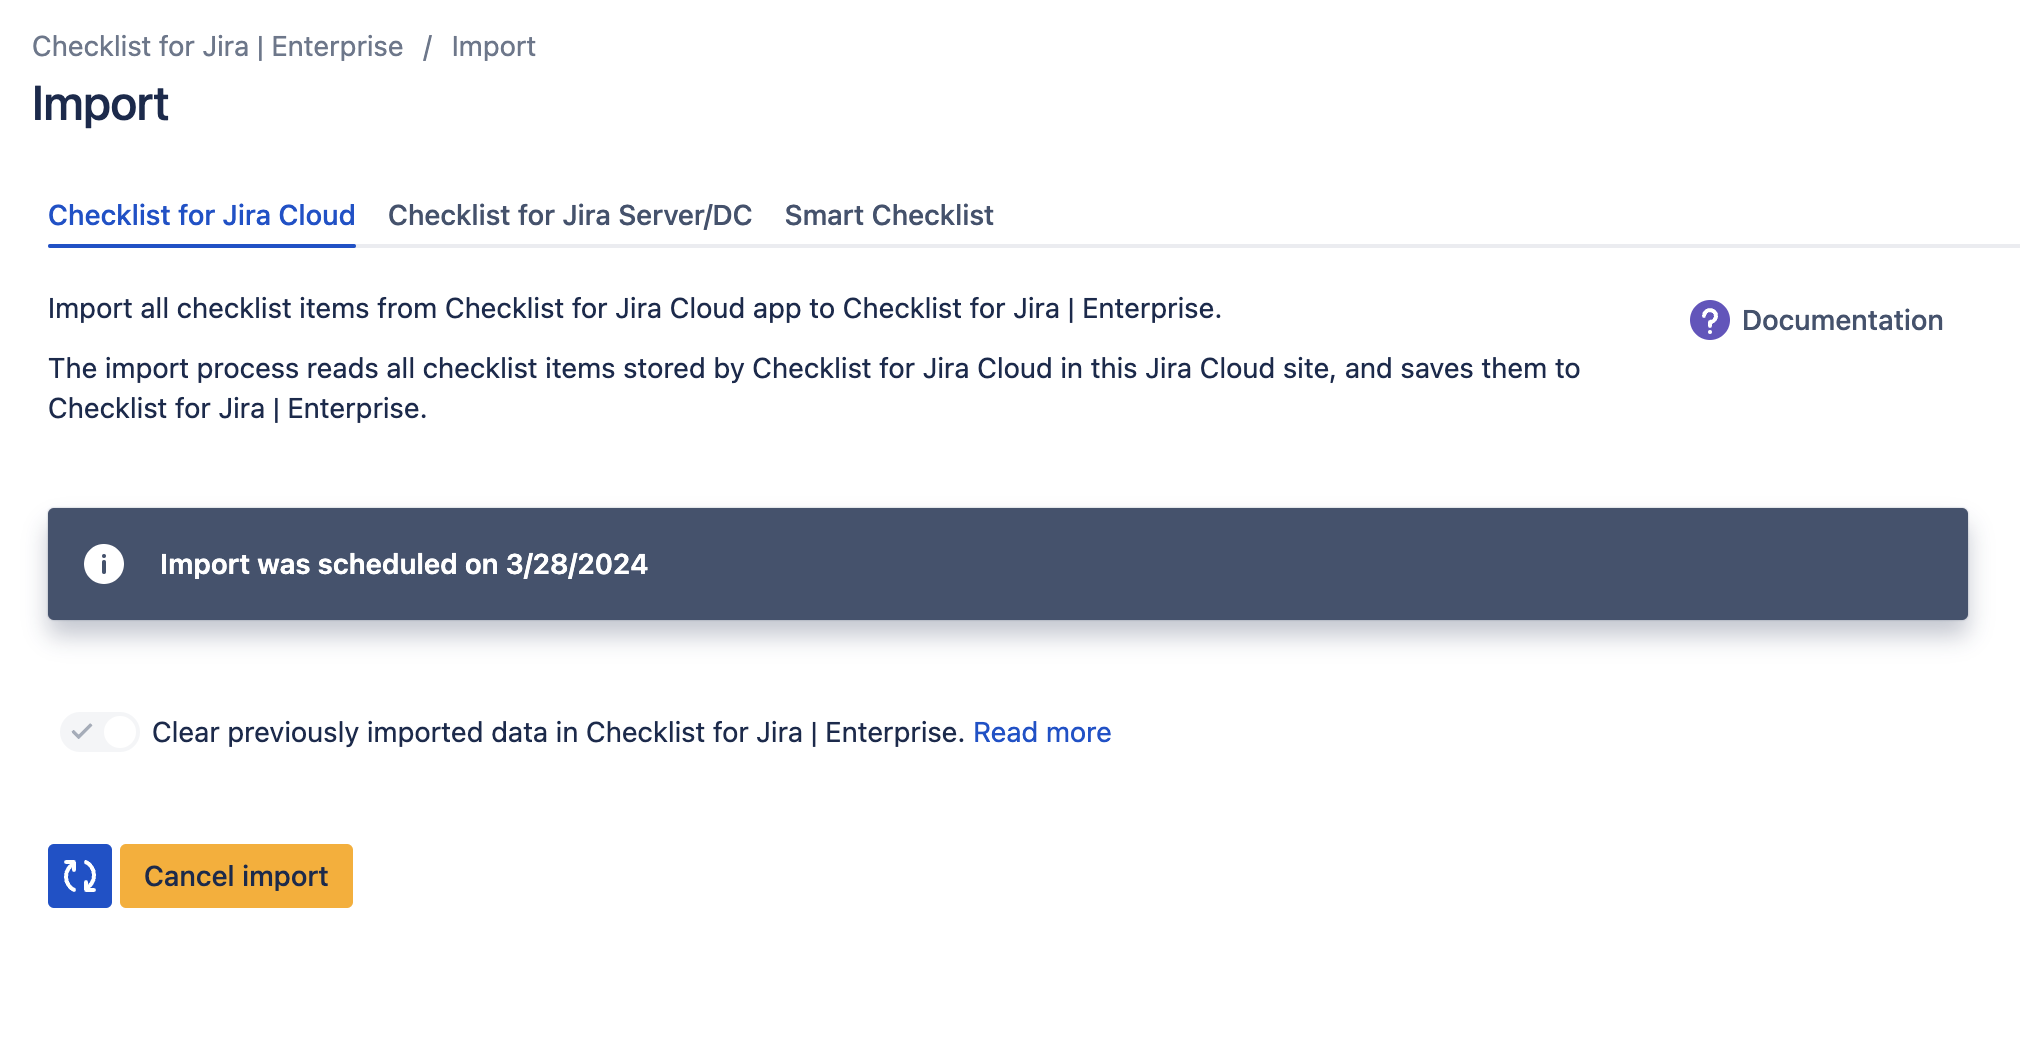
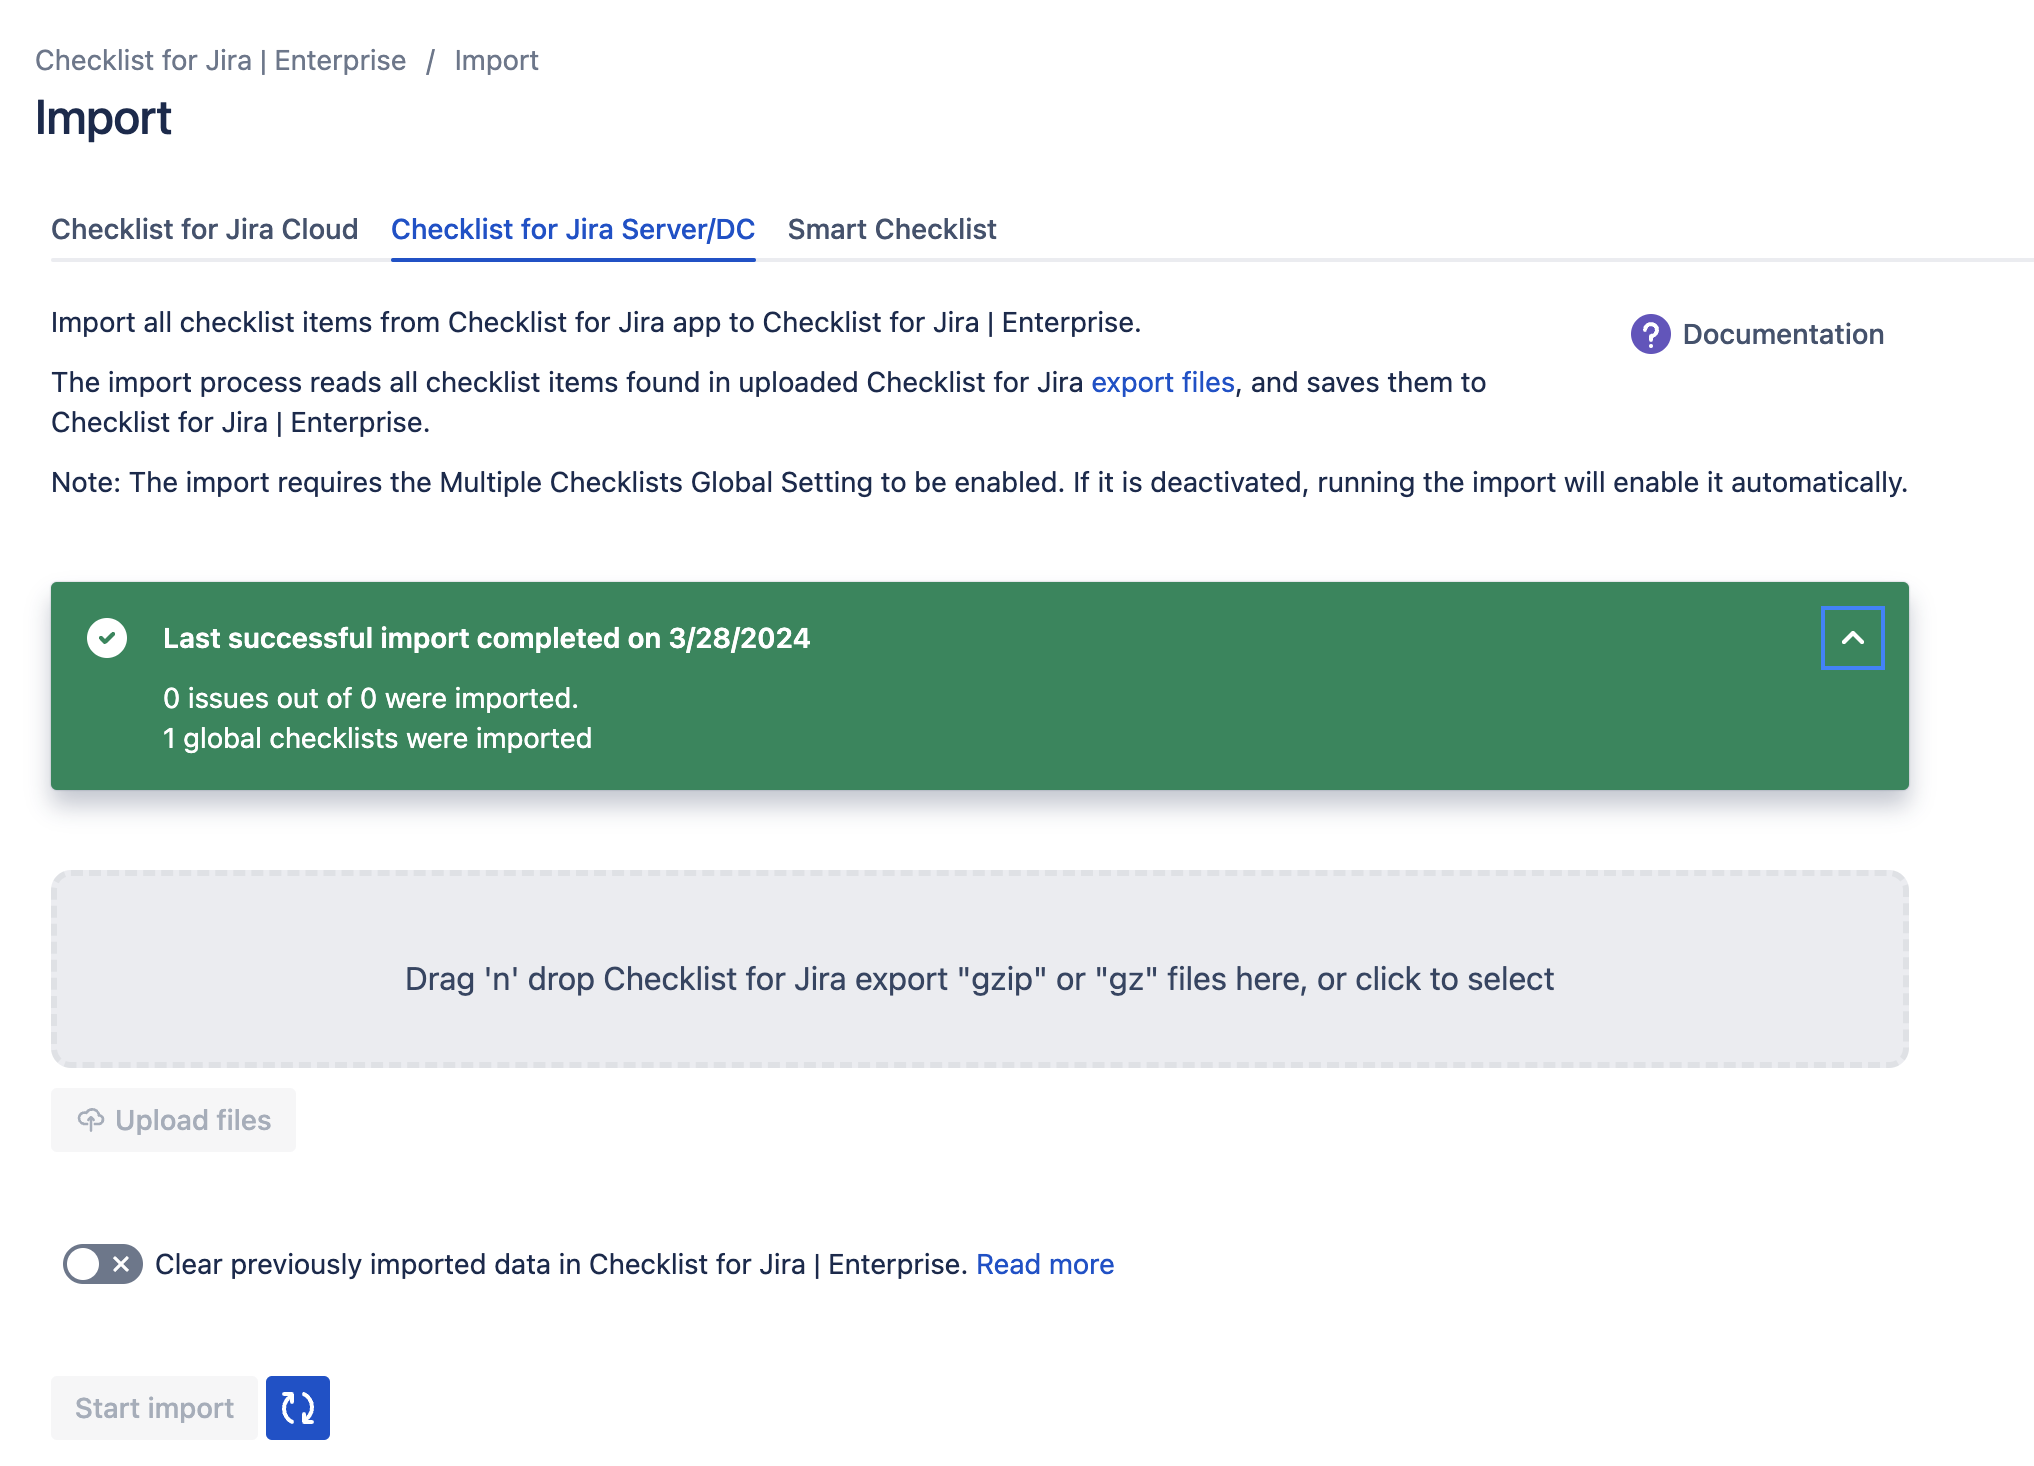
Once the files are uploaded, and you’ve confirmed that the Clear previously imported data toggle is in the correct position, click Start import. The import will be scheduled and a gray panel will show the import status. Click on the Refresh icon to update the status.
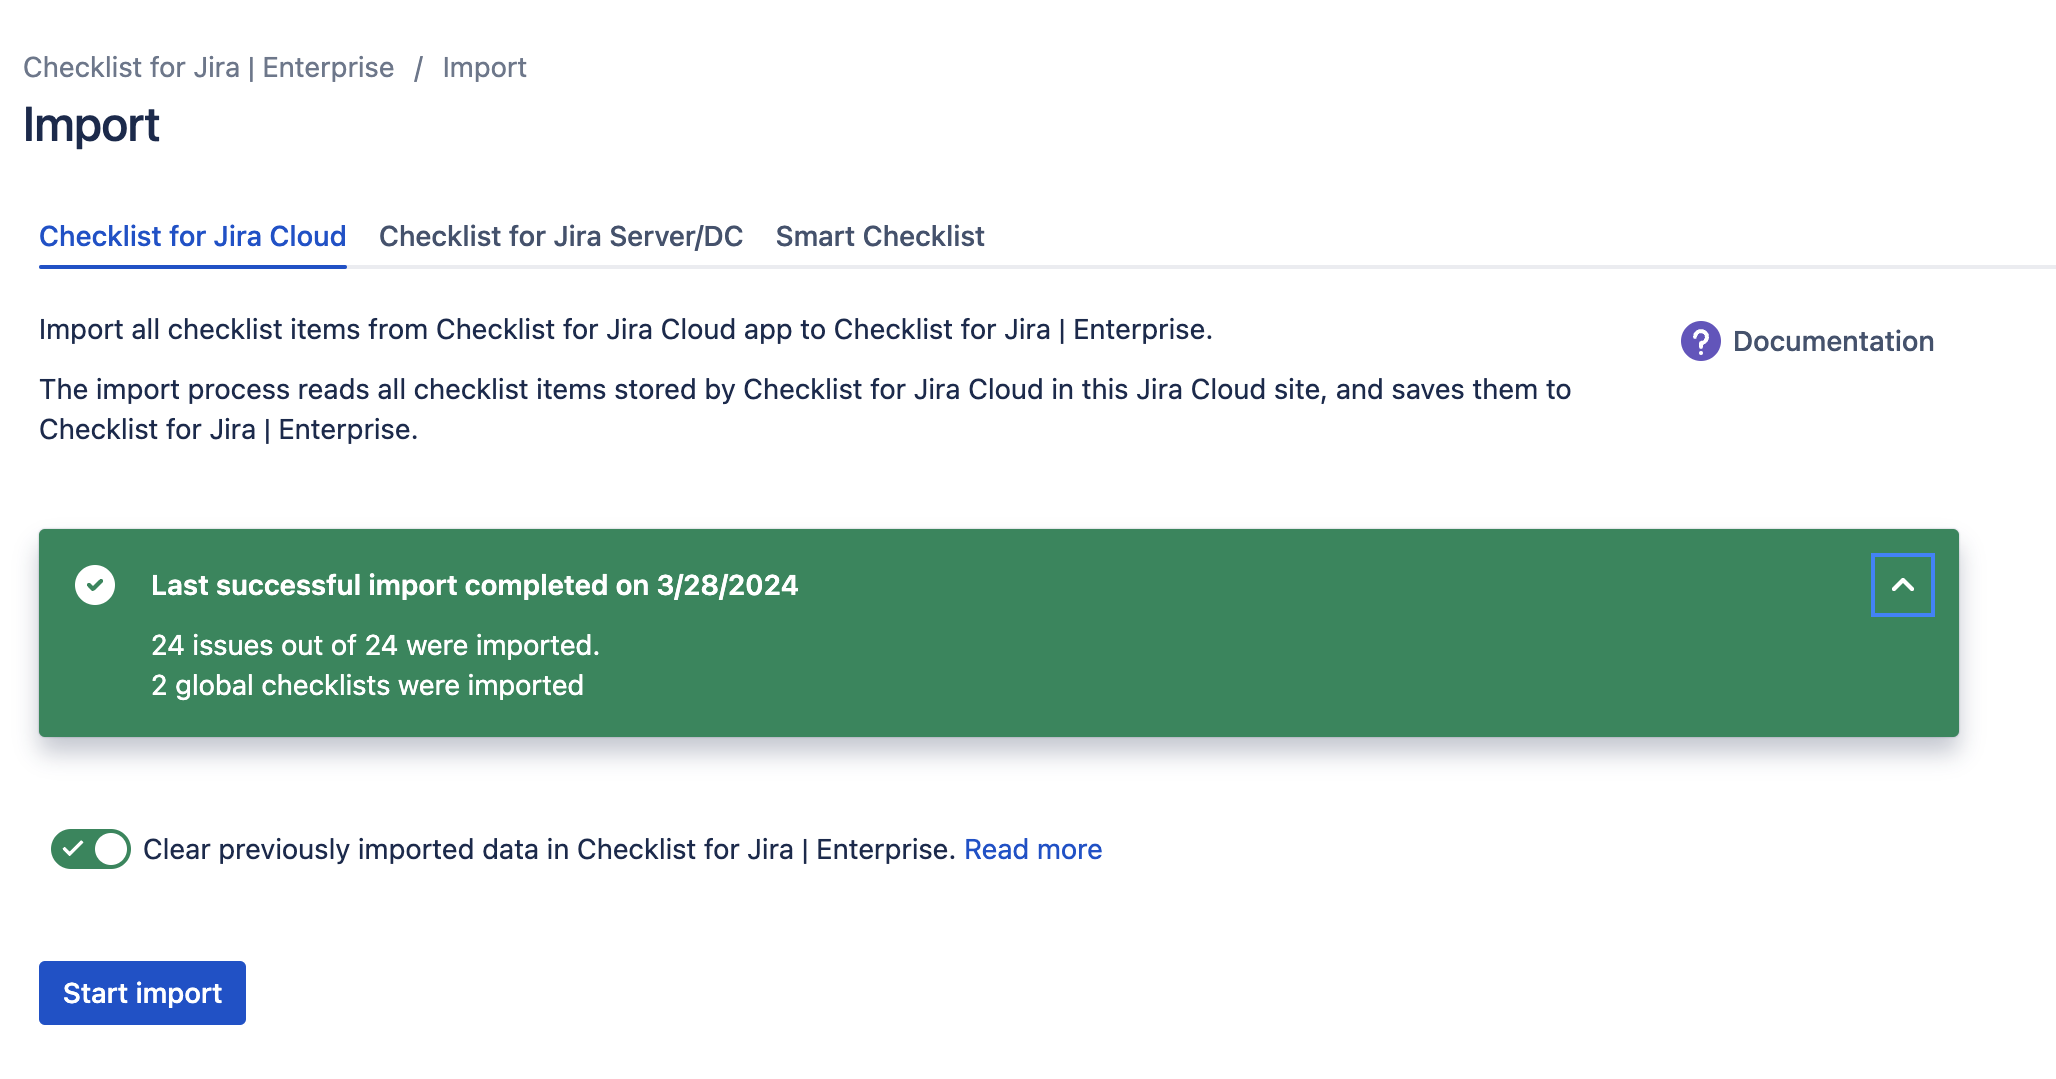
When the import is complete, the status panel will turn green and will display the number of checklist items and issues impacted.
|