We have a new documentation site. Please go here to see the latest.
Formatting
Text format can be used in Editor, Checklist Text custom field as well as new item input field
On this page
Items
Line beginning
In general, every new line is a separate checklist item, unless it starts with:
>>for description, or#for the name of the checklist in the Checklist Text custom field, for example:# Default checklist
Making a list
Checklist item line can start directly with item text or Markdown characters like the following: * - + []
Examples
Unchecked items
Following is a list of six valid unchecked items (each with text/summary "checklist item").
As you can see, various prefixes are accepted to indicate the checklist item (e.g. [], *, -, but no prefix works fine too).
In this simple form, each line is translated into a separate checklist item.
checklist item
[] checklist item
* checklist item
* [] checklist item
- checklist item
- [] checklist item
Optional and mandatory items
Following is a list of valid optional items (each with text/summary "checked item"). Question mark is used to mark item optional.
? checklist item
[]? checklist item
*? checklist item
* []? checklist item
-? checklist item
- []? checklist item
Following is a list of four items, two of which are mandatory and two others are optional:
[] mandatory checklist item (not completed)
[x] mandatory checklist item (completed)
[]? optional checklist item (not completed)
[x]? optional checklist item (completed)
Checked items
Following is a list of three valid checked items (each with text/summary "checklist item"):
[x] checklist item
* [x] checklist item
- [x] checklist item
Separators (headers)
Following is a list of three valid items and one header at the beginning (headers start with three dashes "—") containing some advanced formatting elements:
--- Acceptance Criteria
- checklist item 1
- checklist item 2 with **bold** text
- checklist item 3 with link to an issue IC-245
Description
Following is a list of two items of which the first contains additional details in description:
[] Unchecked checklist item with description
>> Details for the item above come here. Description text can be long and multiline. It can also contain links, mentions, dates, and other formatting elements.
[x] Checked item
Statuses
Following is the list of items with different statuses (as defined in your Jira settings):
[] Open item
[open] Another open item
[in progress] Item with status 'in progress' which is still unchecked
[done] Completed/checked item with status 'done'
[skipped] Completed/checked item with status 'skipped'
Advanced formatting
Items can consist not only of plain text, but also advanced formatting elements like description, markdown, inline code, user mention, due dates, issue keys that will be automatically linked to issues, etc.
Editor
You can examine the text format of the checklist in the editor.
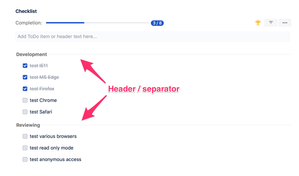
Header (separator)
Header (also known as separator) allows to visually split checklist into parts or groups as presented on the screenshot below:
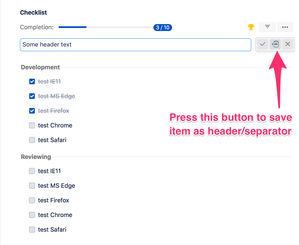
Add header/separator with a button
When adding a new item or editing an existing item there is an option to save text as a separator with the button:
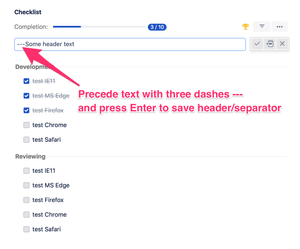
Add header/separator without a button
When adding a new item, editing an existing item, using Editor or Checklist Text custom field, there is an option to add a separator by preceding the text with three dashes "---":
You can also use the multiple checklists feature to separate checklists even more.
Description
Description is an additional multiline text that can be attached to an item. It can contain long notes and details that don't need to be immediately visible when looking at a checklist.
Description consists of all lines which follow the checkbox item and start with ">>" characters.
Description can be added through Editor or Checklist Text custom field.
How to add description in Editor
To add a description:
- Click Pen icon to open the checklist in the editor
- Add description in the lines below the item to which the description should be attached.
Remember to start each line of the description with ">>" characters or use "Toggle description" button which will add the characters automatically: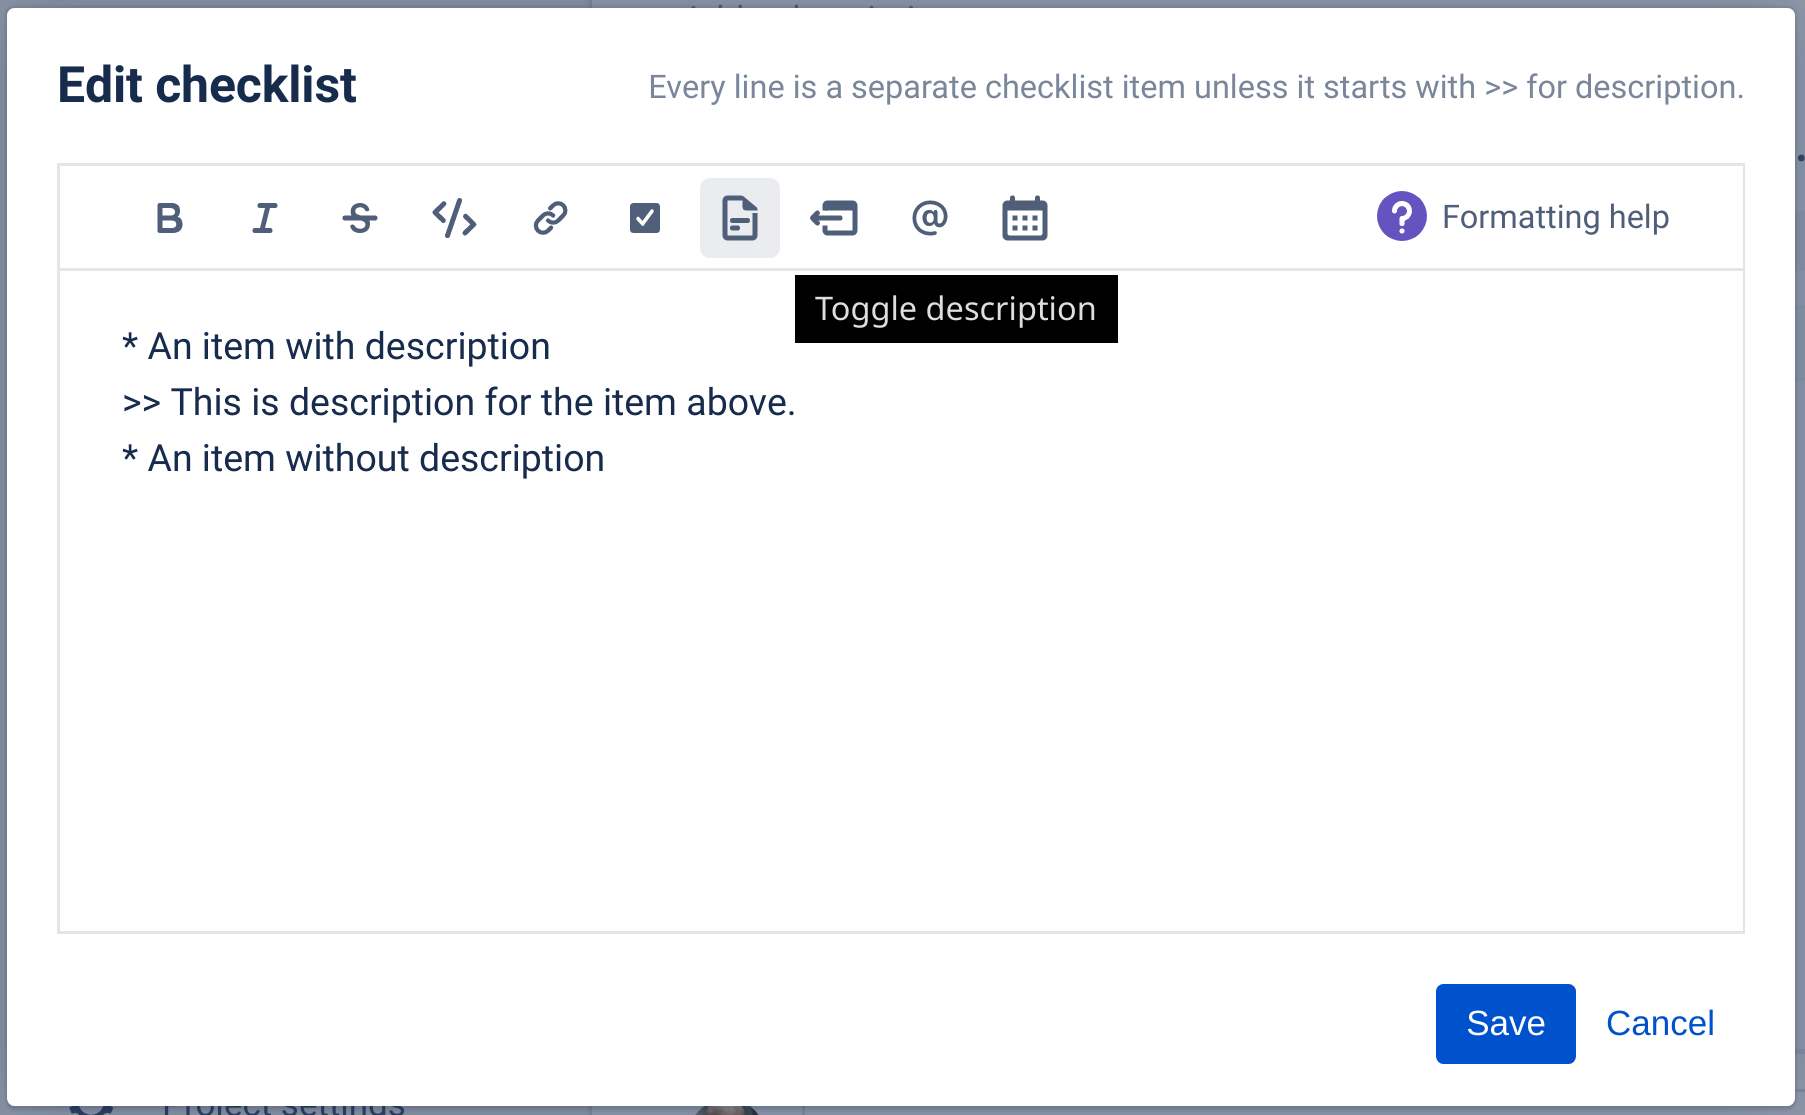
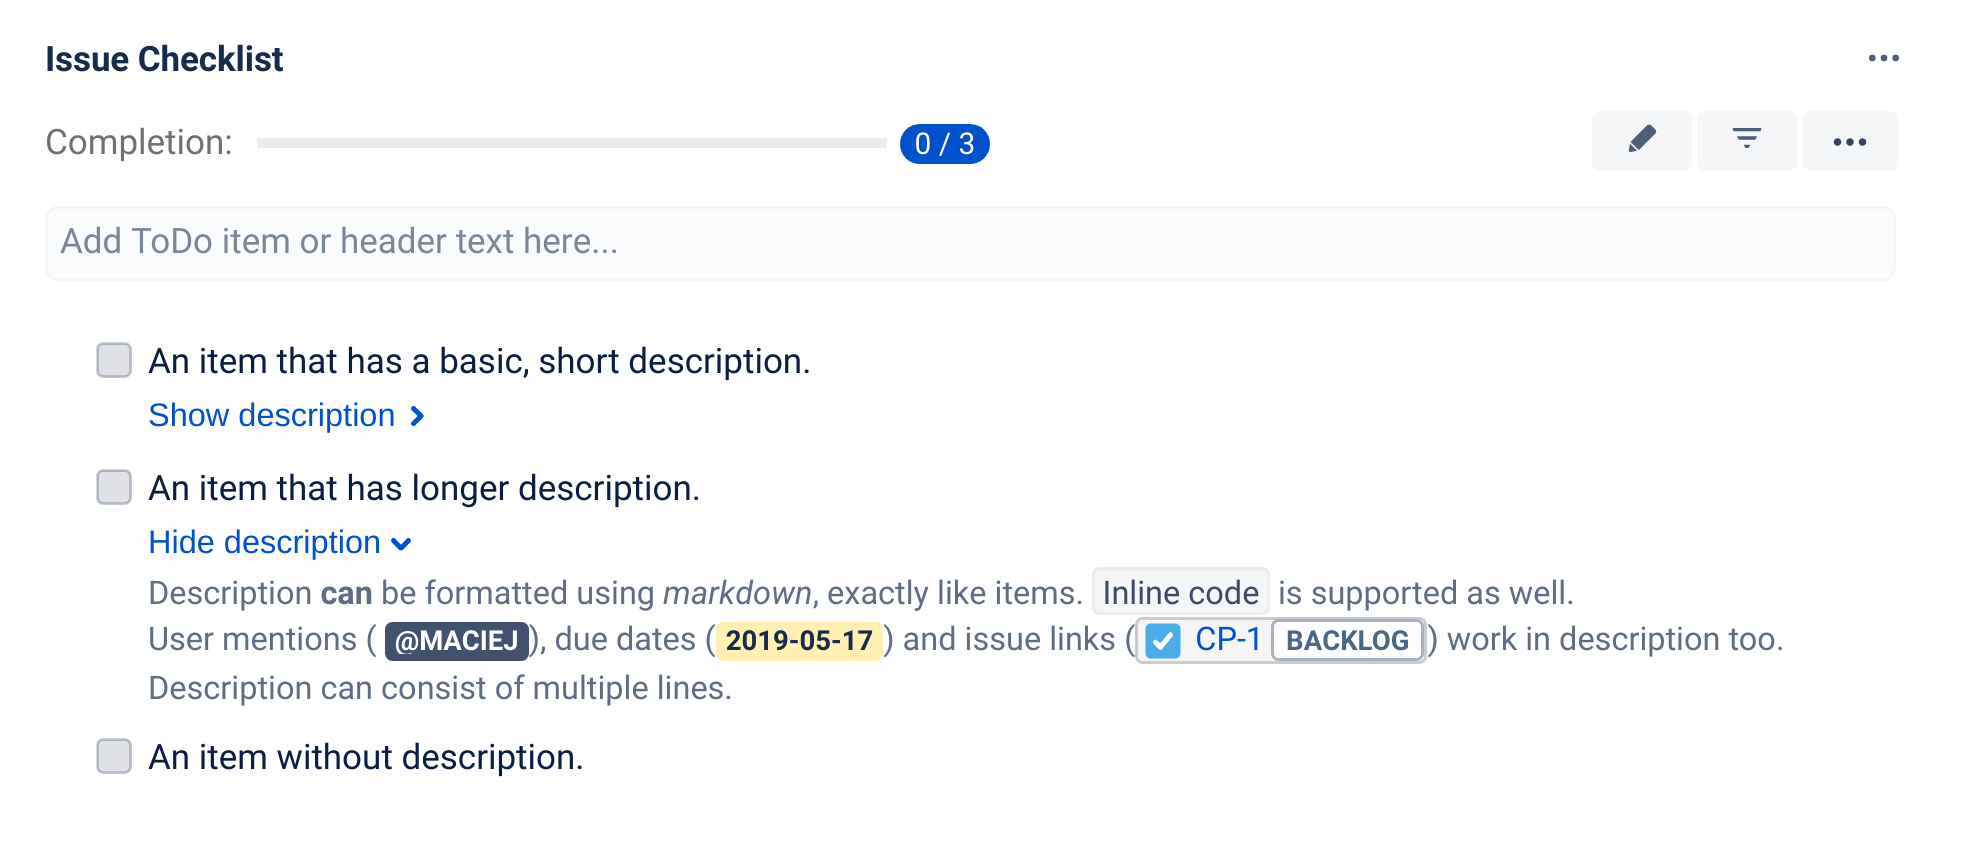
The checklist from the example above will render as in the following screenshot: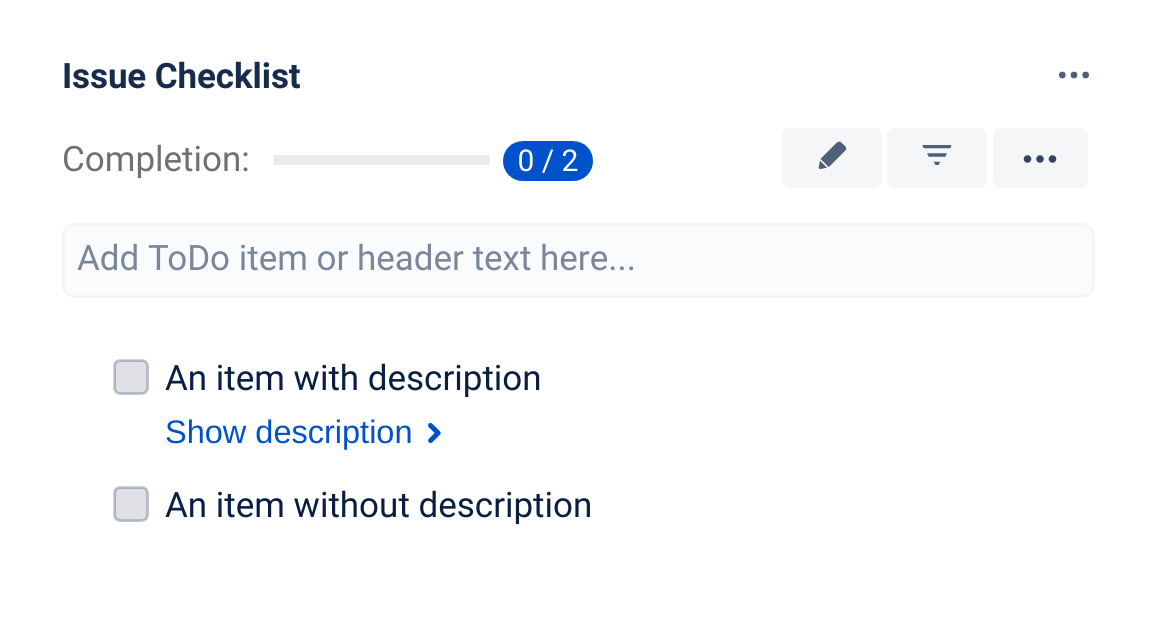
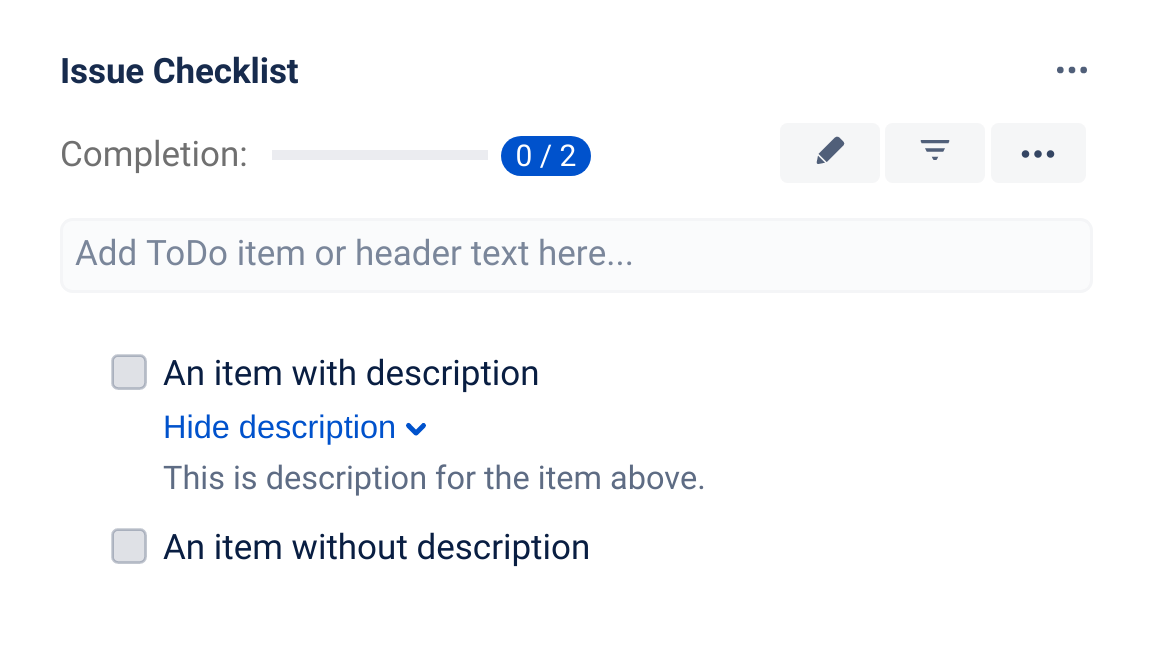
Click "show description" link to expand the content.
How descriptions are presented in a checklist
If an item has description there will be a link below it titled "Show description". When clicked, description will be shown below the item, but this view will be read-only - descriptions can be added, modified and removed only through the editor.
Advanced formatting and additional elements in description
Descriptions don't necessarily have to consist only of plain text - they can span multiple lines, and consist advance formatting elements (markdown, inline code, user mentions, due dates and issue keys that will be automatically linked to issues, etc.).
For example, the following checklist:
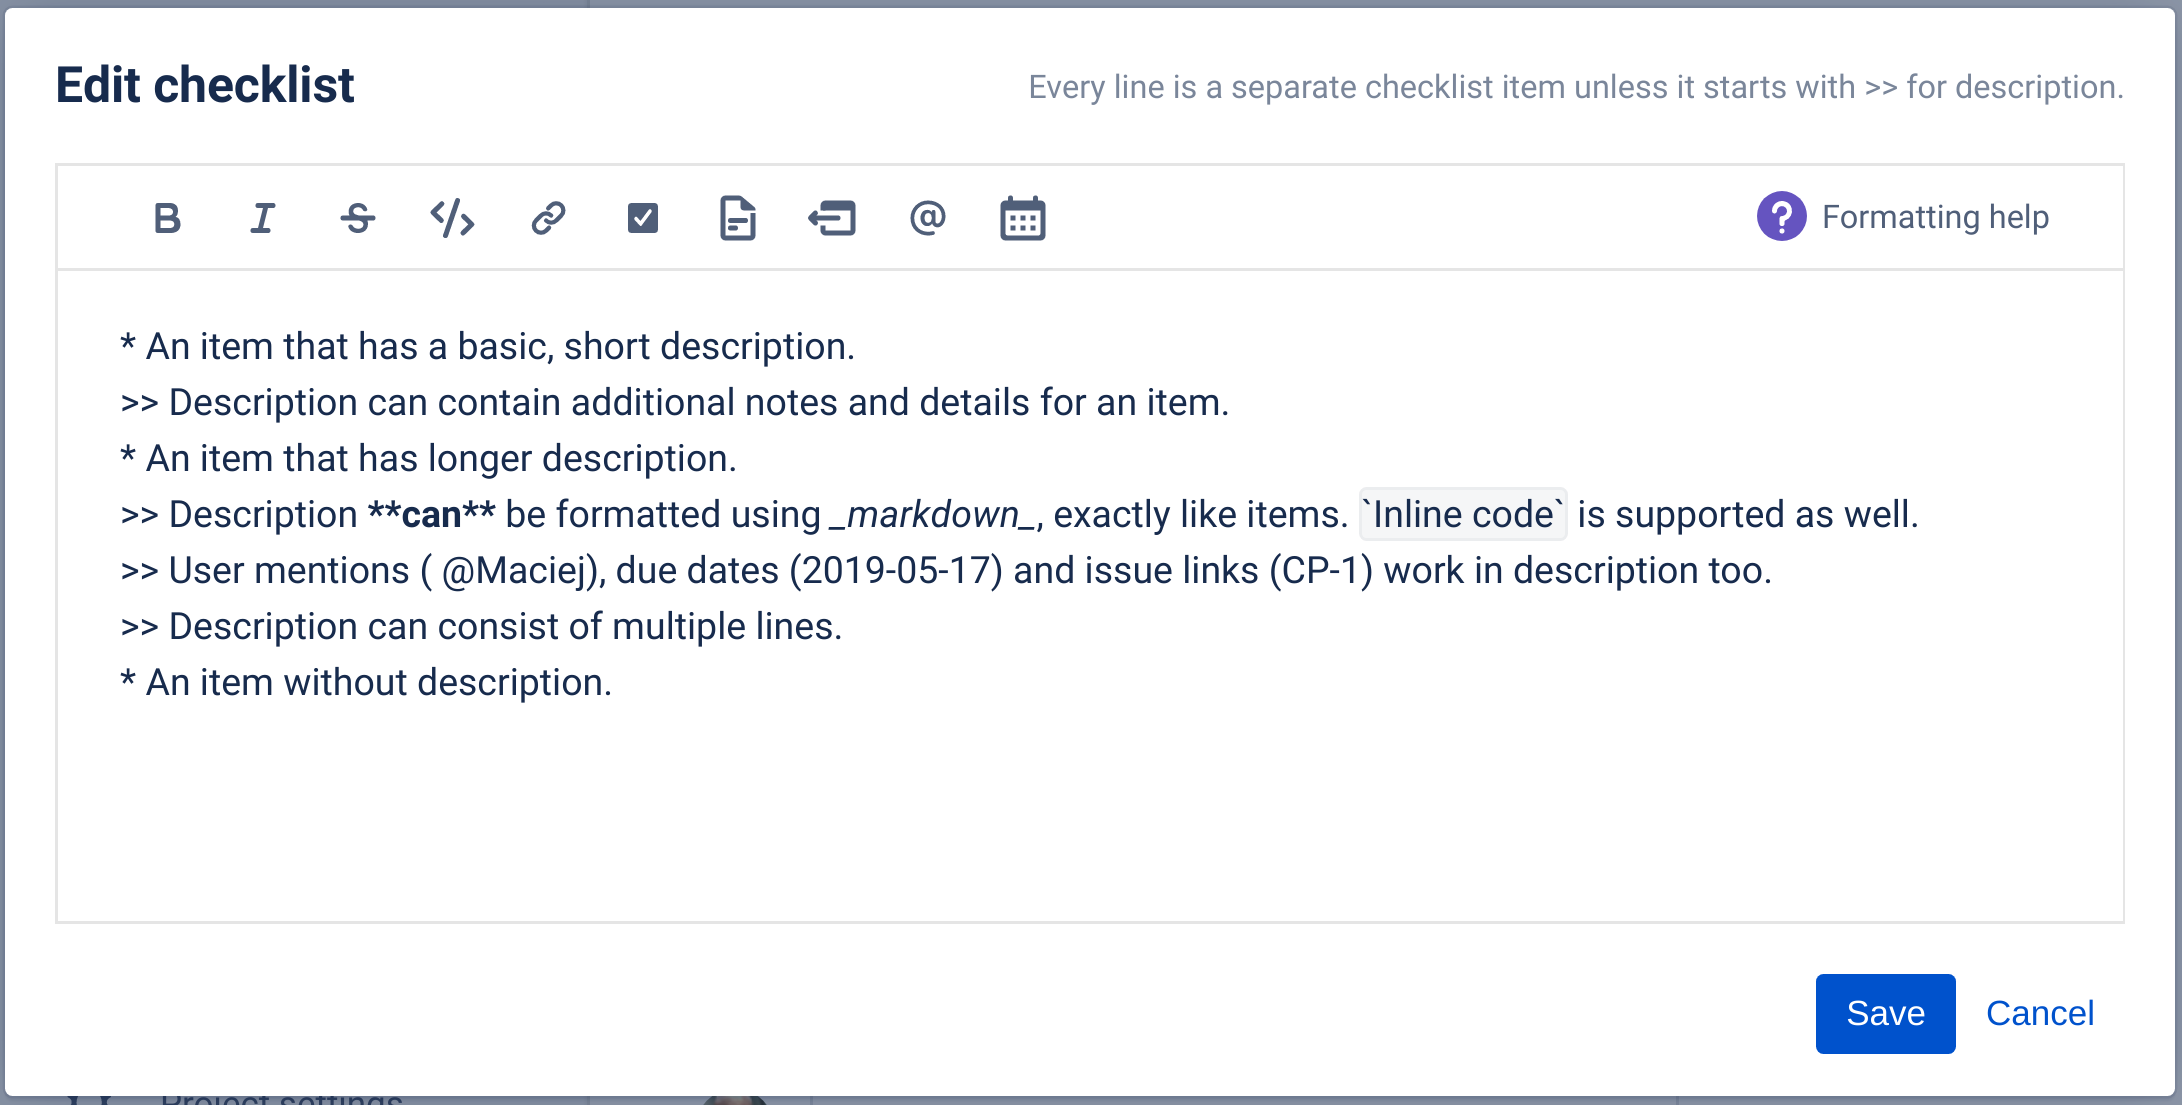
will be rendered as:
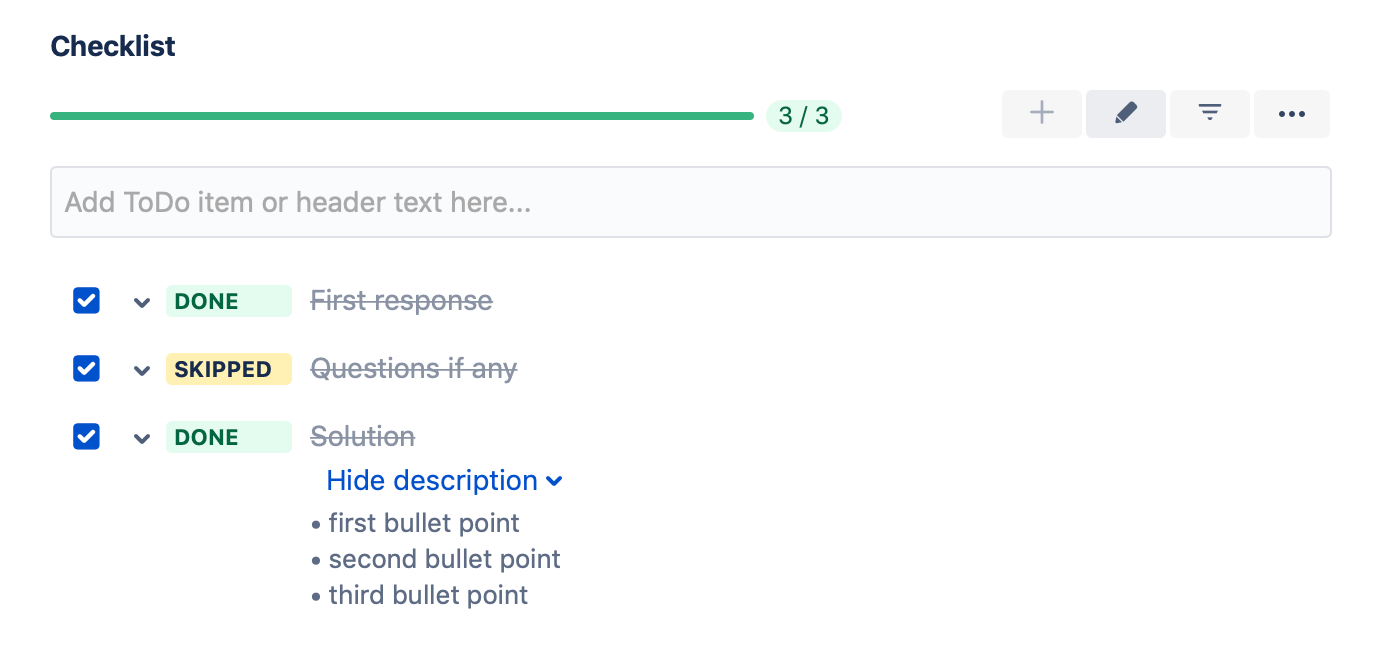
Bullet points in description
Since the description can hold multiline text along with emoji and other rich content, a bullet point list can be added as presented below.
For example, the following checklist:
* [done] First response
* [skipped] Questions if any
* [done] Solution
>> • first bullet point
>> • second bullet point
>> • third bullet point
will be rendered as:
Description can contain checkbox Emojis like ☑️or ☑, but it is not possible to add to the description a working checkbox that you can toggle on/off.
Markdown (bold, italic, etc.)
Introduction
Single line checklist item as well as multiline description can contain selected Markdown elements. See below for supported Markdown syntax.
Apart from Markdown, Issue Checklist also supports other advanced formatting elements like description, user mentions, due dates, and issue keys that will be automatically linked to issues, etc.
Example

Markdown formatting
Bold
To bold text, add two asterisk or underscore characters before and after a word or phrase, e.g.,
| Markdown text | Rendered output |
|---|---|
I love **bold text**. | I love bold text. |
I love __bold text__. | I love bold text. |
Italic
To italic text, add one asterisk or underscore character before and after a word or phrase, e.g.,
| Markdown text | Rendered output |
|---|---|
I love *italic text*. | I love italic text. |
I love _italic text_. | I love italic text. |
Strikethrough
To strikethrough text, add two tilde characters before and after a word or phrase, e.g.,
| Markdown text | Rendered output |
|---|---|
I love ~~strikethrough text~~. | I love |
Inline code
To style text as inline code, add back-tick characters before and after a word or phrase, e.g.,
| Markdown text | Rendered output |
|---|---|
I type `inline code`. | I type inline code. |
Links
To create a link:
- add URL directly into the text, or
- enclose the link text in brackets e.g.,
[Issue Checklist]and then follow it immediately with the URL in parentheses e.g., (http://gebsun-support.com):
| Markdown text | Rendered output |
|---|---|
I love http://herocoders.com. | I love herocoders.com. |
I love [Issue Checklist]( | I love Issue Checklist. |
Emails @
To create an email link:
- add the email address directly into text, or
- enclose the link text in brackets e.g., [Contact us] and then follow it immediately with a mailto data (this way you can specify email subject too):
| Markdown text | Rendered output |
|---|---|
Contact us at support@gebsun-support.com. | Contact us at support@herocoders.com. |
| Contact us |
Markdown escaping
It is possible to display Markdown formatting character by escaping it with the backslash \ character like demonstrated below.
| Markdown text | Rendered output |
|---|---|
| Escaped \_italic\_ formatting | Escaped _italic_ formatting |
| Escaped \_italic_ formatting | Escaped _italic_ formatting |
| Escaped \**bold\** formatting | Escaped **bold** formatting |
| Escaped \**bold** formatting | Escaped **bold** formatting |
| Escaped \*\*bold\*\* formatting | Escaped **bold** formatting |
| Escaped \**bold\\** formatting containing backslash | Escaped **bold\** formatting containing backslash |
| Escaped \`inline code\` formatting | Escaped `inline code` formatting |
| Escaped back-tick \` character | Escaped back-tick ` character |
| Standard text with \ backslash | Standard text with \ backslash |
Please note that in the column Rendered output:
- formatting is not applied due to backslash \ usage
- backslash \ is not displayed when it is used to escape Markdown
- double backslash allows to display a single backslash inside Markdown formatted phrase
- backslash behaves like a normal character when used outside Markdown formatted phrase
User mention
You can use mentions to assign a user to a specific item or to inform other users that someone is relevant to an item.
Sending a notification email to mentioned users can be enabled in Global Configuration.
You can always mention a user, but if you don't have Browse users and groups permission then user picker will only list assignee and reporter of the current issue (if they are set). Without that permission no other users will be suggested even if they would match your query.
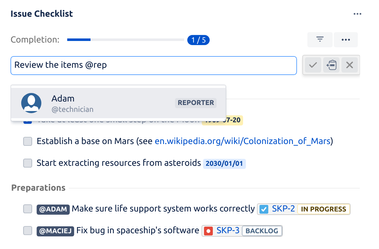
Adding a mention
To mention a user type "@" followed by part of the user's display name (full name) or nickname (username). A popup will show up listing all users matching the query. You can change the selected user by using arrow keys and mouse. To confirm your choice and make use of auto-completion press Enter or click on a user in the popup:
![]()
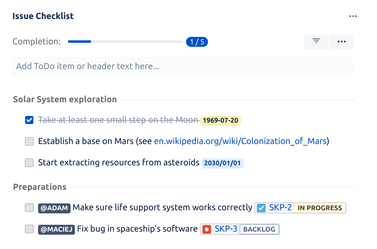
Example of user mentions:
More details
If your query is empty, i.e. the mention consist of "@" character only, the popup will show users related to the current issue: assignee and reporter (if they are set on the issue). You can also use two special aliases, "assignee" and "reporter", to find and mention corresponding users:
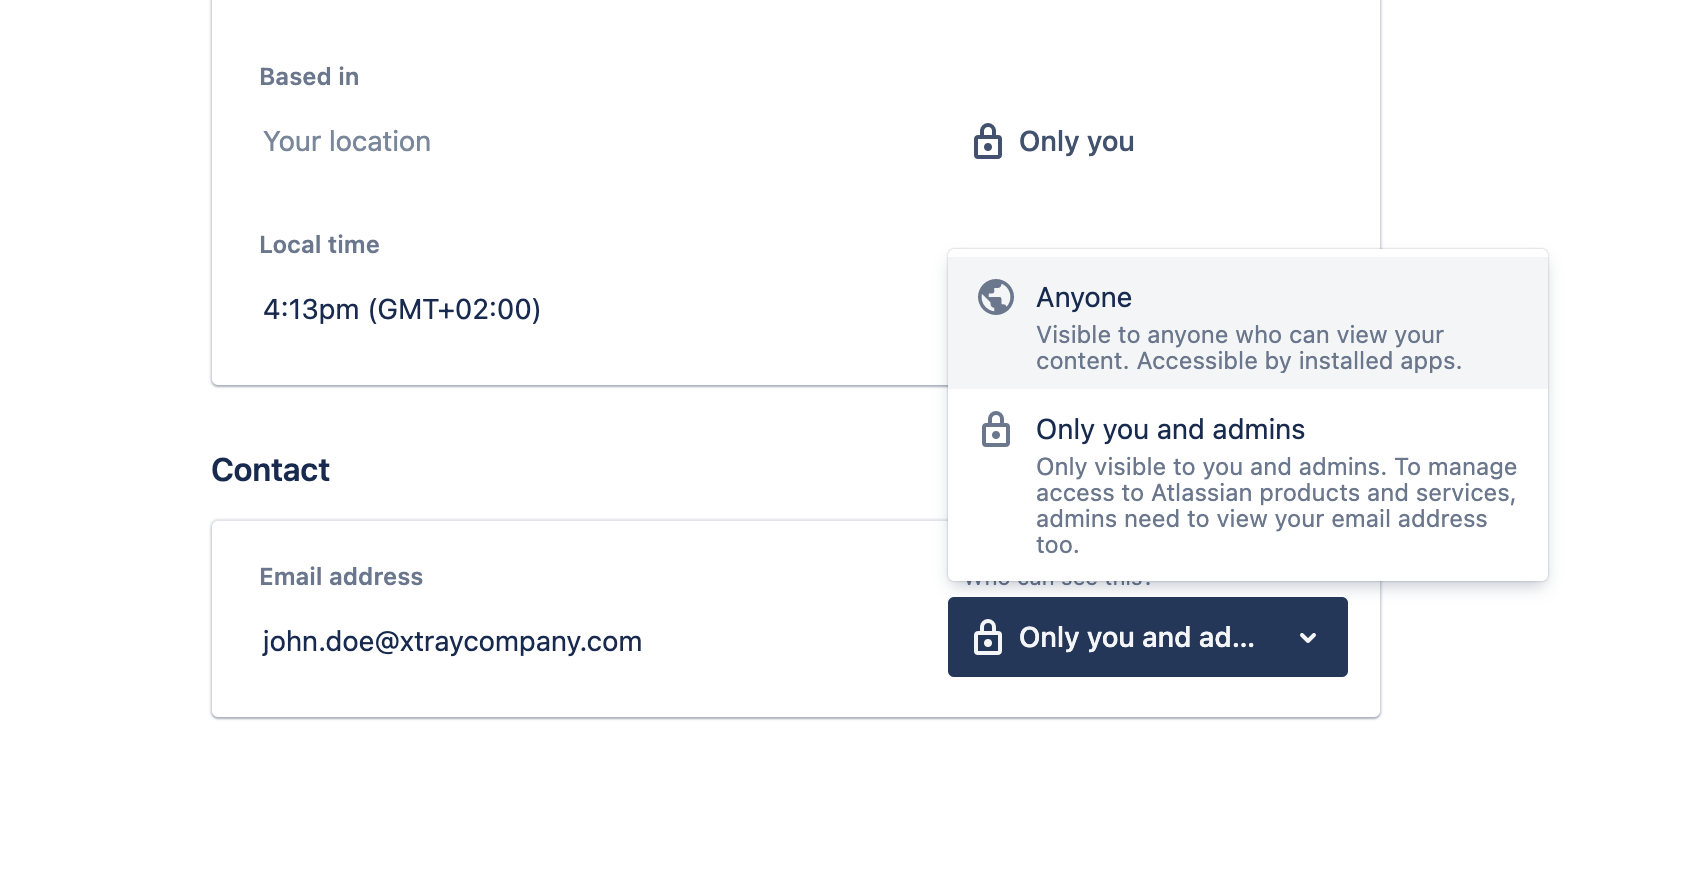
Mention by email
Mentioning users by their email addresses is supported by Issue Checklist. The search will match partial emails for users who have made their email address public in their profile. Otherwise a full email address must be provided to match the user that needs to be mentioned.
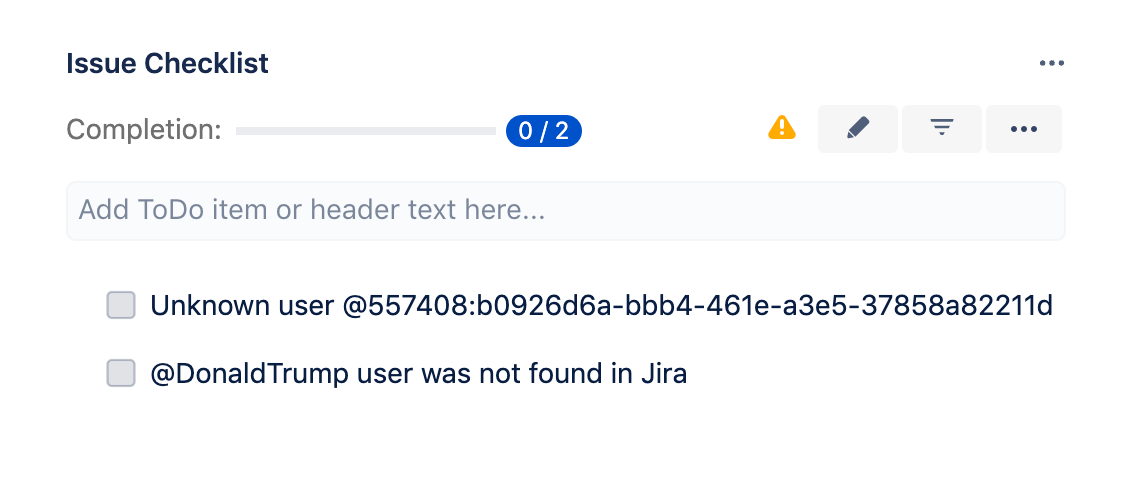
Not linked mentions
Mentions of non-existing (not found) users are displayed as plain text and not a highlighted lozenge:
See also
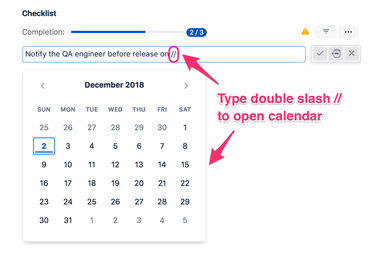
Due date
To assign a date to an item type // (double slash), which opens a calendar, and pick the date:
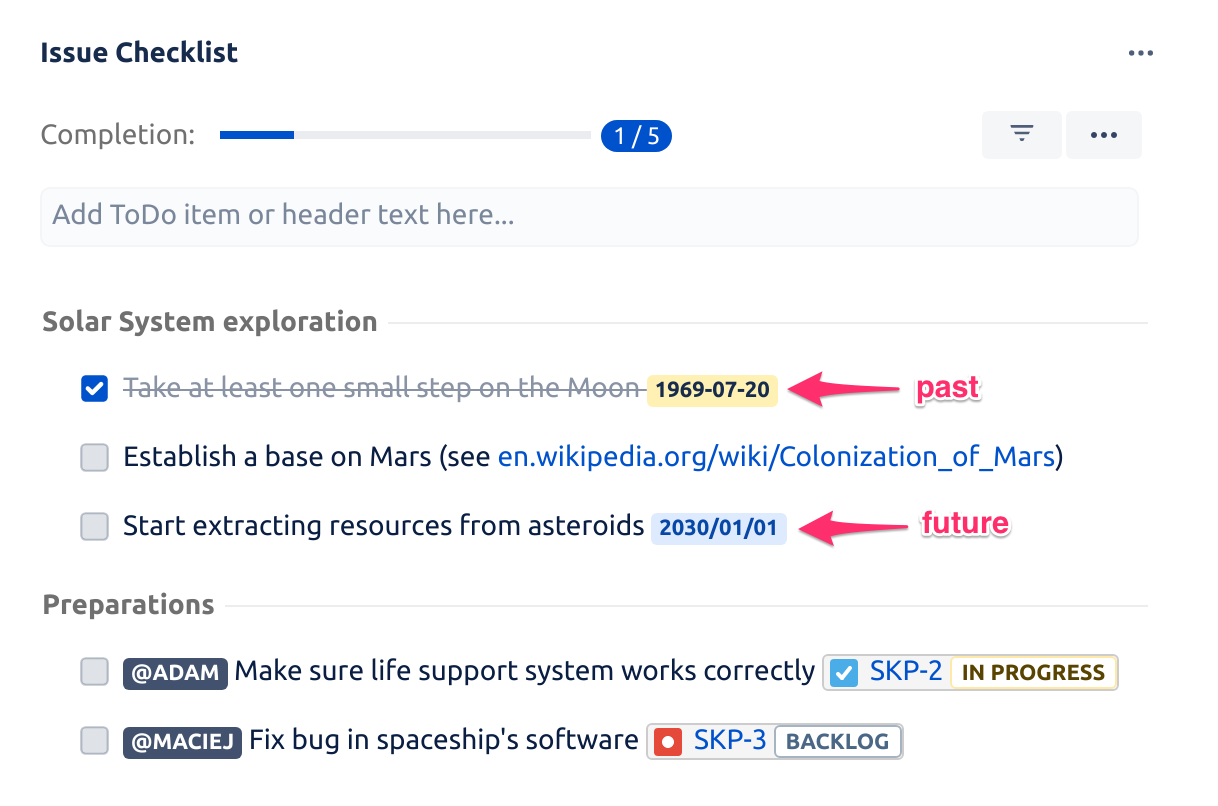
You can also include date directly in the item's content (supported formats: YYYY-MM-DD, YYYY/MM/DD, DD-MM-YYYY, DD/MM/YYYY):
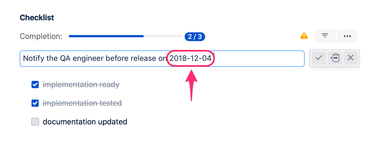
Dates in the future are rendered with a blue background, while dates in the past are rendered with an orange background like presented on the screenshot below.
Emoji
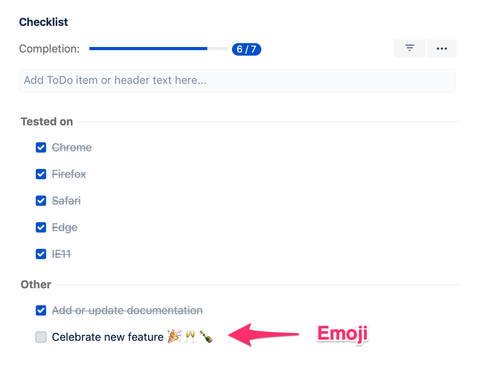
You can type ":" to open the emoji picker.

Once saved, emoji is displayed in the following way:
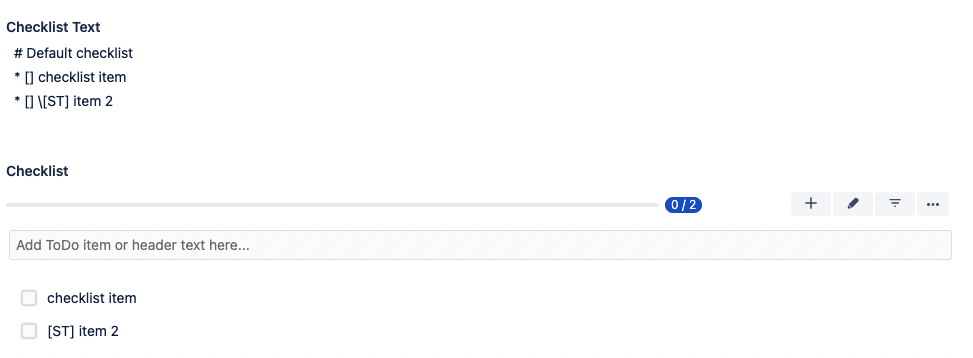
Square Brackets
In brief: You can use the \ escape character to add [] to the start of your checklist items.
Issue Checklist uses square brackets to handle represent the state of an item in the text format. This text format is used in the Checklist Text custom field to enable some important use cases.
A side effect of the mentioned use case is that when you put square brackets at the beginning of a checklist item, the square brackets are removed.
So when you add a new item like this:
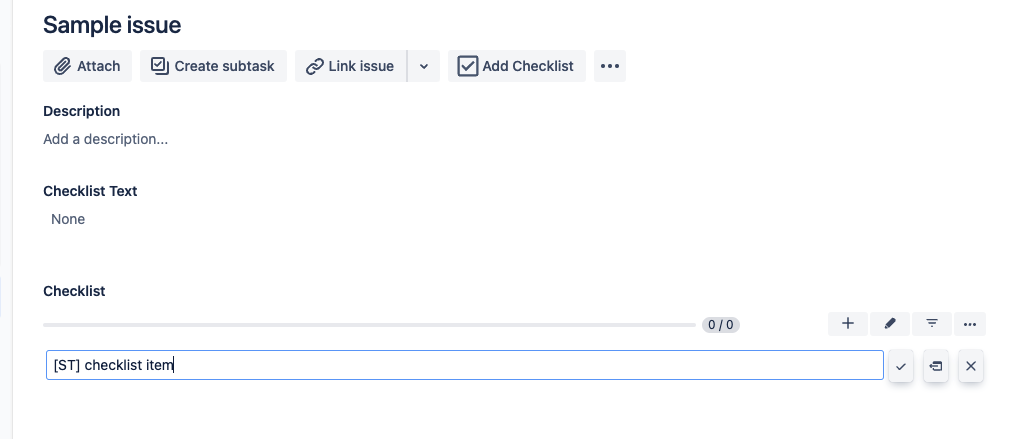
The items will look like this:
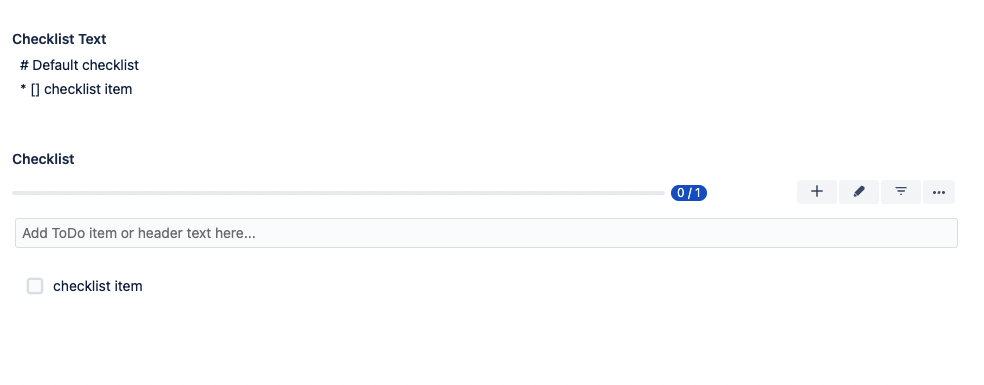
As you can see, the square brackets are removed from the checklist item.
A workaround to show the square brackets is to use the \ character at the beginning of the item name:
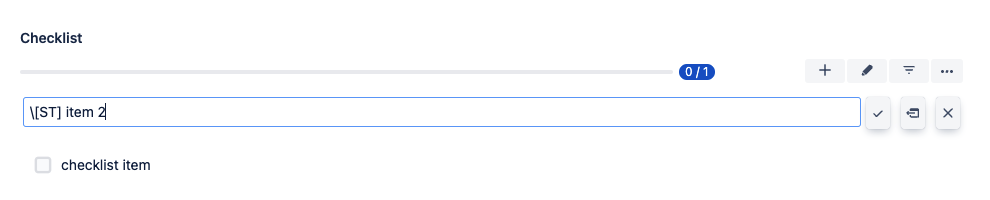
The result will have the square brackets at the beginning: