Versions Compared

Key

  • This line was added.
  • This line was removed.
  • Formatting was changed.

...

...

...

...

...

...

...

...

...

...

...

New Feature Announcement

...

Status
colourBlue
titleENTERPRISE

...

Status
colourPurple
titlePRO

...

Table of Contents
minLevel1
maxLevel7

...

Excerpt
nameBulkAddChecklist

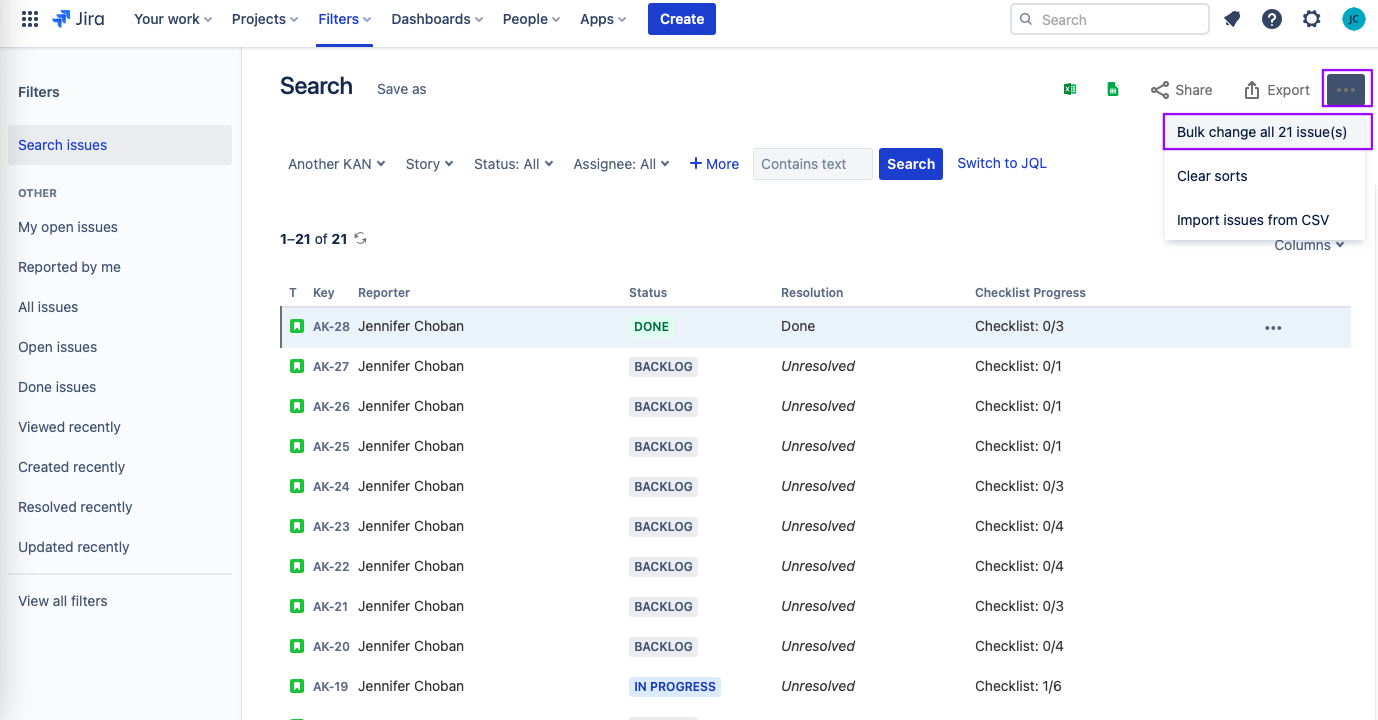
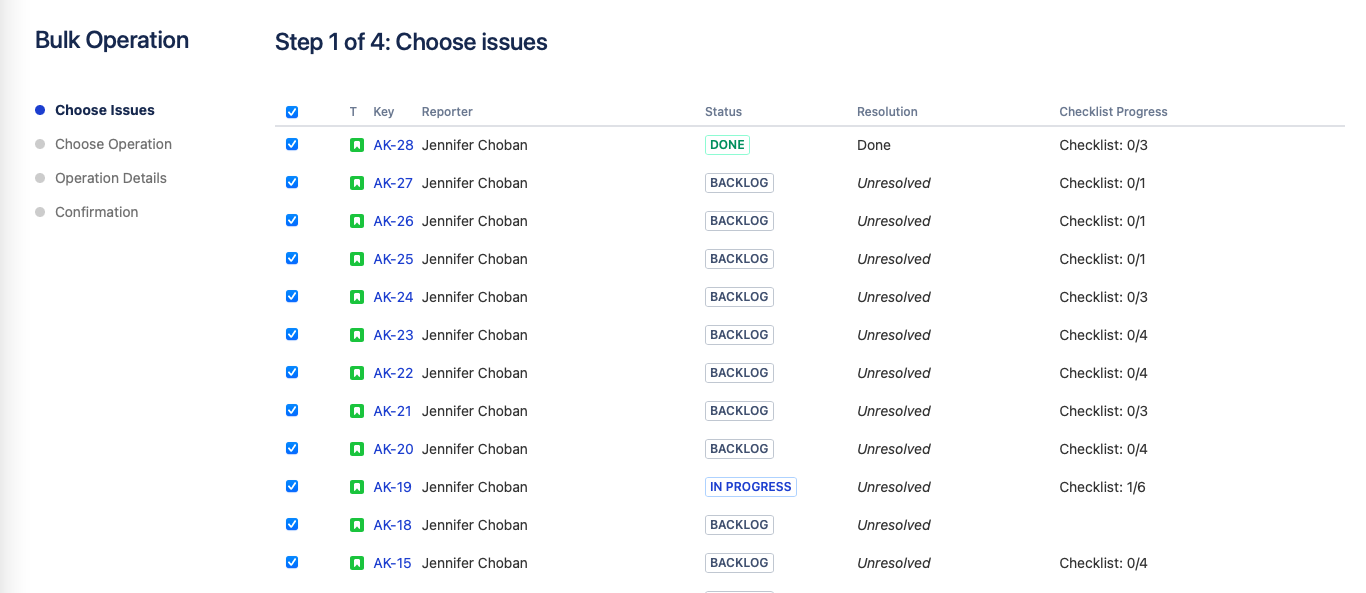
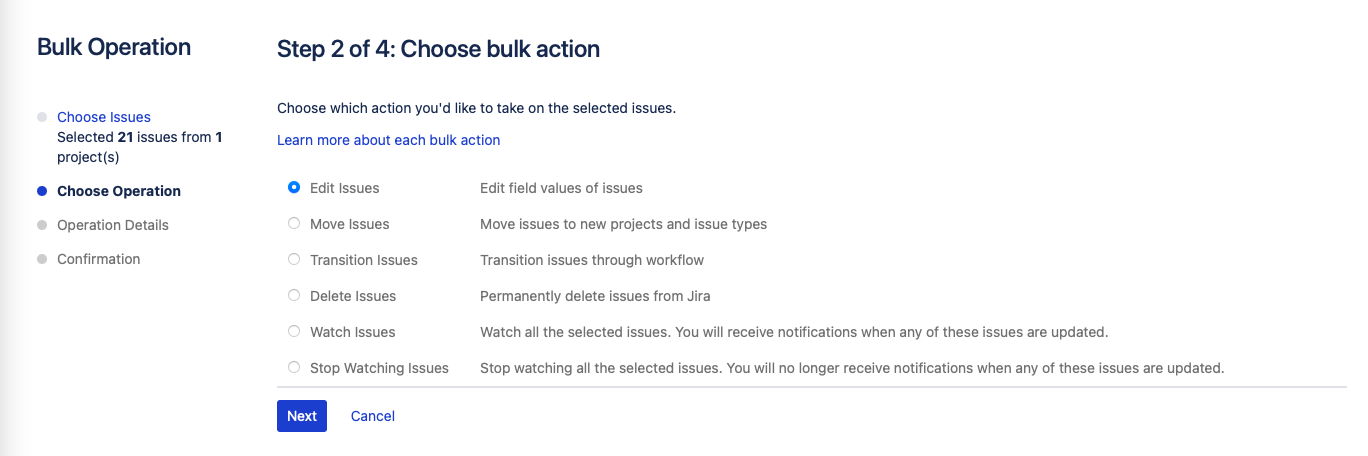
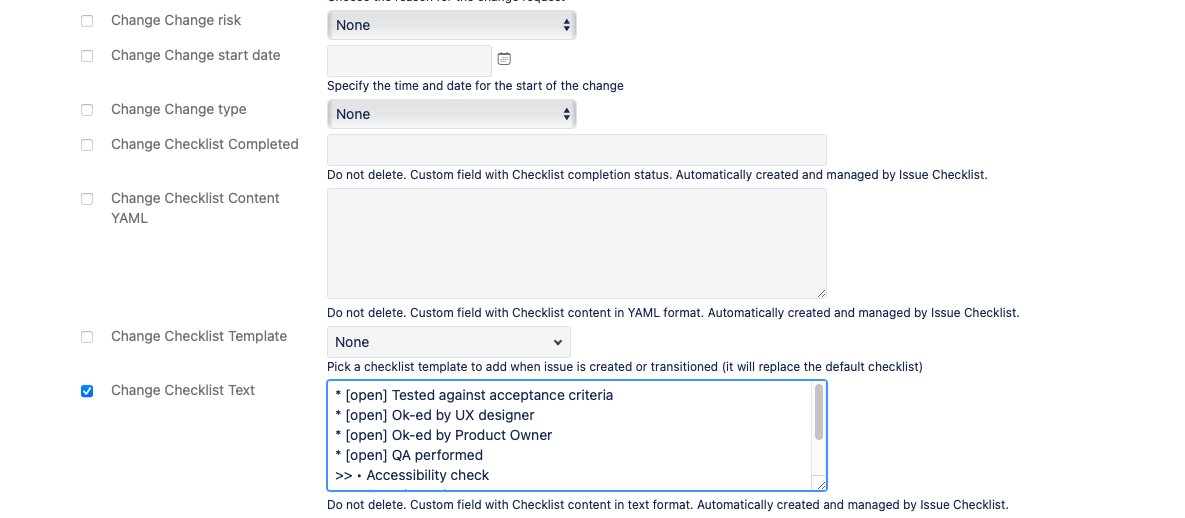
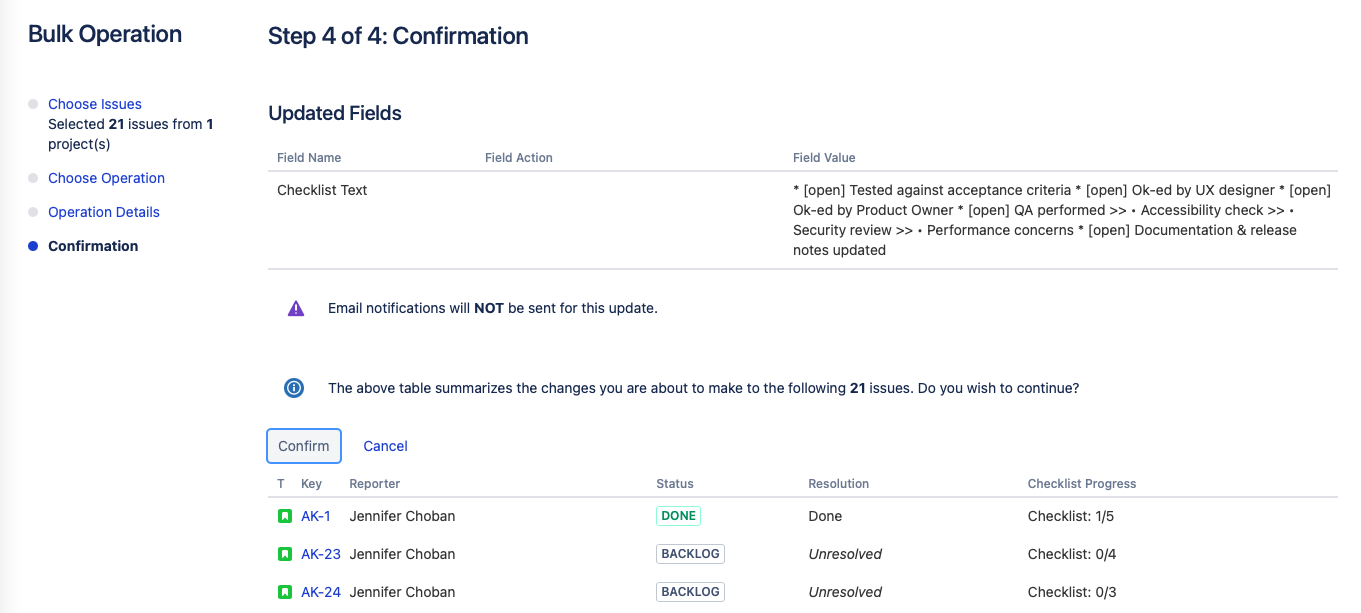
You can use a bulk operation to simultaneously add a checklist to multiple existing issues:

  1. Ensure that the Save local checklist items to Jira custom fields global setting is enabled.

  2. Ensure that theChecklist Text custom field is present on the Edit Issue screen. If not, add it to the screen following the instructions here.

  3. Copy the formatted checklist to the clipboard. The easiest way to do this is to prepare the checklist on an issue and then copy it from the checklist editor.

  4. Use JQL to select the issues you want to add the checklist to.
    Note that if you have created a default template that is automatically added to issues of a given type in a project, you may want to bulk add the checklist to all issues that were created before the default list was created.
    This query will return all issues in the Another KAN project that were created before the start of the current month.

    Code Block
    project = AK AND createdDate < startOfMonth()
  5. To bulk edit the select issues, click the menu in the upper right corner and select Bulk change all x issue(s).

  6. Use the checkbox to indicate which issues you want to add the checklist to. Click Next.

  7. Select Edit issues as the operation and click Next.

  8. Select the checkbox for Change Checklist Text field and paste in the checklist.

  9. Use the checkbox at the bottom to indicate if you want an email to be sent to notify users of the bulk update.

  10. Click Next.

  11. Click Confirm to initiate the update.

  12. Click Acknowledge when the update is complete. The checklist will have been added to the selected issues.

...