| Info |
|---|
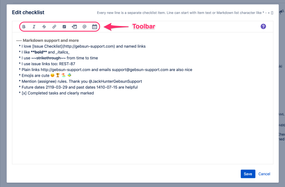
Editor The editor allows you to quickly made changes to several items at once. It is also a convenient way to introduce or change formatting of the items in Markdown WYSIWYG mode. |
...
- compile a checklist in a text form (like a text in the editor)
- use Markdown WYSIWYG mode
- use toolbar buttons to apply formatting
- copy-paste bullet point list of items from an external list (Word, Trello, OSX Notes, web page, you name it)
- delete all items at once (press Ctrl+A to select editor content and then press Delete to remove selection)
...
| Info |
|---|
Saving the editor's content overwrite overwrites the entire checklist for a given issue, so that any changes made in other tabs will be lost. |
| Include Page | |||||
|---|---|---|---|---|---|
|
Features of the editor (toolbar)
Besides of manually entering Markdown and other formatting elements, it is possible to use toolbar buttons to quickly bold, italic or strikethrough selected text, toggle item completed or not, add a link, date, separator (header), mention a user, or add emoji.
Bold, Italic, Strikethrough
These basic formatting actions are available directly from the editor's toolbar. Select the word or phrase and click a selected button to apply formatting.
Link
Click a link button in the editor's toolbar and enter the link's label and URL in a dialog. This will generate and insert link's Markdown for you.
...
| Item unchecked | Item checked | ||||||||||
|---|---|---|---|---|---|---|---|---|---|---|---|
|
|
Toggle if item is optional
Click the toggle optional button (looks like a question mark) in the toolbar to mark an item as optional. Click the button once again to reverse the action and make the item mandatory again.
The table below presents the states of an item when toggled:
| Item is mandatory | Item is optional | ||||||||||
|---|---|---|---|---|---|---|---|---|---|---|---|
|
|
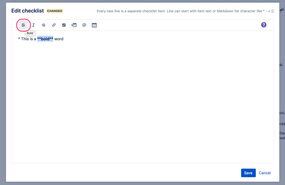
Add description
Click a toggle description button in the toolbar to change the current line into an item description (it becomes a description for the preceding item).
...
Click a separator button in the toolbar to turn an item into separator (header). Click the button once again to turn the separator into a checklist item.
...
Click a calendar button to insert a "//" token into the cursor's current position and open a calendar popup. You can continue typing or click inside the popup to have a complete date inserted into an item.
...
Click an emoji button to insert a ":" token into the cursor's current position and open an emoji popup. You can continue typing or click inside the popup to insert an emoji into an item.
...