| Table of Contents |
|---|
| maxLevel | 3 |
|---|
| exclude | On this page |
|---|
|
...
| Note |
|---|
You will need to replace the custom field ID with the ID of the Checklist Text fieldin your instance. |
Get a Checklist
GET /rest/api/2/issue/{issueIdOrKey} (reference)
Returns the details of an issue, including the checklist in text format.
...
Create or Update a Checklist
PUT /rest/api/2/issue/{issueIdOrKey} (reference)
Updates the issue by adding or updating a formatted checklist.
...
You may want to retrieve a checklist from a Jira issue, modify the checklist’s items (for example, mark them as complete), and pass the updated checklist back to Jira issue. The steps are:
Retrieve a representation of the issue via GET /rest/api/2/issue/{issueIdOrKey}
Using Checklist Text field id, extract and parse checklist value: representation → fields → customfield_xxxxx (parse items by new line characters)
Modify the parsed checklist as needed. For example, to check an item as complete, put an "x" in the square brackets (so that "* [] summary" becomes "* [x] summary").
Upload the modified value back to the issue via PUT /rest/api/2/issue/{issueIdOrKey}
Add a Checklist to the Issue (cURL)
| Expand |
|---|
| title | Example: Add a Checklist to an Issue (cURL) |
|---|
|
Open terminal.
Save the content of the snippet below to a local file, e.g. example.json: Text | Code Block |
|---|
{"fields": {"customfield_12345": "[x] example item"}} |
Replace customfield_12345 string with the ID of Checklist Text custom field in your Jira instance. See instructions here for finding custom field ID.
Type following command in the terminal. | Code Block |
|---|
curl -D- -u "jack@herocoders.com:api_token" --request PUT --header "Content-Type: application/json" --url 'https://jiraUrl.atlassian.net/rest/api/2/issue/DEMO-1' --data-binary @example.json |
Replace jack@herocoders.com with the email address provided in your Atlassian ID account.
Replace api_token with a valid token generated in your Atlassian ID account (see instructions for generating tokens).
Replace jiraUrl with URL of your Jira instance.
Replace DEMO-1 with the appropriate issue key.
Go to Jira issue page to confirm that:
Checklist has been updated and contains a single checked item "example item".
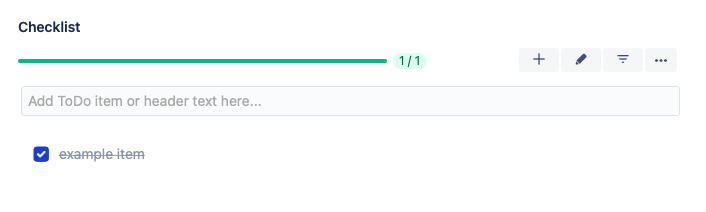 Image Modified Image ModifiedThe Checklist Text field has been updated with the checklist provided in example.json file. This will be visible if the Checklist Text field is on theView Issue Screen:
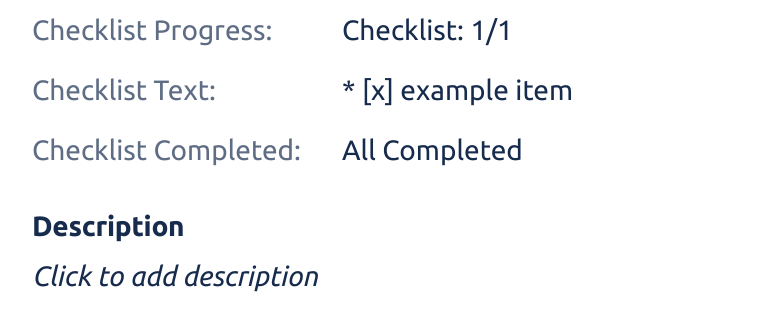 Image Modified Image Modified
You can also see that the other checklist custom fields (Checklist Progress and Checklist Completed) has been updated accordingly.
|
Check All Checklist Items on an Issue (Node.js)
| Expand |
|---|
| title | Check All Checklist Items on an Issue (Node.js) |
|---|
|
Install Node.js.
Install required Node.js modules with following command: | Code Block |
|---|
npm install axios lodash |
Save the content of script.js file provided below to your local filesystem: script.js | Code Block |
|---|
| const axios = require('axios');
const _ = require('lodash');
const issueKey = 'DEMO-2';
const jiraURL = 'https://your-jira-url.atlassian.net';
const credentials = { username: 'username', password: 'apiToken' };
const checklistFieldName = 'Checklist Text';
async function updateChecklist() {
console.log(`Looking for ${checklistFieldName} field ID`);
const metaResponse = await axios.get(`${jiraURL}/rest/api/2/issue/${issueKey}/editmeta`, { auth: credentials });
const checklistField = _.find(metaResponse.data.fields, (field) => {
return _.isMatch(field, { name: checklistFieldName }) && _.find(field.operations, (operation) => {
return operation === 'set';
});
});
if (!checklistField) {
throw new Error('Checklist field not found');
}
const checklistFieldId = `customfield_${checklistField.schema.customId}`;
console.log(`Found checklist field ID: ${checklistFieldId}`);
const issueResponse = await axios.get(`${jiraURL}/rest/api/2/issue/${issueKey}`, { auth: credentials });
const checklistText = issueResponse.data.fields[checklistFieldId];
console.log('Found checklist:');
console.log(checklistText);
// replace "x" with "done" if you use checklist item statuses
const updatedChecklistText = checklistText.replace(/^\*\s+\[.*]/gm, '* [x]');
console.log('Saving updated checklist:');
console.log(updatedChecklistText);
const fieldsToUpdate = {
[checklistFieldId]: updatedChecklistText,
};
await axios.put(`${jiraURL}/rest/api/2/issue/${issueKey}`, { fields: fieldsToUpdate }, { auth: credentials });
}
updateChecklist().then(() => {
console.log('Checklist updated successfully');
}).catch((error) => {
console.error('Failed: ', error instanceof Error ? error.stack : JSON.stringify(error));
});
|
The scripts reads Checklist Text value from your issue, checks every item and performs PUT request to JIRA to change value of Checklist Text field.
Edit script.js file and change issueKey, jiraUrl and credentials as appropriate.
Type following command in the terminal: Go to your JIRA and selected issue page and see the Checklist modified by the script.
|
...